

Procedure
- Log on to the Autotask web console at https://ww2.autotask.net.
- Go to the .The Automation screen appears.
- Expand EMAIL NOTIFICATIONS & SURVEYS and click
Incoming Email Processing.The INCOMING EMAIL PROCESSING screen appears.
- Hover over the Add Ticket Email Service (ATES) menu icon
(
 ) and click
Edit.The EMAIL PROCESSING MAILBOX - ADD TICKET EMAIL SERVICE (ATES) screen appears.
) and click
Edit.The EMAIL PROCESSING MAILBOX - ADD TICKET EMAIL SERVICE (ATES) screen appears. - Make a note of your Service Provider ID and Service Provider Password, so you can enter these details later.
- Log on to the Remote Manager web console.
- Go to .
- In the Autotask section, select Enable
Integration, and then type the Logon ID
and Logon password you noted down earlier. From the
Language drop-down menu, select your preferred
language.
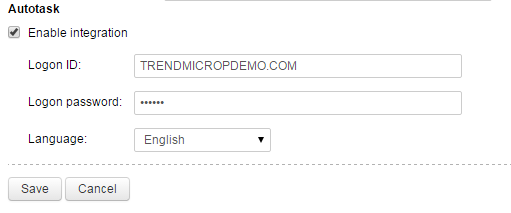
- Click Save.
- Go to the Customers screen.
- Select the company you want to receive Autotask notifications from.
- Click the Notification tab.
- Select Me as the recipient to ensure that you will receive email notifications. Add additional recipients, if necessary, by typing their email addresses in the Additional recipients field.
- Select Autotask from the Third-party
notifications list.
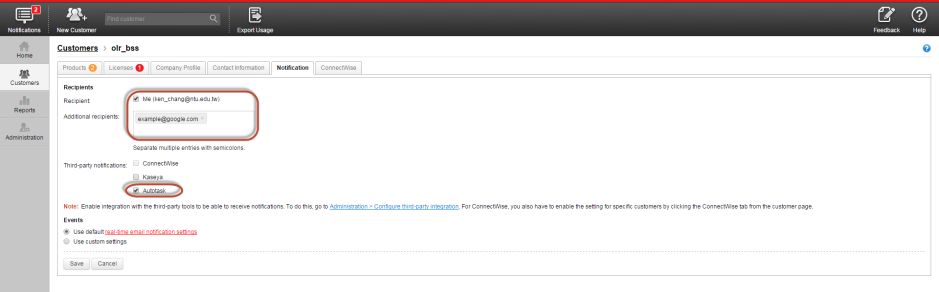
- Select one of the following options:
-
Use default real-time email notification settings
-
Use custom settings
-