

Use Active Directory GPO (Group Policy Object) to enforce the use of a PAC file
for traffic forwarding.
Windows Server 2012 GPO Creation
Create an Active Directory GPO (Group Policy Object) in Windows Server
2012 to enforce the use of the PAC file.
Procedure
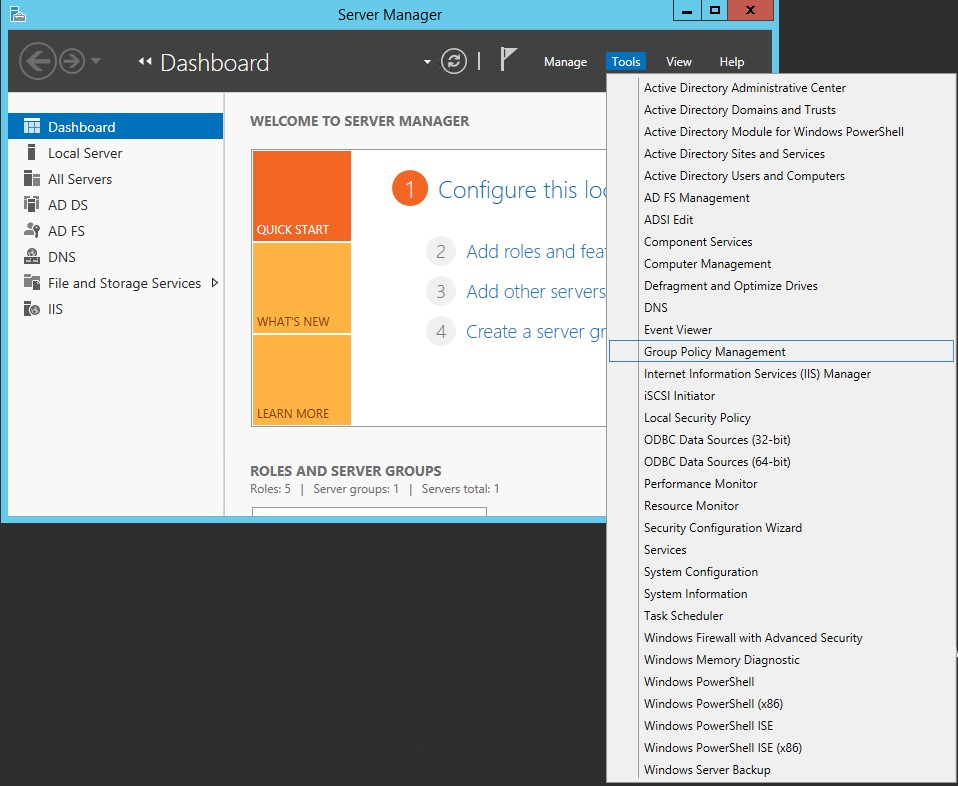
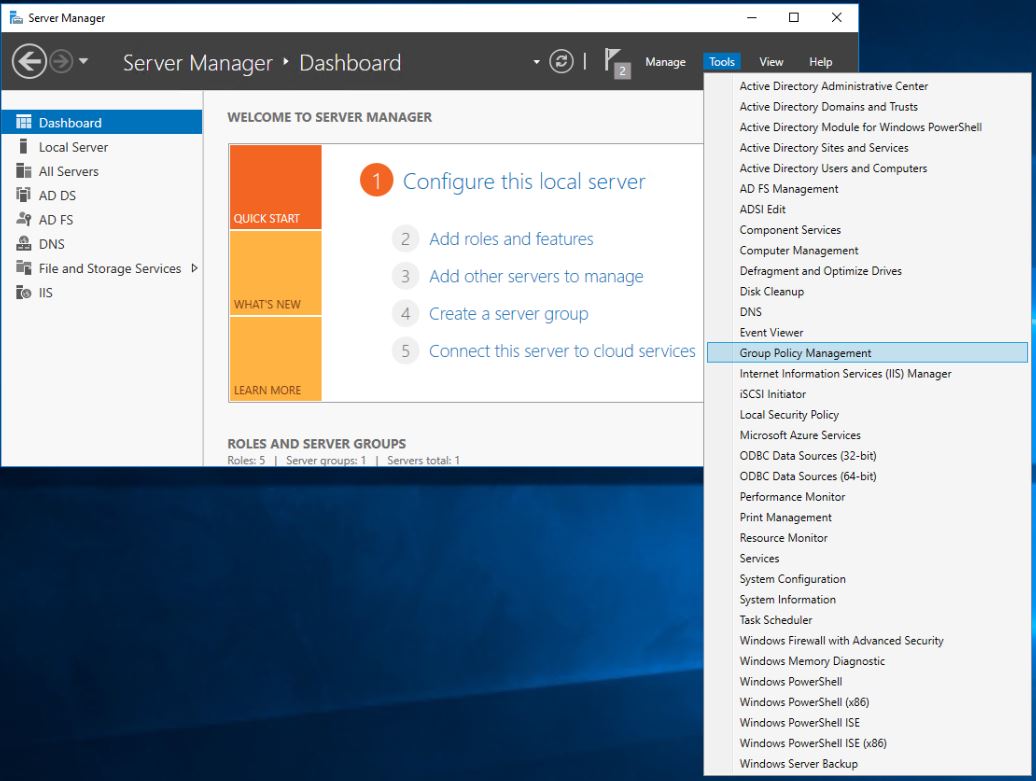
- Log on to the Active Directory server as an administrator.
- Go to .The Group Policy Management window appears.
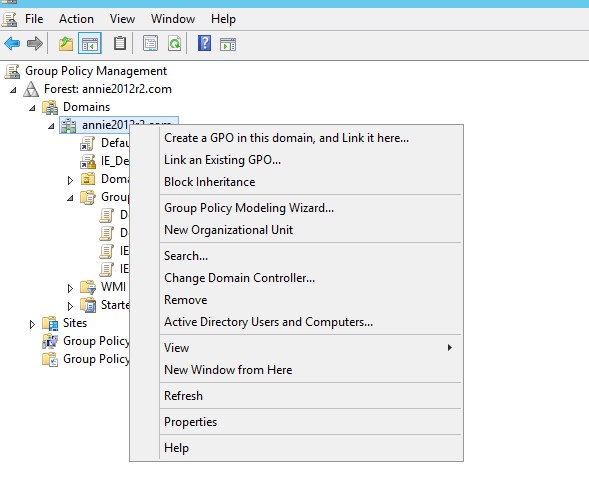
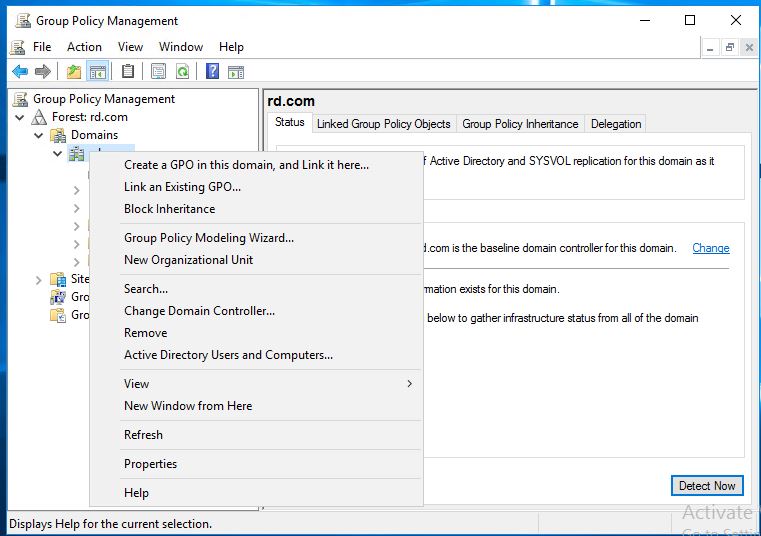
- From the left navigation tree, go to , right-click [your domain], and then
select Create a GPO in this domain, and Link it
here....
 The New GPO window appears.
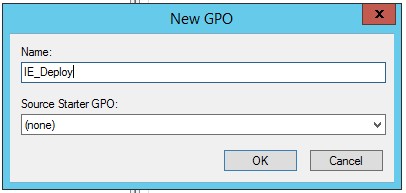
- Type a name for the new Group Policy Object in the Name
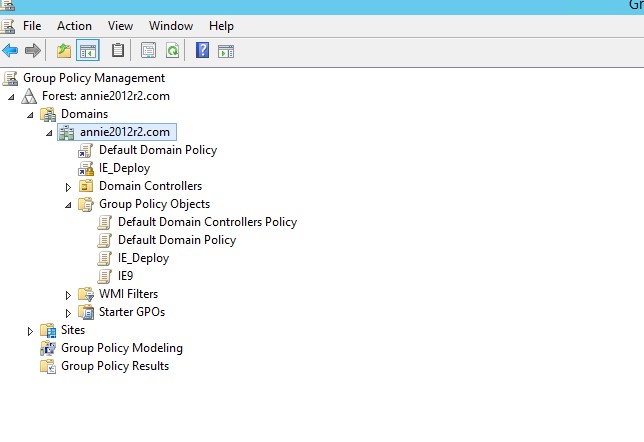
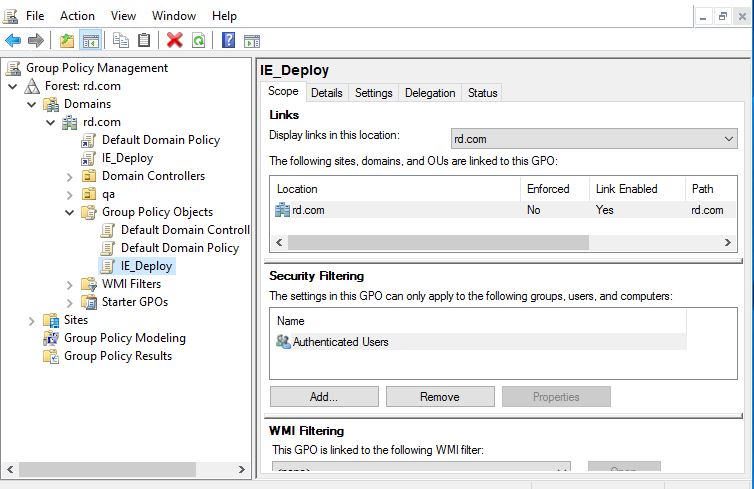
text box and click OK.The newly created GPO displays under Group Policy Objects.
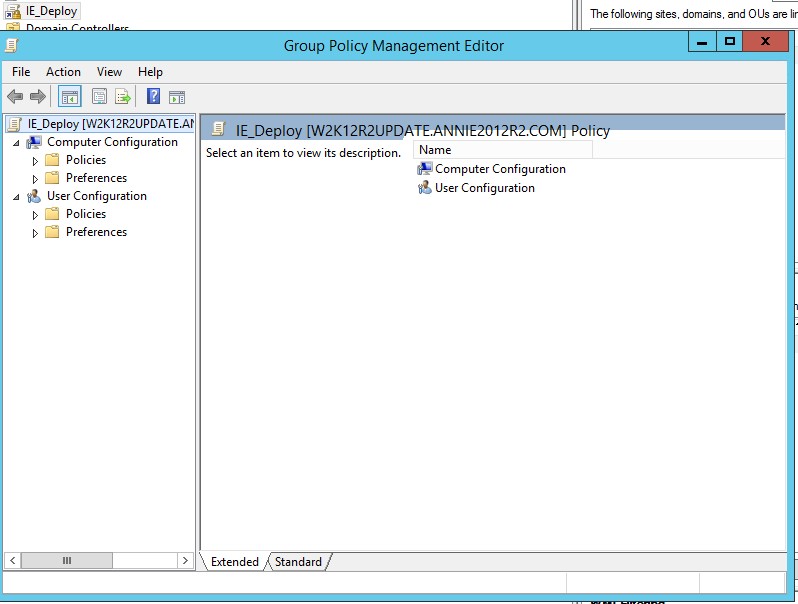
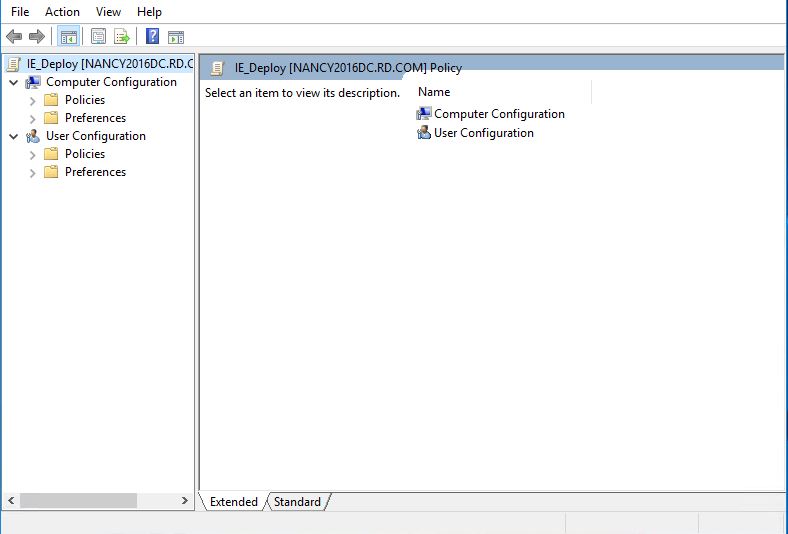
- Right-click the GPO and select Edit.The Group Policy Management Editor window appears.
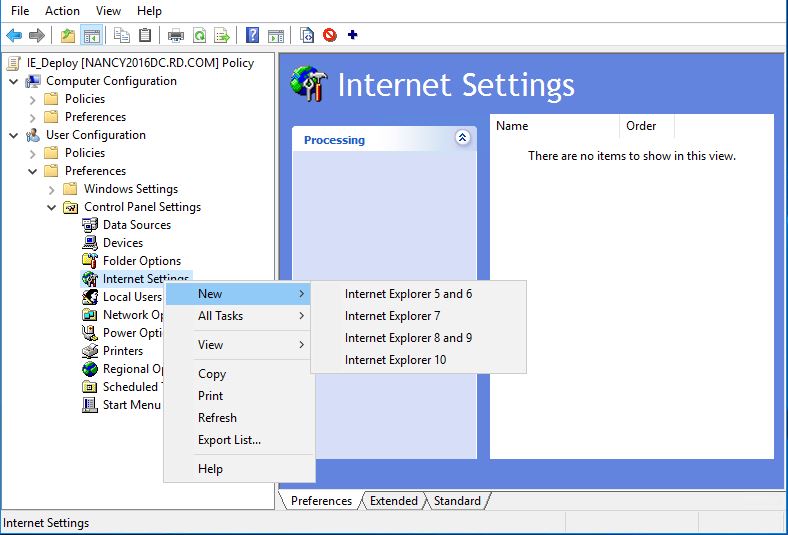
- From the left navigation tree, go to , right-click Internet Settings, and then
select .
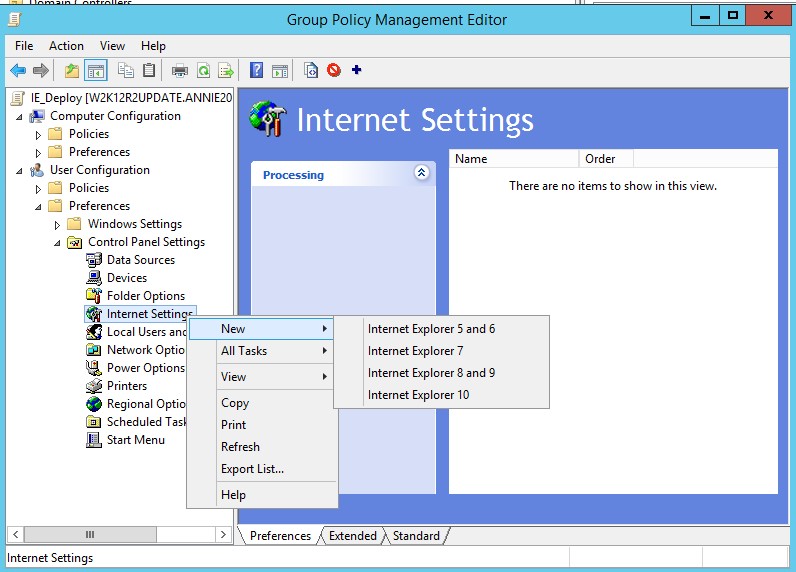 The New Internet Explorer 10 Properties window appears.
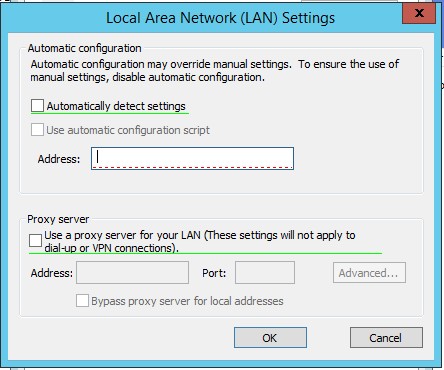
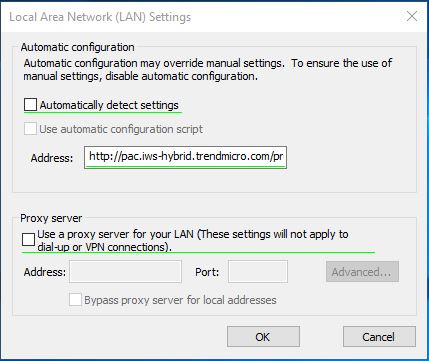
- Click the Connections tab, and then click LAN
Settings.The Local Area Network (LAN) Settings window appears.
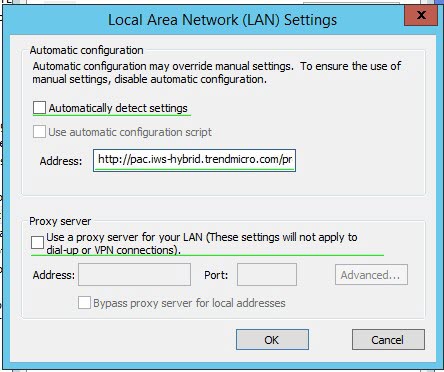
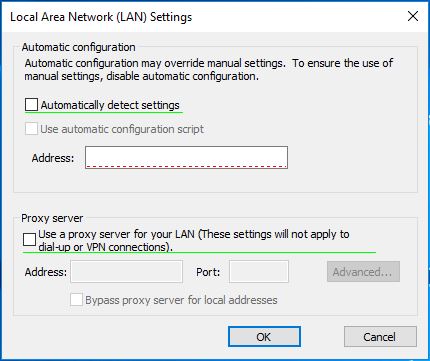
- Type the PAC file address as necessary, for example,
http://pac.iws-hybrid.trendmicro.com/proxy.pac, in the
Address text box under Use automatic
configuration script, and then press F5
to enable the setting (The red dotted line turns to a green solid line.).
- Click OK.
- Click Apply, and then click OK.
Windows Server 2016 GPO Creation
Create an Active Directory GPO (Group Policy Object) in Windows Server 2016 to
enforce the use of the PAC file.
NoteThis procedure also applies to Windows Server 2019 and Windows Server 2022.
|
Procedure
- Log on to the Active Directory server as an administrator.
- Go to .The Group Policy Management window appears.
- From the left navigation tree, go to , right-click [your domain], and then
select Create a GPO in this domain, and Link it
here....
 The New GPO window appears.
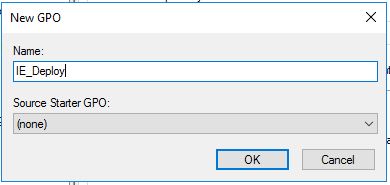
- Type a name for the new Group Policy Object in the Name
text box and click OK.The newly created GPO displays under Group Policy Objects.
- Right-click the GPO and select Edit.The Group Policy Management Editor window appears.
- From the left navigation tree, go to , right-click Internet Settings, and then
select .
 The New Internet Explorer 10 Properties window appears.
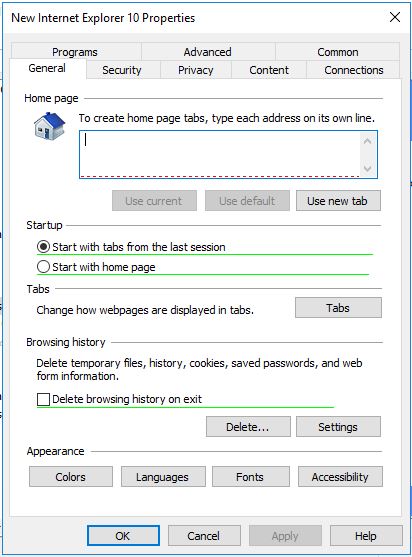
- Click the Connections tab, and then click LAN
Settings.The Local Area Network (LAN) Settings window appears.
- Type the PAC file address as necessary, for example,
http://pac.iws-hybrid.trendmicro.com/proxy.pac, in the
Address text box under Use automatic
configuration script, and then press F5
to enable the setting (The red dotted line turns to a green solid line.).
- Click OK.
- Click Apply, and then click OK.