The following procedure is for VMware.
Procedure
- Click Virtual machines and then click Create / Register VM.
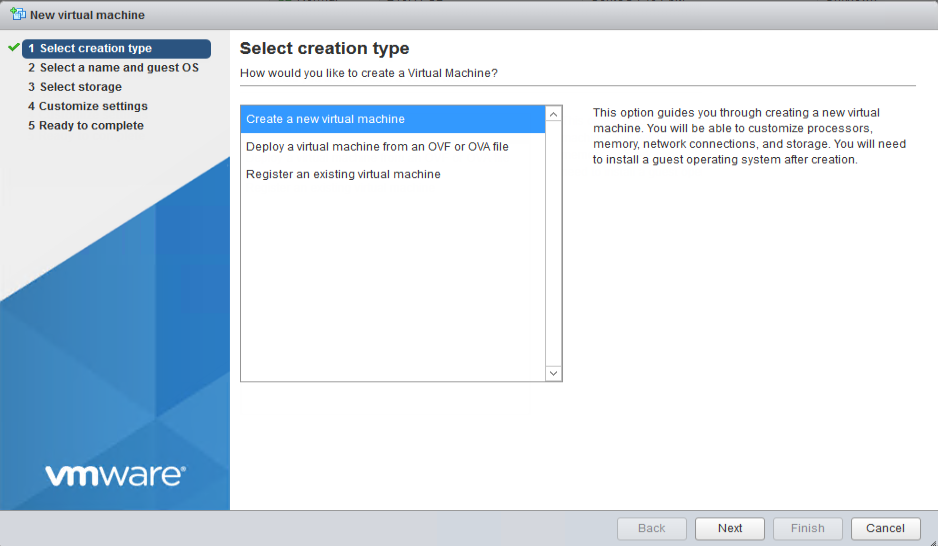
- On the Select creation type screen, click Create a new virtual
machine and then click Next.
- On the Select a name and guest OS screen, configure the
settings.
- For Name, type New Virtual Machine.
- For Compatibility, select ESXi 7.0 U1 virtual machine.
- For Guest OS family, select Linux.
- For Guest OS version, select CentOS 7 (64-bit).
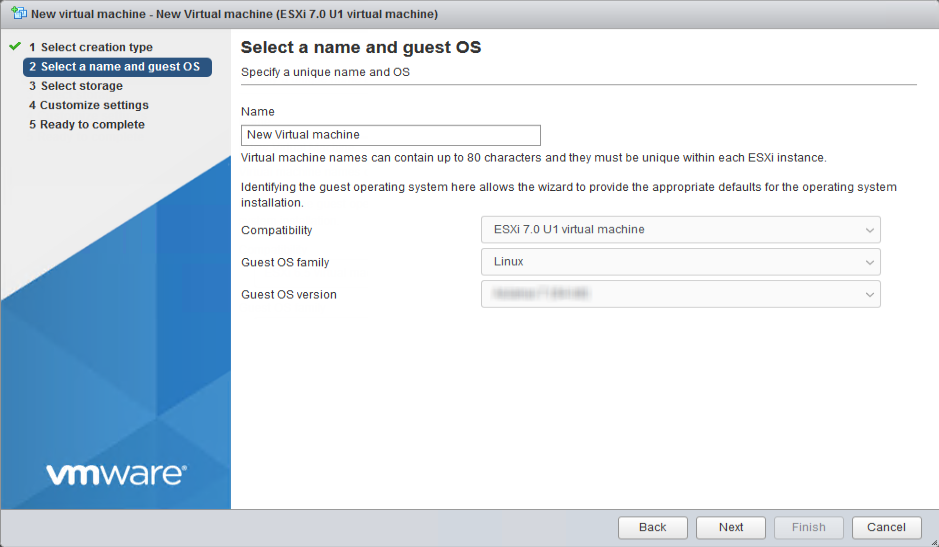
- Click Next.
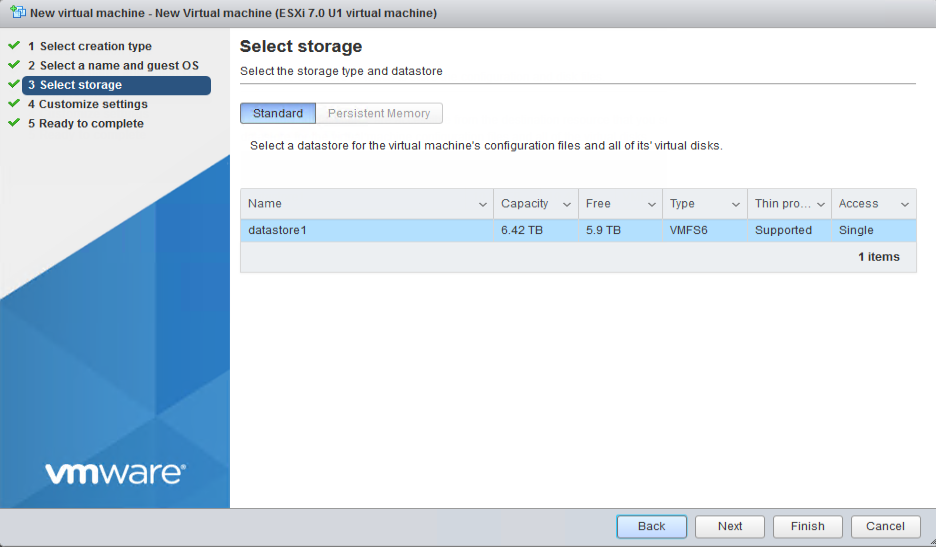
- On the Select storage screen, select the destination
storage where the virtual machine resides and click
Next.
- Configure the settings on the Customize settings
screen.
- For CPU, select the virtual CPU amount based on
the throughput of your Virtual Deep Discovery Email
Inspector
license.
-
For 300K messages per day, select at least 3 virtual CPUs.
-
For 700K messages per day, select at least 6 virtual CPUs.
-
- For Memory, set the amount of memory based on
the throughput of your Virtual Deep Discovery Email
Inspector
license.
-
For 300K messages per day, set at least 10 GB of memory for the virtual machine.
-
For 700K messages per day, select at least 16 GB of memory for the virtual machine.
-
- For Hard disk, set the amount of disk space
based on the throughput of your Virtual Deep Discovery Email
Inspector
license.
-
For 300K messages per day, set at least 500 GB of disk space for the virtual machine.
-
For 700K messages per day, select at least 1 TB of disk space for the virtual machine.
-
- For Network, configure the amount of NICs based
on the function of your Virtual Deep Discovery Email
Inspector
license.
-
If Deep Discovery Email Inspector is set in MTA or BCC mode, configure at least 1 NIC.
-
If SPAN/TAP mode is enabled, configure at least 3 NICs with one each for the management and data networks.
-
Set the VMware ESXi server VM Network as the Deep Discovery Email Inspector Management Network (NIC 1).
-
Set the Data port group as the Deep Discovery Email Inspector Data Network (NIC 2).
-
For Adapter Type, select VMXNET 3.
-
-
- For CPU, select the virtual CPU amount based on
the throughput of your Virtual Deep Discovery Email
Inspector
license.
- Click Next.
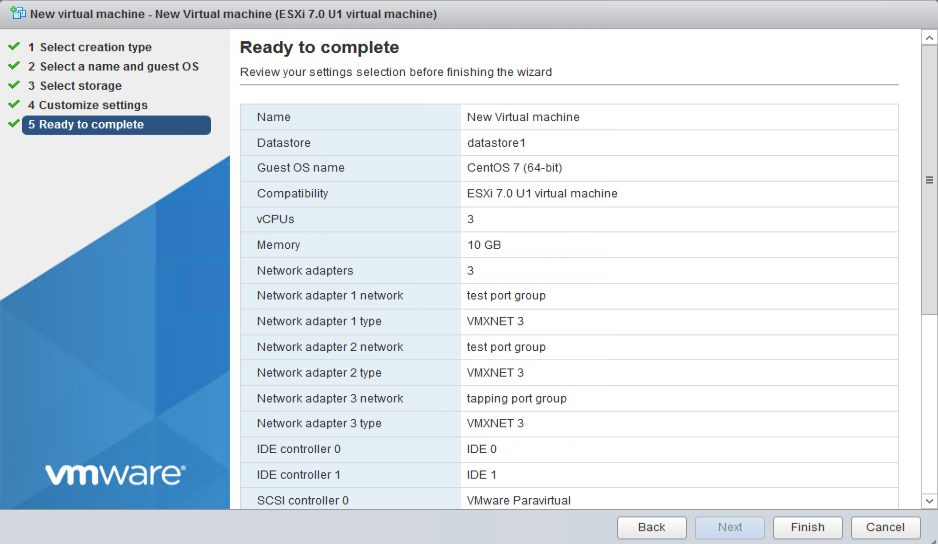
- On the Ready to complete screen, review the settings and
click Finish.