

Procedure
- Download
SandboxWizard.zipfrom the Trend Micro Download Center, or obtain a copy from your support provider. - Extract the package content to a local folder.
- Go to the folder you extracted the package to and run
SandboxWizard.exe.The introduction screen appears.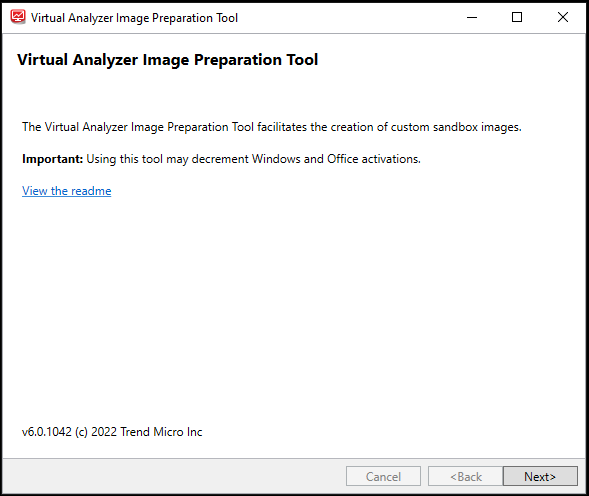
Introduction screen - Click Next.
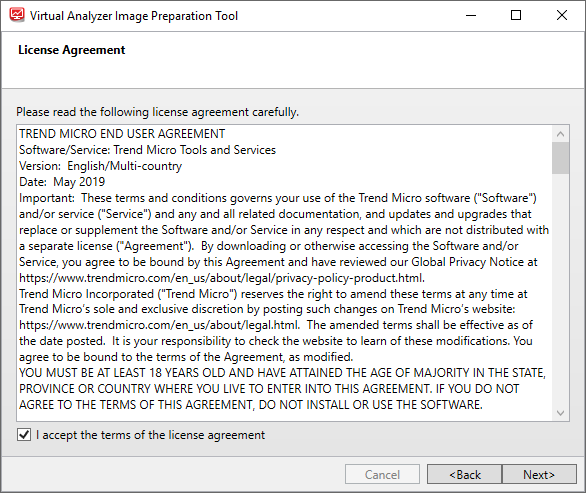
License Agreement screen - Read the license agreement. If you agree with the terms, select I
accept the terms of the license agreement and then click
Next.The tool checks if the computer meets the system requirements. After the check is complete, the System Requirements screen appears.
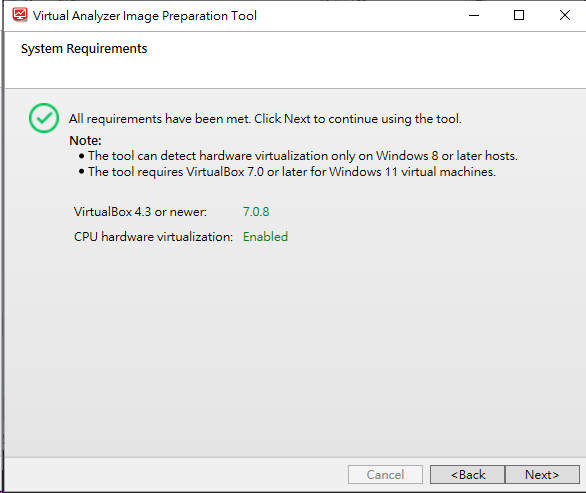
System Requirements screen - Click Next.
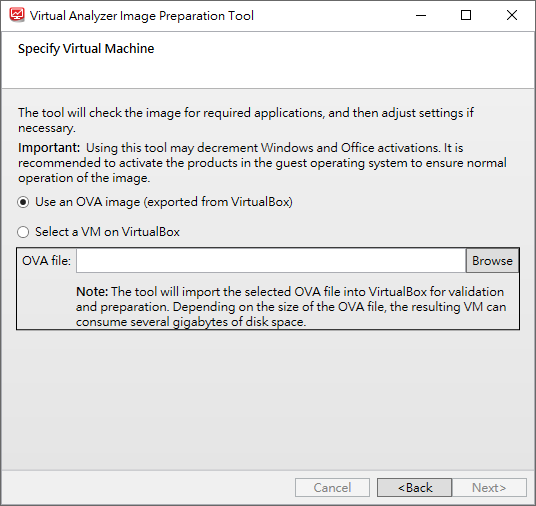
Specify Virtual Machine screen - If you converted a Windows VMware image to an OVA file, perform the following
steps:
- Select Use an OVA image (exported from VirtualBox).
- Click Browse and select the OVA file you exported.
For more details about this option, see Windows OVA File Creation Using Converted Virtual Hard Disk Drives.
Important
Open Virtualization Format (OVF) is a cross-platform standard for packaging and distributing software to be run in virtual machines. OVF enables the creation of ready-to-use software packages (operating systems with applications) that require no configuration or installation.An OVF package consists of several files that can be packed into a single archive file with the extension.ova. Virtual Analyzer supports only image files in the OVA format. - If you created a virtual machine on VirtualBox, perform the following
steps:
- Select Select a VM on VirtualBox.

Specify Virtual Machine screen - Select a VM on VirtualBox - Select the virtual machine you want to use from the VirtualBox VM list.
- Select Clone VM before processing to create a
new copy of the virtual machine with its own set of individual
snapshots..Cloning allows quick creation of duplicate environments for testing. You can run as many clones as the memory and processors on the system allow.
- Select Select a VM on VirtualBox.
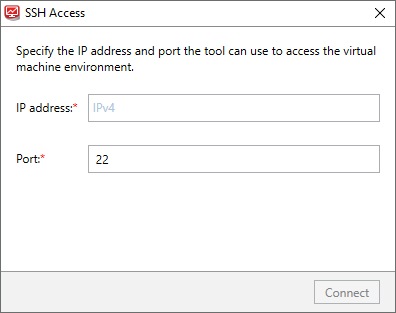
- Click Next.The Sandbox Preparation screen appears and the tool begins preparing the image.If the Linux virtual machine network adapter is attached to NAT, the tool automatically modifies settings using SSH.If the Linux virtual machine network adapter is attached to Bridged Adapter, the SSH Access dialog appears. Specify the IP address and port the tool can use to access the virtual machine environment and then click Connect.
SSH Access screen for Linux images The tool modifies incorrectly configured settings. For a list of settings that the tool validates, see Image Validation and Configuration. For solutions to issues that occur during this phase, see Troubleshooting Common Issues. - If the Sandbox Preparation Unsuccessful screen appears,
click View detailed log to see recommended actions.
-
For missing software on Windows images, see Sandbox Preparation Unsuccessful - Missing Windows Software.
-
For missing packages on Linux images, see Sandbox Preparation Unsuccessful - Missing Linux Packages.
-
For all other issues, see Troubleshooting Common Issues.
-
- If the Products Not Activated screen appears, resolve the
issue or click Next.
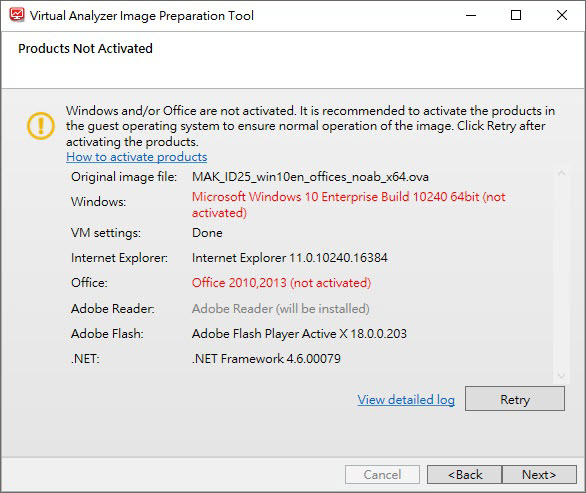
Products Not Activated screen for Windows images To resolve the issue, see Products Not Activated - Windows.
Note
Trend Micro recommends activating Windows and Microsoft Office to ensure normal operation of the image. - Once the Sandbox Ready screen appears, click
Next.The Sandbox Ready screen appears when the tool has successfully validated and configured all settings.

Sandbox Ready screen for Windows images 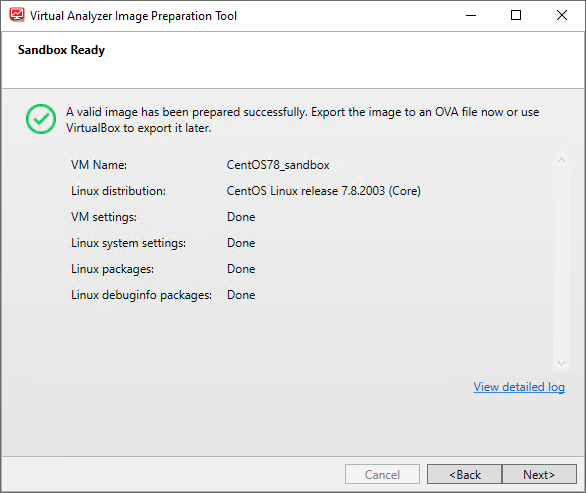
Sandbox Ready screen for Linux images Note
SandboxWizard.exesaves logs in the\logfolder where you run the tool. Logs use the following naming convention:d:\SandboxWizard\log\VATool-yyyymmddhhmmss.txtFor example:d:\SandboxWizard\log\VATool-20170925025520.txt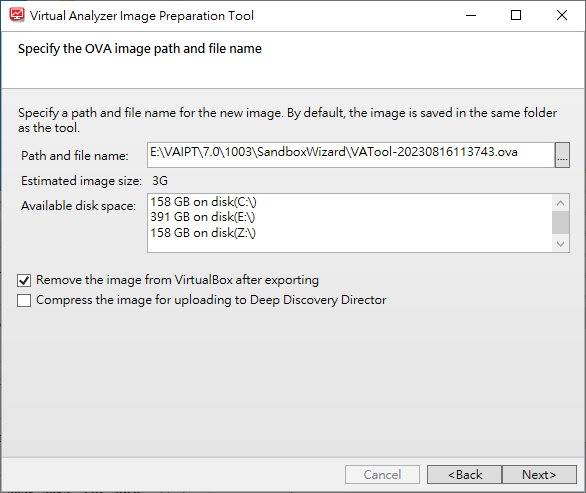
Specify the OVA image path and file name - Configure the settings on the Specify the OVA image path and file
name screen.
-
Specify the path and file name that the tool uses when saving the OVA file.
Note
The tool uses the following naming convention when saving an OVA file:VATool-20170925025520.ova -
(Optional) Enable Remove the image from VirtualBox after exporting.Trend Micro recommends removing unused images from VirtualBox to help reduce storage usage and minimize performance impact on the host system.
-
(Optional) Enable Compress the image for uploading to Deep Discovery Director.
Important
Only Virtual Analyzer images compressed in TAR format by the Virtual Analyzer Image Preparation Tool can be uploaded to and deployed from Deep Discovery Director.
-
- Click Next.The Export the image to OVA screen appears and the tool exports the OVA file.The OVA Image Ready screen appears when the export process completes.
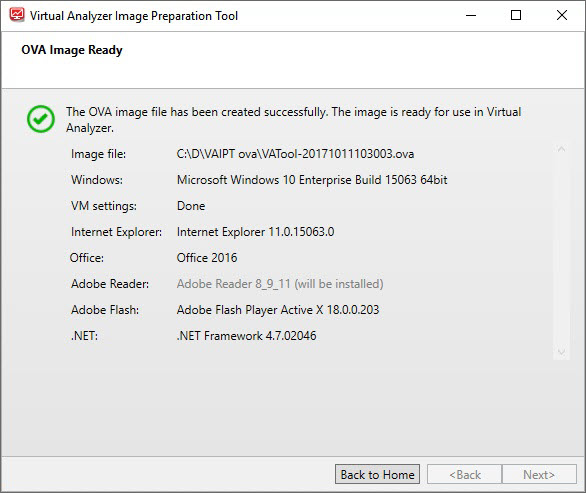
OVA Image Ready screen for Windows images 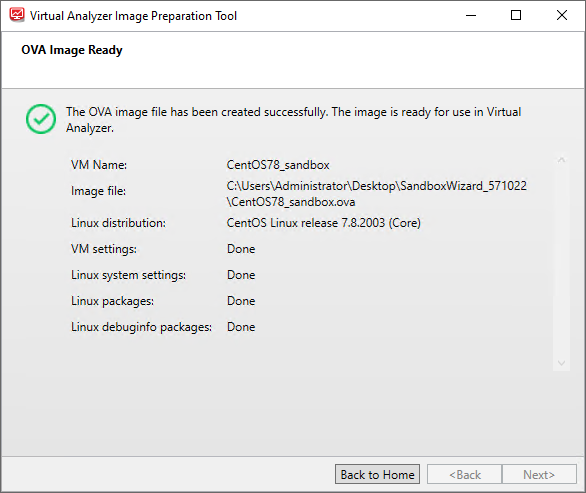
OVA Image Ready screen for Linux images - Click the Close button in the upper right corner to exit the tool or click Back to Home to prepare another image.