


Procedure
- Open VirtualBox.The VirtualBox Manager window opens.
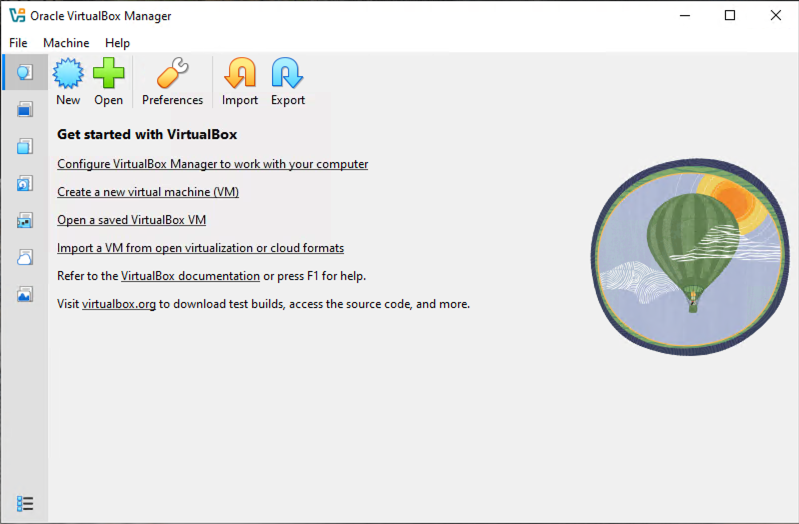
VirtualBox Manager - Click New.The New Virtual Machine window opens. By default, VirtualBox opens in Expert Mode. If you are in Guided Mode instead, click Expert Mode.
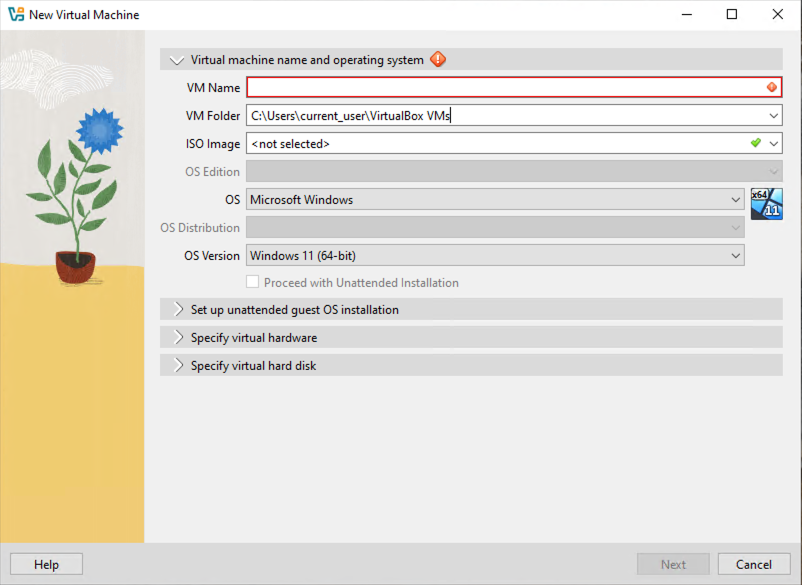
Create Virtual Machine - Expert Mode - Configure the Virtual machine name and operating system settings.
-
Type a permanent and unique VM Name for the virtual machine.
-
Specify the VM Folder to store the completed virtual machine.
-
For the OS, select Microsoft Windows.
-
For the OS Version, select the version of Windows you want to use for the virtual machine.For a list of supported Windows OS versions, see Required Software.
-
- Open the Specify virtual hardware section.
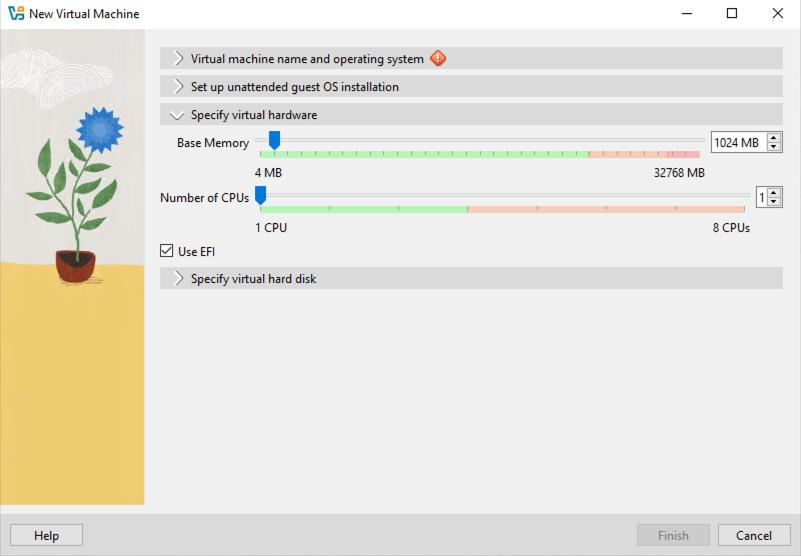
Specify virtual hardware - Specify the recommended memory size for your operating
system.
-
For Windows XP and Windows Server 2003, specify at least 512 MB
-
For Windows 11 and Windows Server 2025, specify at least 4096 MB
-
For all other supported versions of Windows and Windows Server, specify at least 1024 MB.
-
- For Windows 11 and Windows Server 2025, specify at least 2 CPUs for Processors.
- For Windows 11, select Use EFI.
- Open the Specify virtual hard disk section.
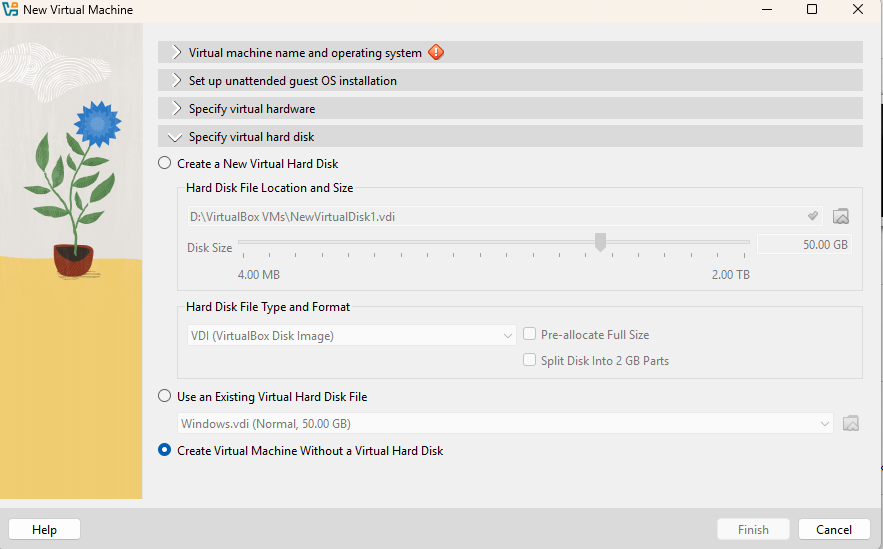
Specify virtual hard disk - Select Create Virtual Machine Without a Virtual Hard Disk.
- Click Finish. VirtualBox creates the virtual machine. The new virtual machine appears in the left pane.
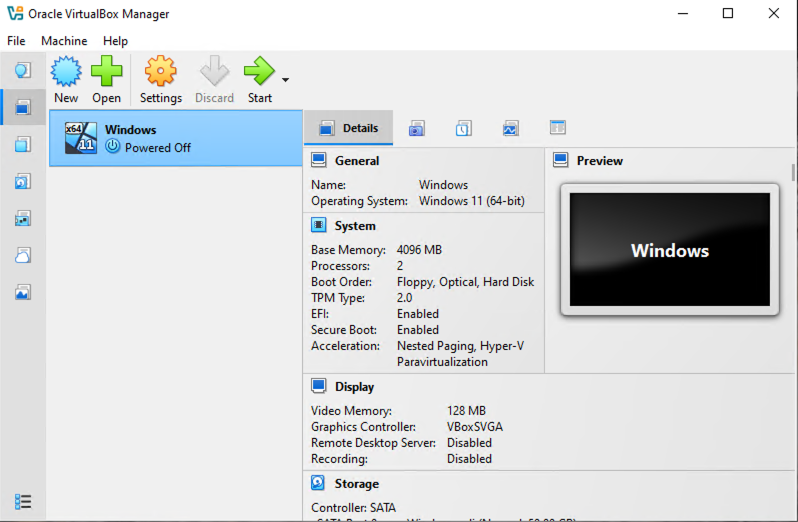
Newly-created Virtual Machine - Click Settings.The Settings window opens.
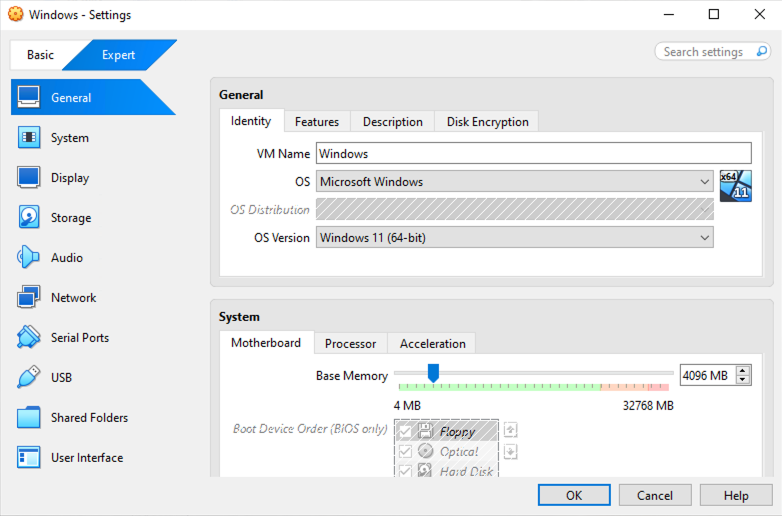
VirtualBox Settings - Go to System.
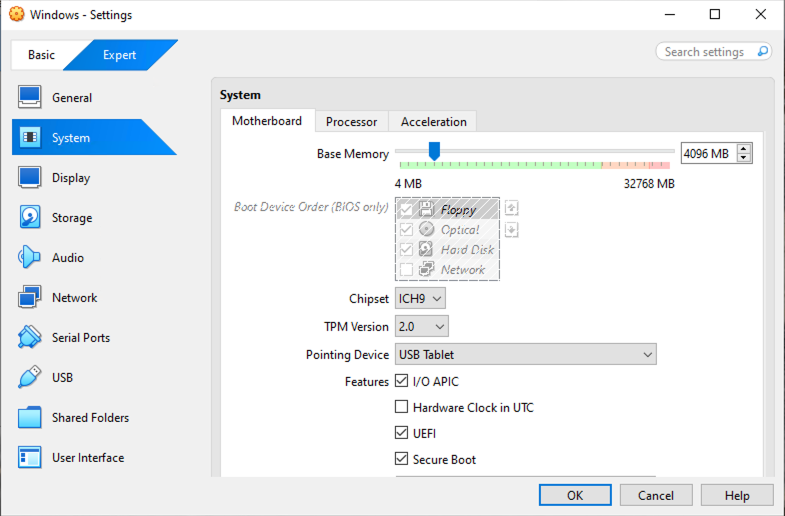
System Screen - Configure the settings on the
Motherboard tab.
-
For Chipset, select ICH9.
-
For TPM, select v2.0.

Important
TPM v2.0 is required for Windows 11. The setting is optional for all other supported Windows versions. -
For Pointing Device, select USB Tablet
-
Select the following Extended Features:
-
I/O APIC
-
UEFI (Required for Windows 11)
-
Secure Boot (Required for Windows 11)
-
Important
For Windows 11 virtual machines, UEFI and Secure Boot are required settings. The settings are optional for all other versions of Windows.Use UEFI if you want to create EFI-compatible images. EFI-compatible images are only supported by the following Trend Micro products:-
Deep Discovery Inspector 5.6 and later
-
Deep Discovery Email Inspector 3.6 and later
-
Deep Discovery Analyzer 6.8 and later
-
Deep Discovery Director 5.1 and later
-
Deep Discovery Web Inspector 2.5 and later
-
- On the Processor tab, select PAE/NX.
- On the Acceleration tab, select Nested Paging.If you are using VirtualBox 5.2 and before, also select Enable VT-x/AMD-V.

Note
-
The Acceleration tab is only available if the processor of the host system supports virtualization technology and the virtualization setting is enabled in the BIOS of the host system.
-
VirtualBox 6.0 and later automatically enables VT-x/AMD-V if the processor of the host system supports virtualization technology and the virtualization setting is enabled in the BIOS of the host system.
-
- Go to Storage.
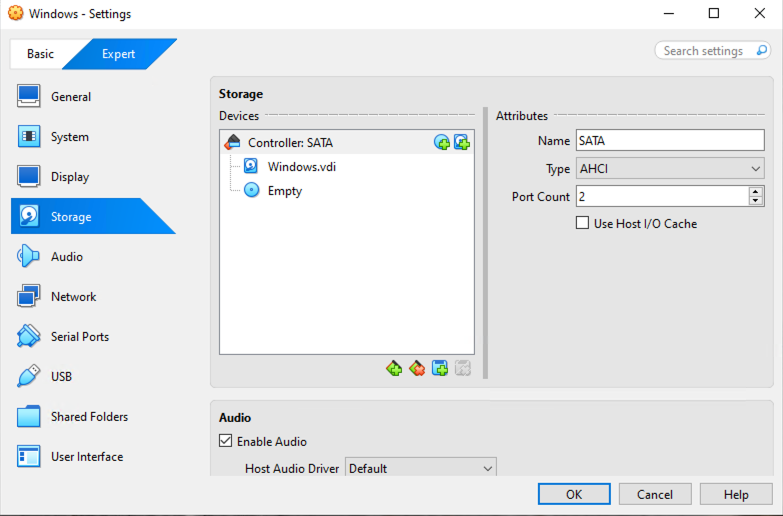
Storage Screen - If Controller: SATA appears under
Storage Devices, select the controller and click
 to remove the SATA
controller.
to remove the SATA
controller. - Add an IDE controller.
- Click
 and select
PIIX4 (Default IDE).
and select
PIIX4 (Default IDE).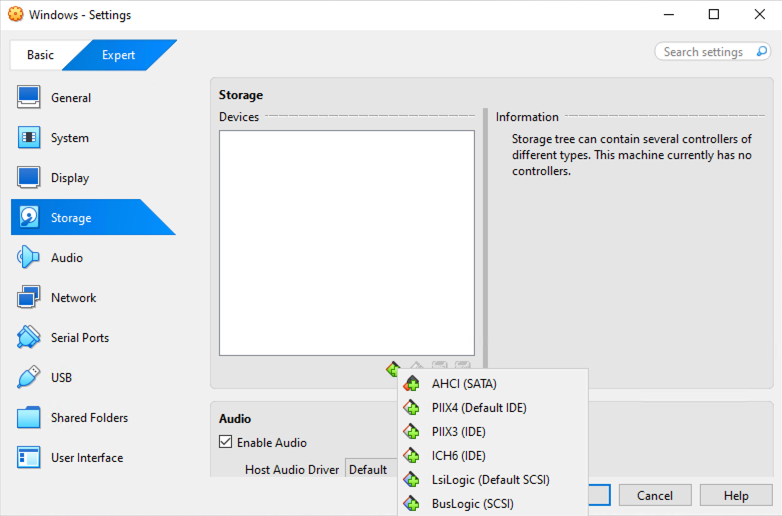
Add Storage Controller Controller: PIIX4 appears on the Storage Devices list. - Click the controller and change the Name
attribute to
IDE.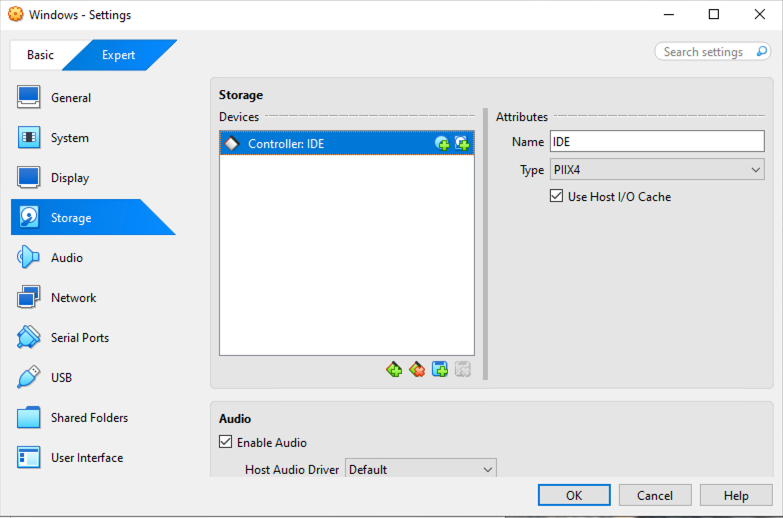
Controller IDE - Select Use Host I/O Cache.
- Click Controller: PIIX4 and
then click
 .The Hard Disk Selector window appears.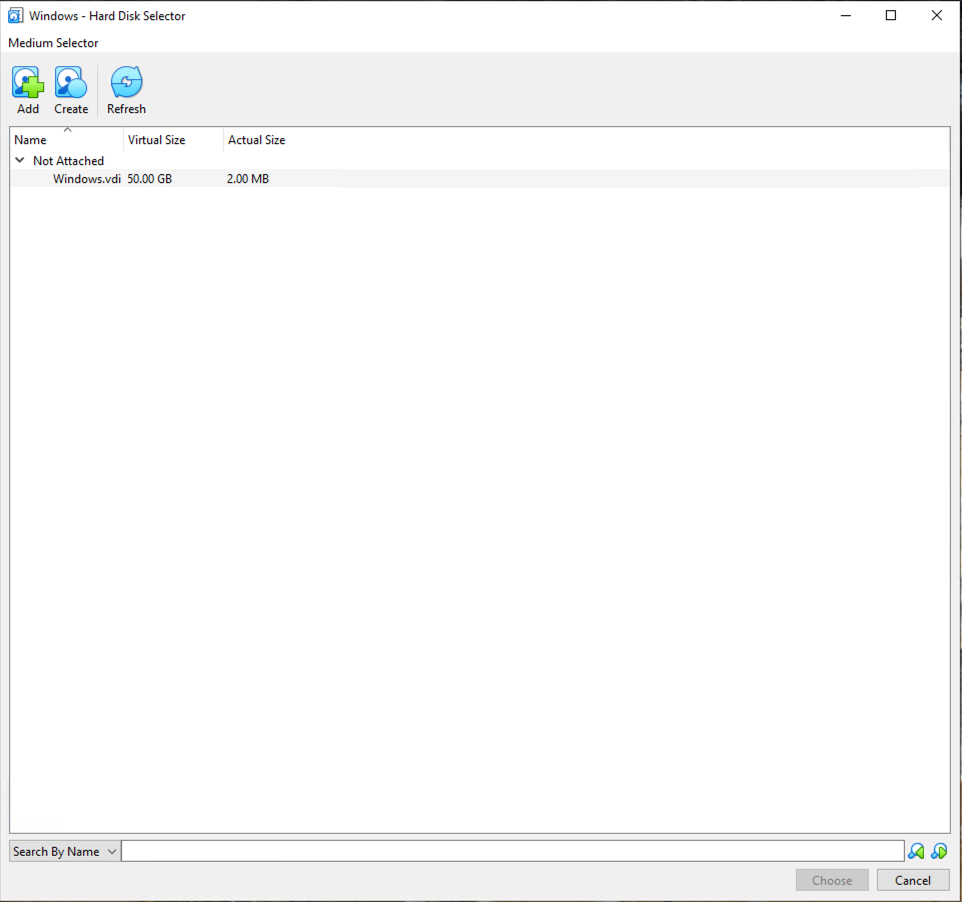
Hard Disk Selector - Select the converted VMDK file you want to use and click Choose.
- Click Controller: IDE and
then click
 to create an
optical drive.
to create an
optical drive. - In the Optical Disk Selector
window, click Leave Empty.
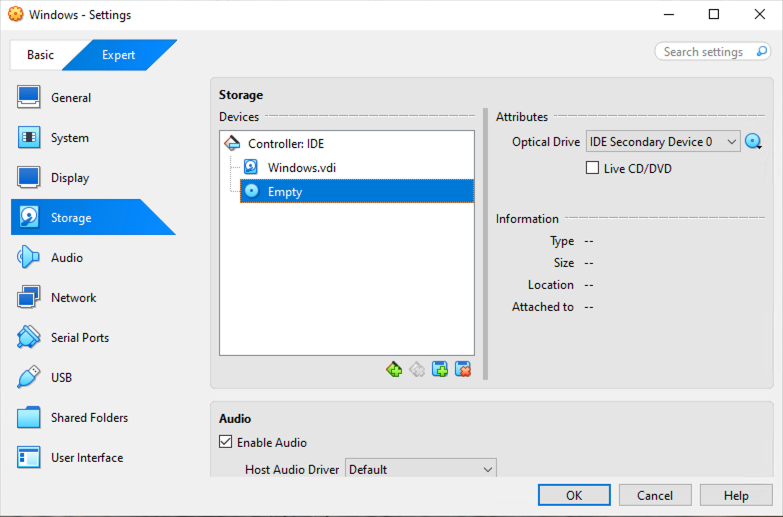
Optical Disk Selector - Click the optical drive you created and verify the Optical Drive attribute is set to IDE Secondary Device 0.
You should only have one Controller: IDE listed under Storage Devices. If there are any other controllers listed, remove the extra controllers. - Click
- (Optional) Go to Audio and verify
that Enable Audio is selected.
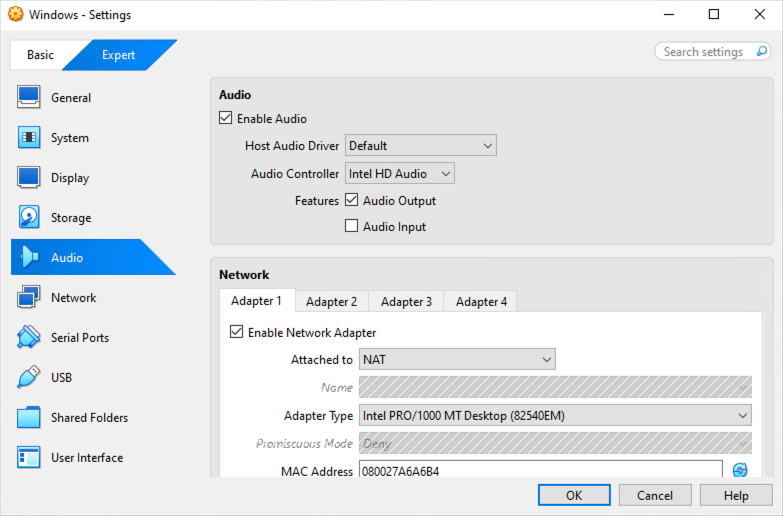
Audio Options Settings - Go to USB.
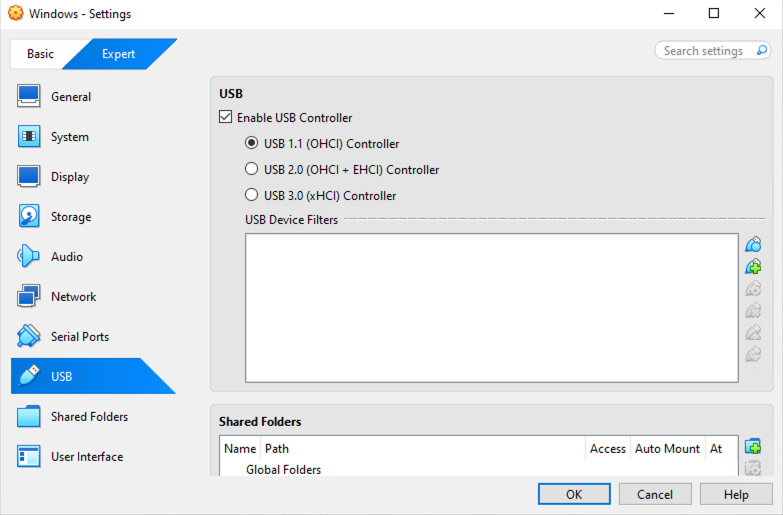
USB Settings - Select Enable USB Controller.
- Select USB 1.1 (OHCI) Controller.
- Go to Shared Folders and verify that
no folders are shared.
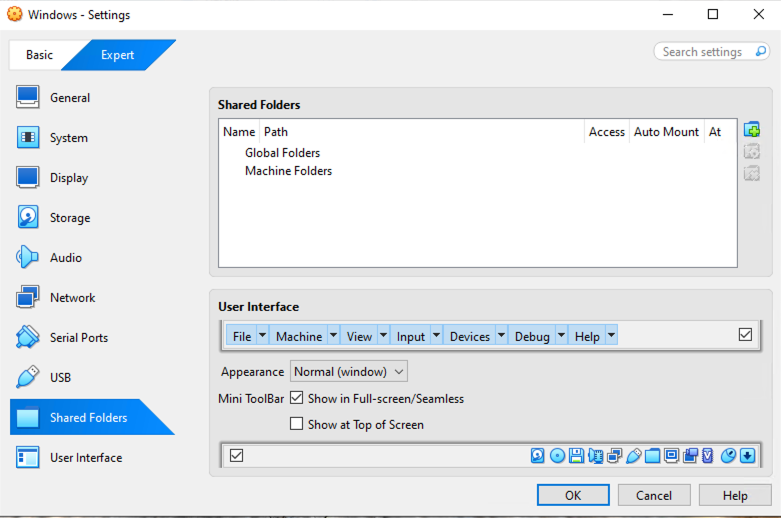
Shared Folders Settings - Click OK.
- On the VirtualBox Manager screen,
click
 to power on the image.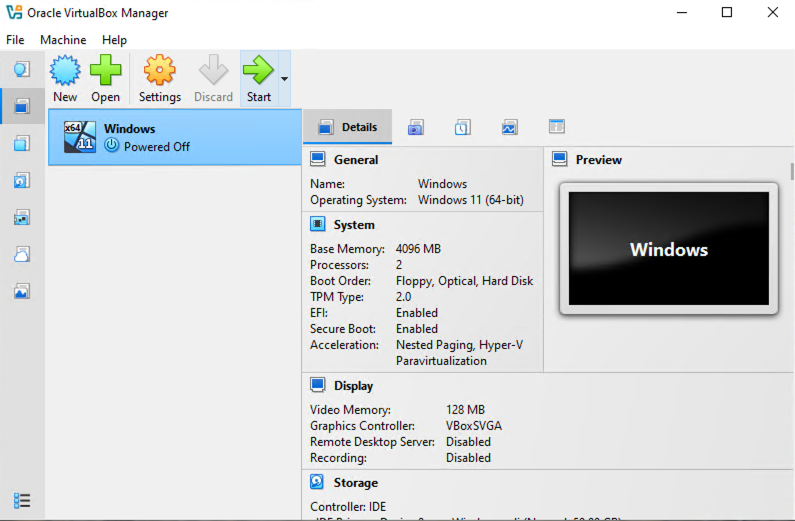
VirtualBox Manager The installation process starts. - Install Microsoft Office and other required software to achieve satisfactory
detection results.
Important
Verify there is at least 3072 MB free virtual disk space on the virtual machine to ensure normal operation of Virtual Analyzer.