

If you you want your agents to be able to use the Trend Micro Smart Protection
Network, then you must allow them to connect to the Internet on required port numbers.) If
a direct connection is not possible, or if you have many agents and want to reduce
bandwidth usage on your Internet connection, you can deploy your own Smart
Protection Server (SPS) within your Virtual Private Network (VPC) in AWS, or another
local VPC. The Smart Protection Server will connect to the Trend Micro Smart
Protection Network to retrieve the latest anti-malware, file reputation, and web
reputation information and then pass it to your agents.
To deploy a Smart Protection Server, you can either:
- Use an AWS CloudFormation template created by Trend Micro for easy, automated deployment.
- Install it manually. See the Smart Protection Server documentation.
The instructions below describe how to deploy the Smart Protection Server using the
CloudFormation template.
Procedure
- In AWS, at the top, click Services and search for the
CloudFormation service.
- On the CloudFormation service page, click Create
Stack. The Select Template page appears.
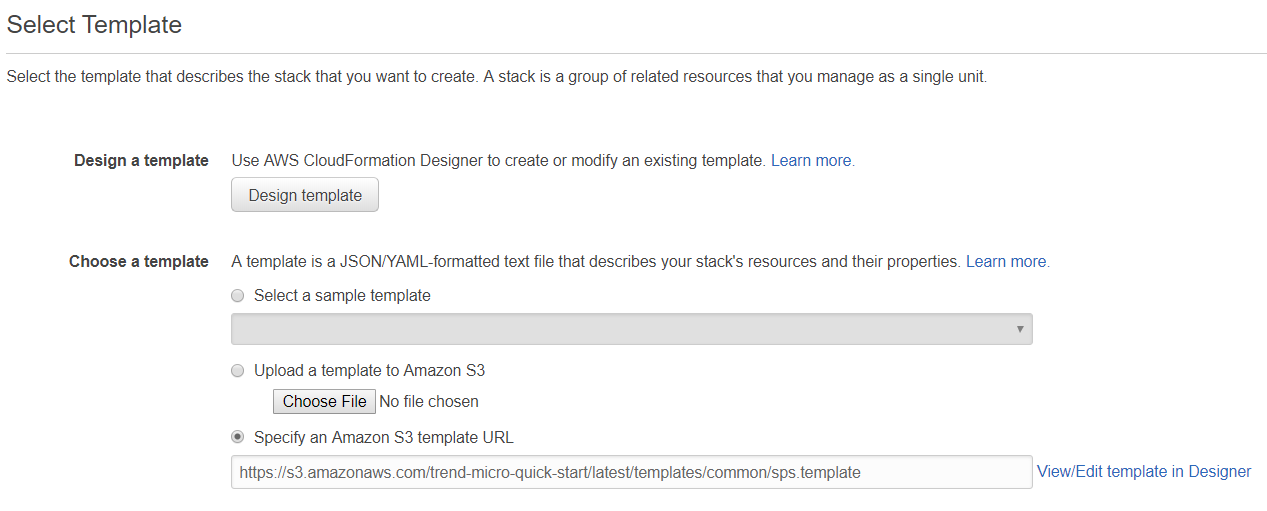
- Select Specify an Amazon S3 template URL and enter this URL into
the underlying field:
https://s3.amazonaws.com/trend-micro-quick-start/latest/templates/common/sps.template - Click Next.Finish entering settings in the template. Choose the AWS key pairs you would like to use to authenticate to the server, the VPC and subnet where the Smart Protection Server will reside, and an administrator password. The password cannot contain special characters such as:
!@#$%^&*().
WARNING
Do not enter a password that contains dictionary words. It should be at least 8 characters in length. Failure to do this will result in a weak password that is vulnerable to guessing and brute force attacks, and could compromise the security of your network.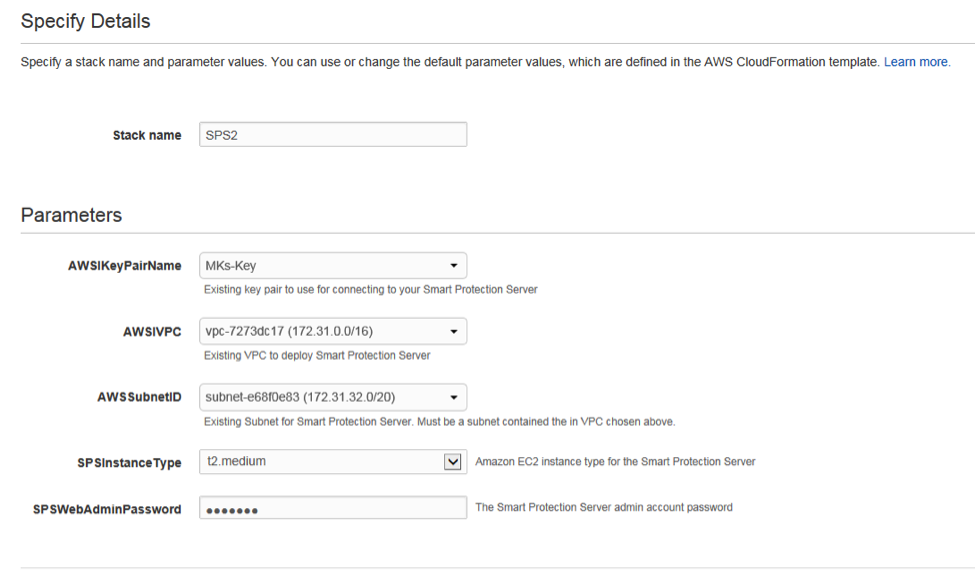
- Click Next.
- Optionally, create any tags that you would like to associate with this server,
then click Next.
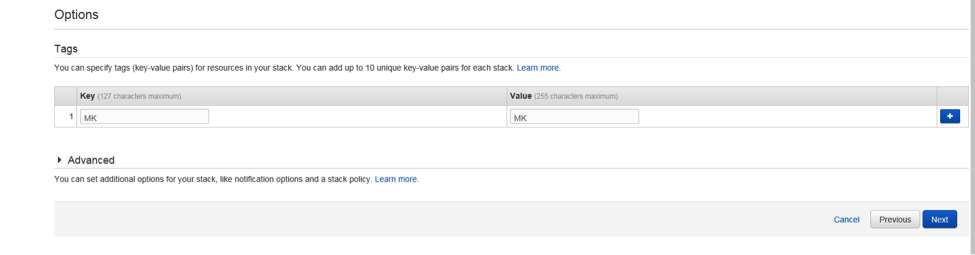
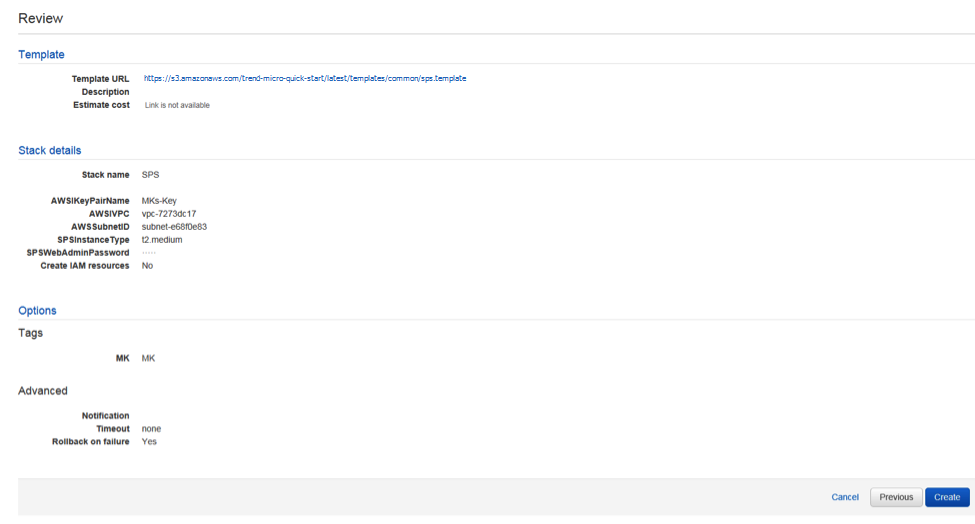
- Review your settings, and then click Create.
 While your server is being installed, the screen will indicate progress. To verify that the process has completed, you may need to click Refresh at the top of the screen.
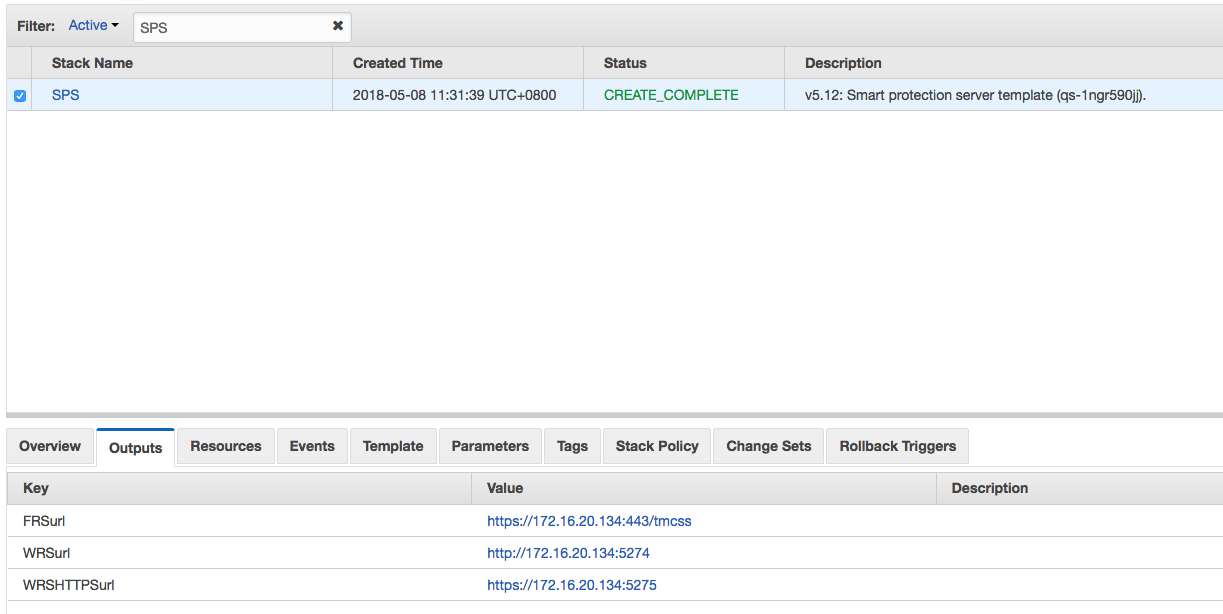
- Click the Outputs tab at the bottom of the screen. There are three
URLS. In the Server & Workload Protection console, you must
configure your computers to use the Smart Protection Server.
- Log in to the Server & Workload Protection console.
- At either the policy level (recommended method) or at the computer level, go to
the anti-malware section.
- Click the Smart Protection tab at the top. Toward the bottom of
the screen, deselect Inherited under Smart Protection Server
for File Reputation Service.
- Select Use locally installed Smart Protection Server.
- Enter in the URL from the Outputs screen in your AWS console
labeled "FRSurl" and click Add.
- Click Save.
- Open the web reputation section of the policy or computer and click the
Smart Protection tab at the top.
- Deselect Inherited under Smart Protection Server for Web
Reputation Service.
- Select Use locally installed Smart Protection Server.
- Add the URL from the Outputs screen in your AWS console labeled
"WRSurl" or "WRSHTTPSurl" and click Add. You
can use the HTTP or HTTPS URL, but HTTPS is only supported with agent version
11.0+.
- Click Save.
- If you didn't configure Server & Workload Protection to
automatically send policies, then manually send the policy.