

Configure the integration with NinjaOne to automate the deployment of TrendAI Vision One™ Endpoint Security agents to your managed customers’ endpoints and monitor agent status directly from TrendAI Vision One™ for Service Providers.
ImportantThe following NinjaOne instructions were valid as of November 17, 2025. For further
help, check your NinjaOne documentation.
|
Procedure
- In TrendAI Vision One™ for Service Providers, go to .
- Locate and click the NinjaOne integration card.
- Connect your NinjaOne account to TrendAI Vision One™ for Service Providers.
- Obtain the NinjaOne URL, client ID, and client secret from NinjaOne.
- Go back to TrendAI Vision One™ for Service Providers, and click Connect NinjaOne in the integration screen.
- In Connection settings, paste the NinjaOne URL, client ID, and client secret obtained from NinjaOne.
- Click Test connection to verify your connection.
- Click Connect to save your settings and establish the connection.Once connected, managed customer data is synchronized from NinjaOne to TrendAI Vision One™ for Service Providers.
- Map your customers to NinjaOne-managed customers, and select the appropriate Protection
Manager for deployment.
- Click
 to begin matching your customers with NinjaOne.The Customer mapping pop-up displays with a list of your managed customers in alphabetical order.
 - In Customer mapping, use either automatic match or manual match to map your managed customers to those
managed by NinjaOne.Mapping methodDescriptionAutomatic matchClick Run auto-match and wait for a while.Customers with exact spelling matches between TrendAI Vision One™ for Service Providers and NinjaOne are automatically matched (indicated by a magic wand icon
 ).Manual matchUse the Mapping status drop-down to easily identify unmatched customers.For each, click the drop-down menu in the NinjaOne-managed customer column, then search and select the corresponding NinjaOne-managed customer.
Important
Any new customers added after the initial mapping must be mapped to ensure proper agent deployment. For customers that do not have a corresponding NinjaOne-managed customer, TrendAI Vision One™ Endpoint Security agents are not installed on their endpoints. - In the Standard Endpoint Protection Manager and Server & Workload Protection Manager columns, select the appropriate Protection Manager to deploy.
- Click Save.
- Click
- Generate a deployment script for each protection type and supported operating system.
- From the Protection type drop-down list, select one of the following:
- Standard Endpoint Protection
- Server & Workload Protection
- Endpoint Sensor
- From the Operating system list, select the appropriate operating system.
- Download or copy the preview script for later use.
- From the Protection type drop-down list, select one of the following:
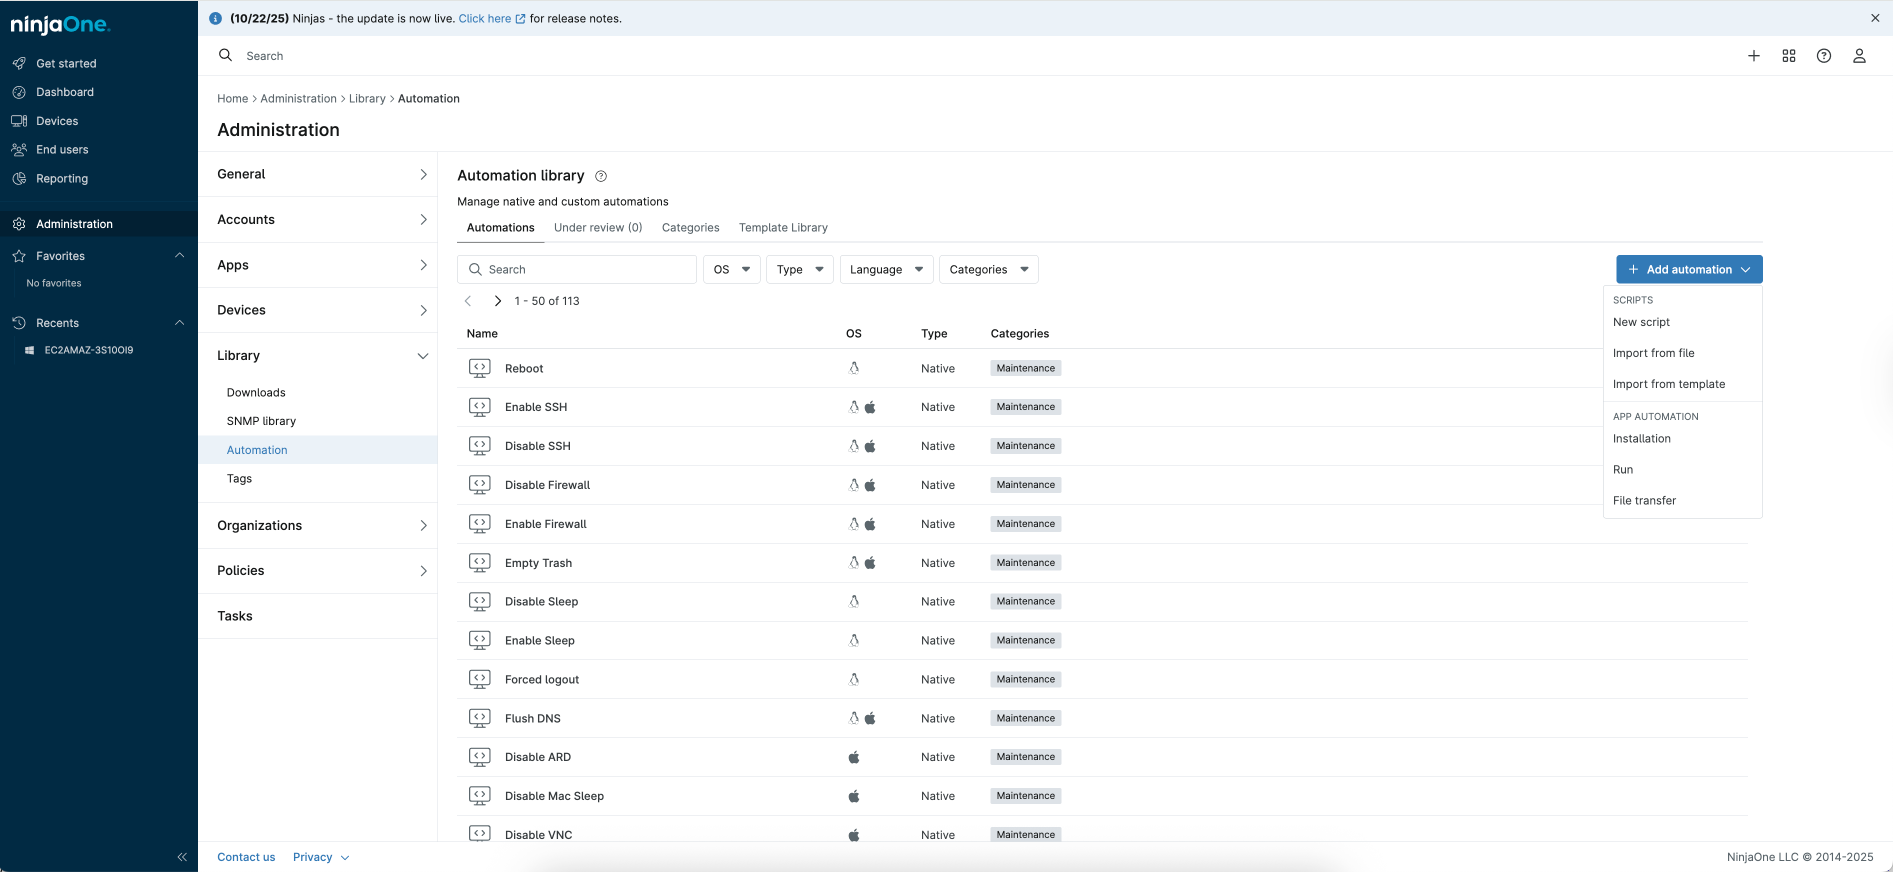
- Add the deployment script to NinjaOne automation.
- In NinjaOne, go to .
- Click Add automation, and select New script or Import from file.
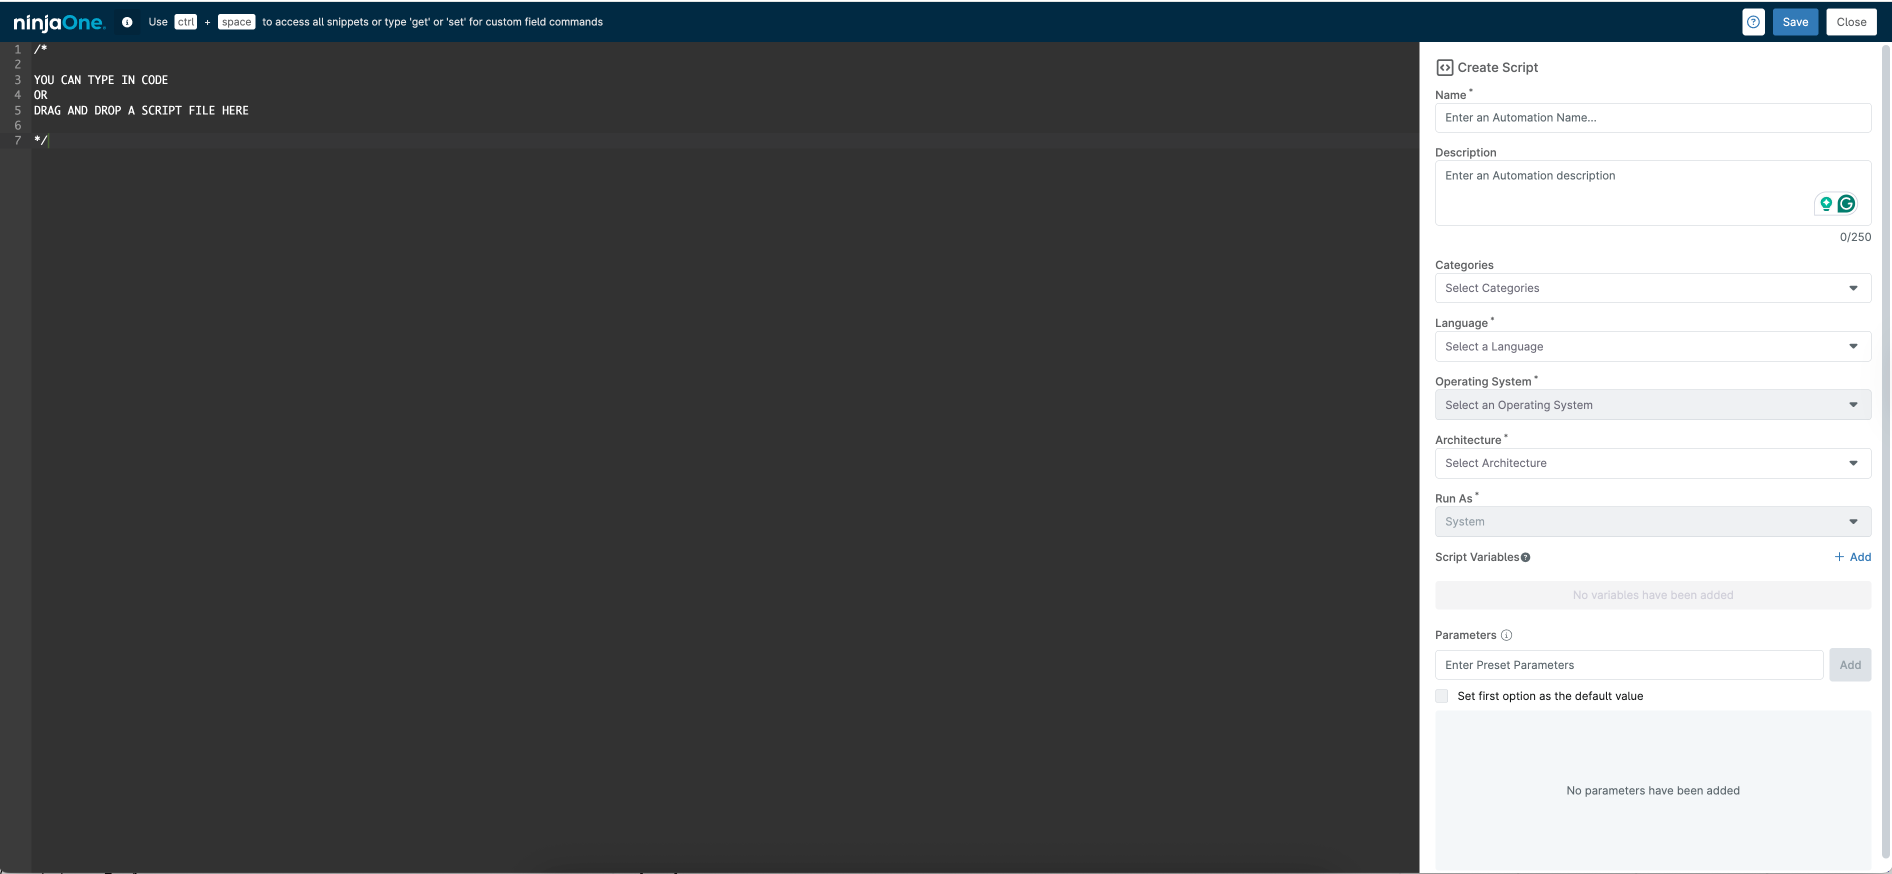
- In Create Script, paste or drag the deployment script into the script section, specify script information,
and click Save.
Important
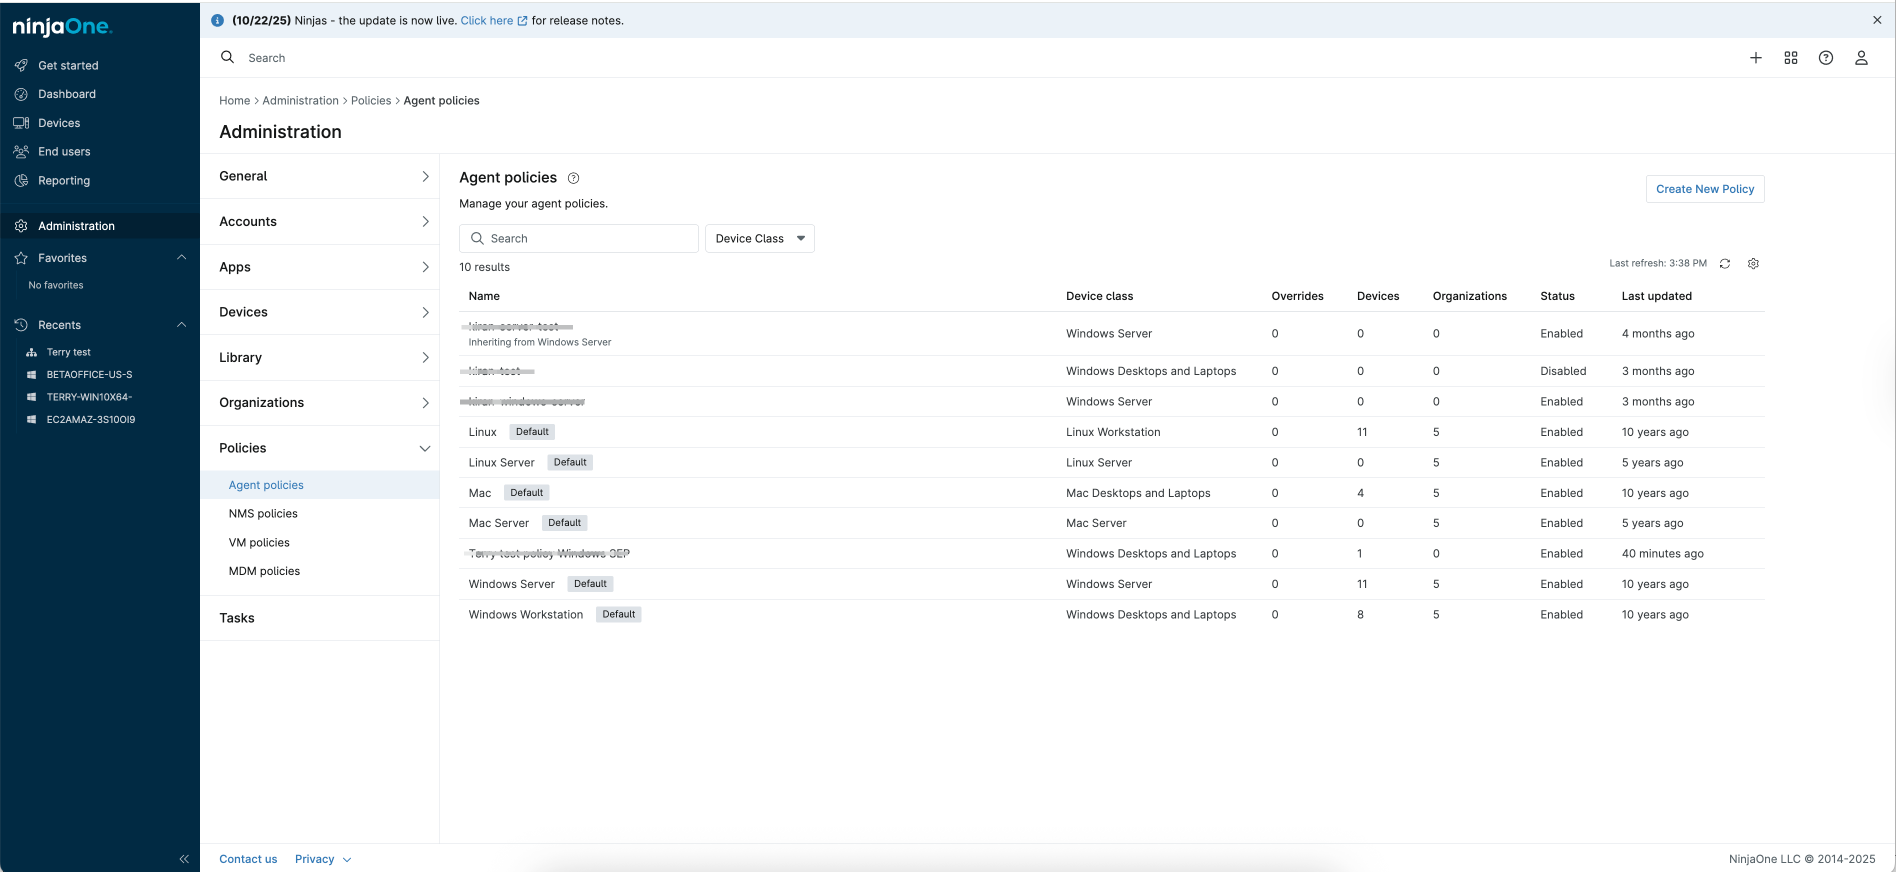
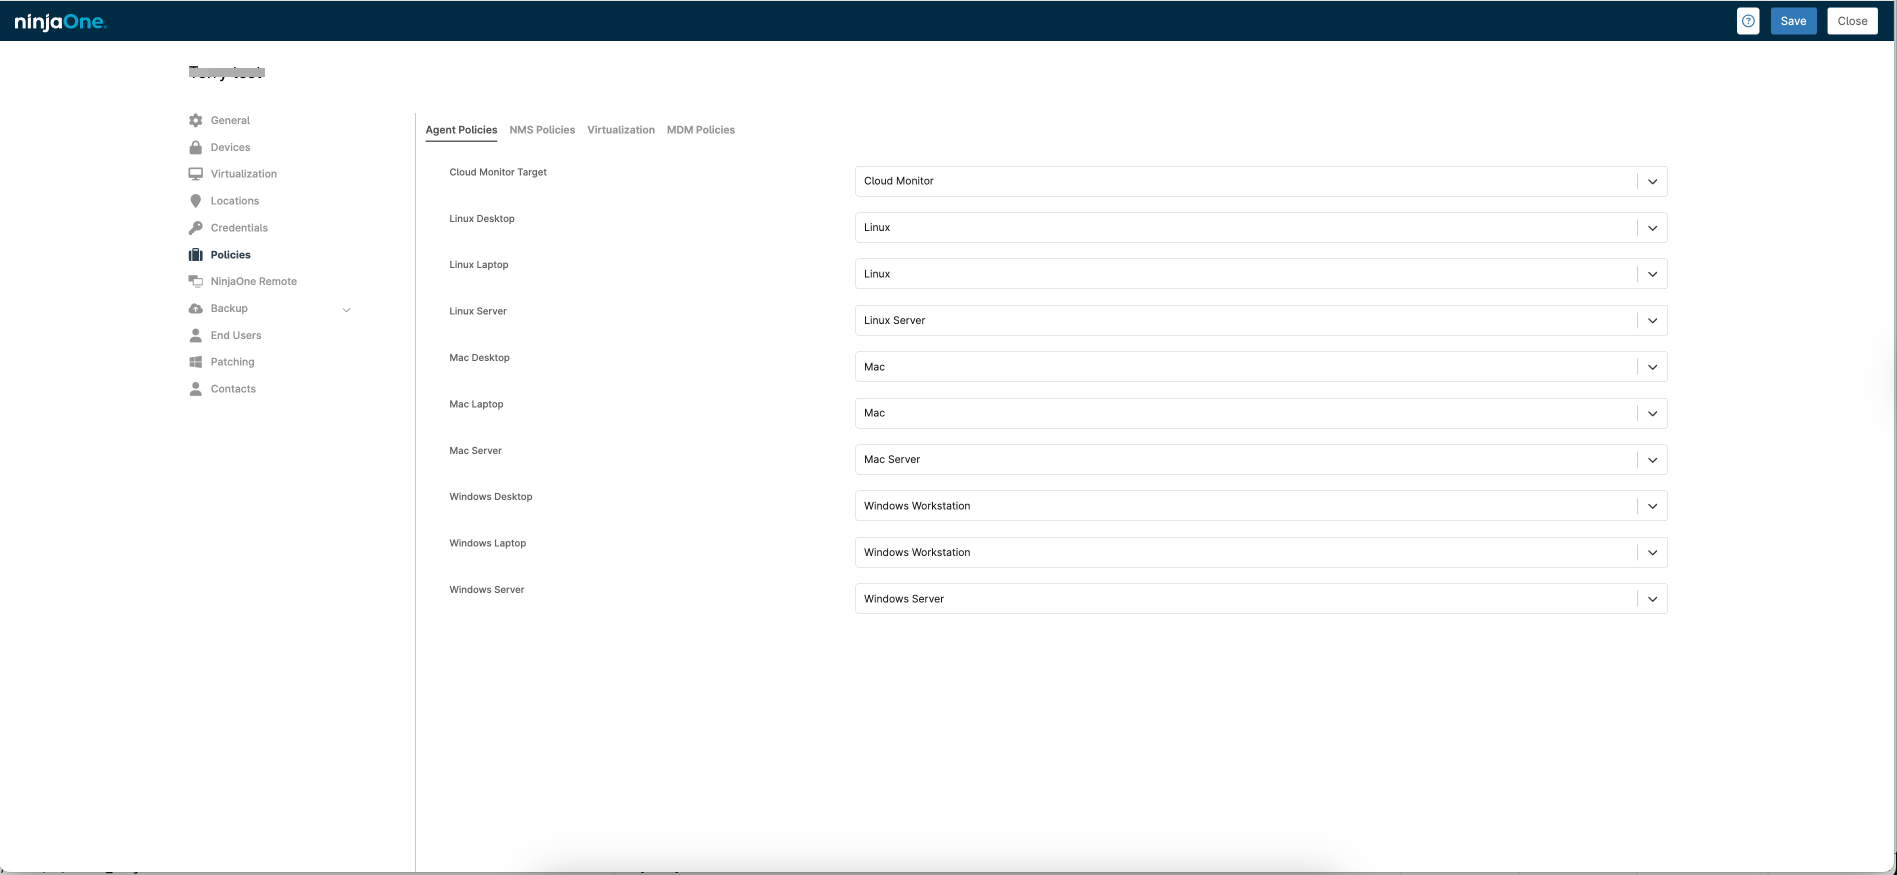
If a previously selected Protection Manager is deleted, the associated script becomes invalid. All installation tasks using that script will fail. - Create an agent policy in NinjaOne.
- Go to .
- Click Create New Policy.
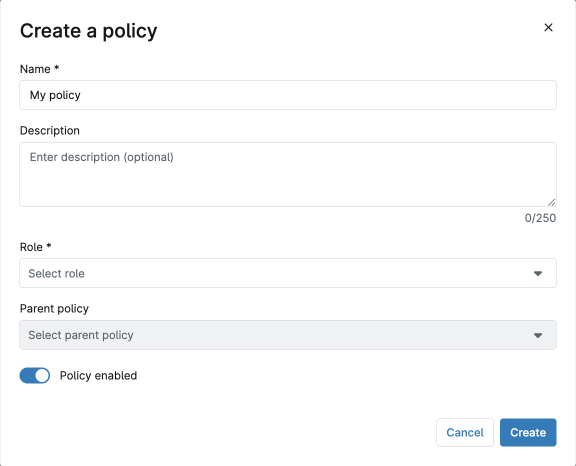
- In Create, specify the policy name, select a role based on the operating system you want to
create the policy for, and click Create.
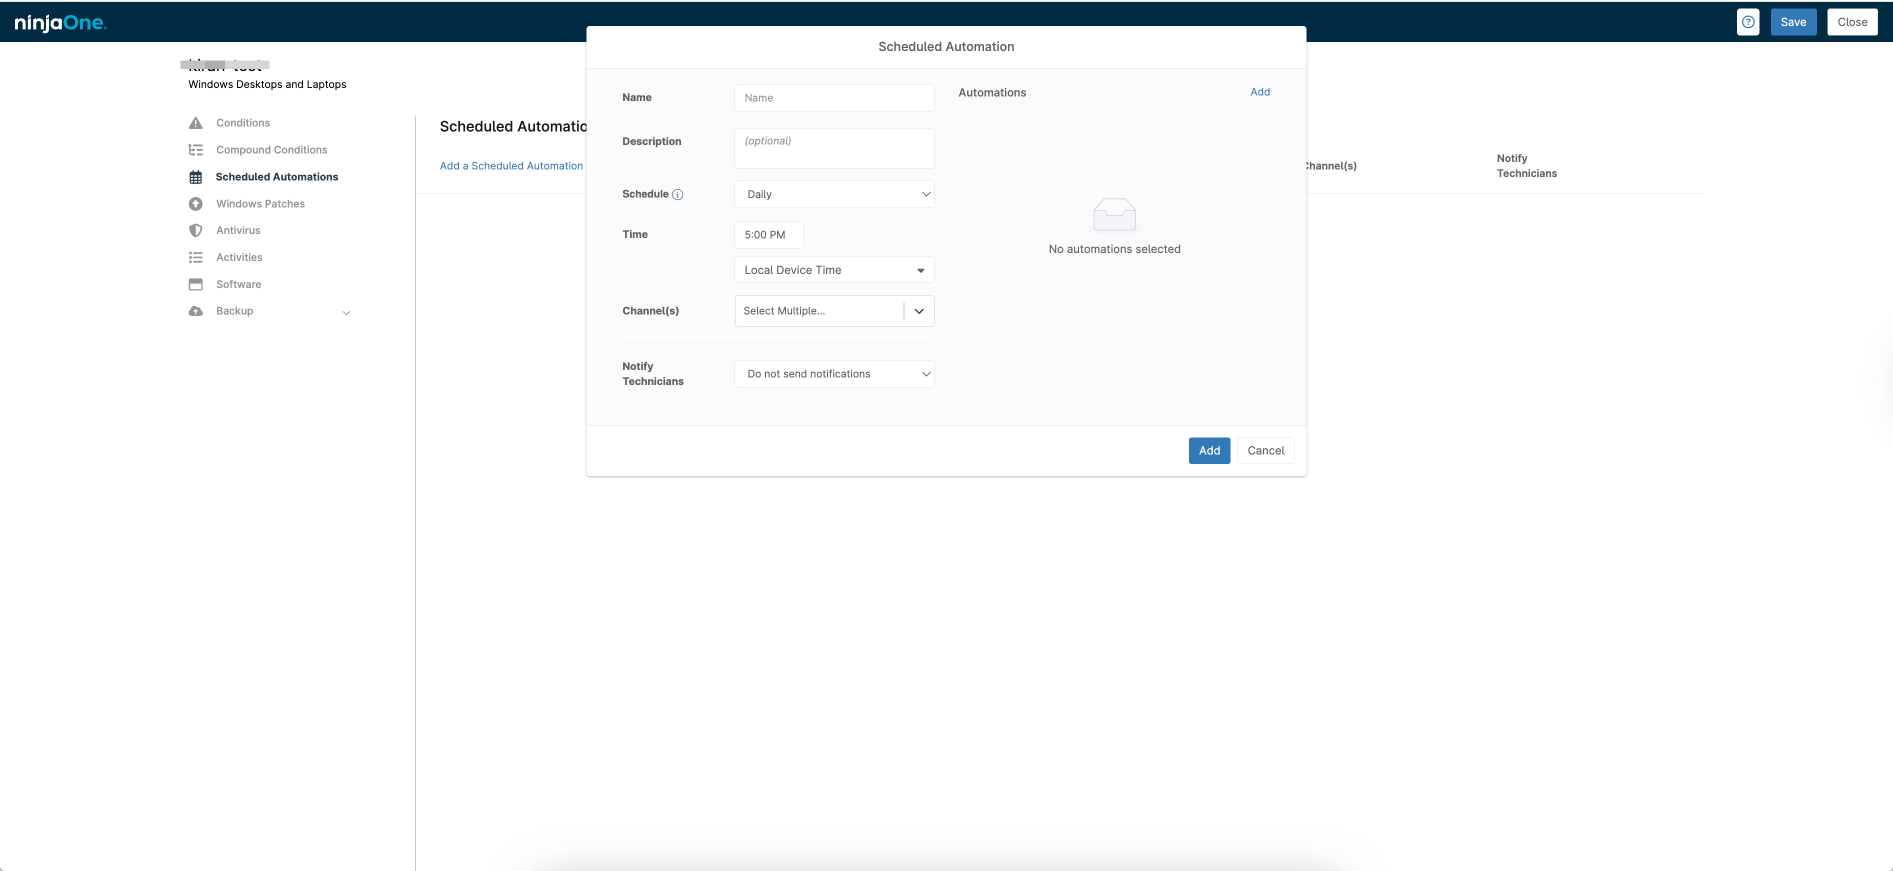
- Configure scheduled automations in the policy by adding the automation created in
the previous step.This ensures that NinjaOne automatically applies the policy when a new endpoint is added to the organization.
- Assign the policy to specified endpoints.
- Go to .
- Select the organization, click Policies, and assign the policy to the endpoint type by selecting from the drop-down list.
Once configured, NinjaOne periodically installs the agent on endpoints added to the selected organization. This ensures consistent protection and centralized management across all endpoints.Installation time per endpoint typically ranges from 30 minutes to 1 hour, depending on the endpoint configuration.
Note
Due to privacy permission issues, you might encounter difficulties completing the automatic installation of TrendAI Vision One™ Endpoint Security agents with Standard Endpoint Protection on macOS endpoints. In such cases, manual intervention may be required to grant the necessary permissions and complete the installation process.If the automatic installation fails, restart the endpoint and try again. If the issue persists, gather the endpoint's activity details from NinjaOne and contact your support provider for assistance. - Monitor agent status on the managed endpoints.
- In TrendAI Vision One™ for Service Providers, go to .
- On the Endpoints tab, select an organization, and monitor agent status of the managed endpoints.