

Configure the integration with Kaseya VSA to automate the deployment of TrendAI Vision One™ Endpoint Security agents to your managed customers’ endpoints and monitor agent status directly from TrendAI Vision One™ for Service Providers.
ImportantThe instructions for Kaseya VSA are valid as of March 2026. For further help, check
your Kaseya VSA documentation.
|
Procedure
- In TrendAI Vision One™ for Service Providers, go to .
- Locate and click the Kaseya VSA integration card.
- Connect your Kaseya VSA account to TrendAI Vision One™ for Service Providers.
- Generate an API credentials token in Kaseya VSA.For more information, see Obtain Kaseya VSA API token credentials.
- On the TrendAI Vision One™ for Service Providers console, click Connect Kaseya VSA in the integration screen.
- Paste the Token ID obtained from Kaseya VSA.
- Paste the Token Secret obtained from Kaseya VSA.
- Click Test connection to verify your connection.
- Click Connect to save your settings and establish the connection.Once connected, managed customer data is synchronized from Kaseya VSA with TrendAI Vision One™ for Service Providers.
- Generate an API credentials token in Kaseya VSA.
- Map your customers to Kaseya VSA-managed customers, and select the appropriate Protection
Manager for deployment.
- Under Step 2, click the edit icon (
 ) to begin matching your customers with Kaseya VSA.The Customer mapping window displays a list of your managed customers in alphabetical order.
 - Use either automatic matching or manual matching to map your managed customers to
those managed by Kaseya VSA.Mapping methodDescriptionAutomatic matchClick Run auto-match and wait for a few moments.Customers with exact spelling matches between TrendAI Vision One™ for Service Providers and Kaseya VSA are automatically matched, indicated by a magic wand icon
 .Manual matchUse the Mapping status drop-down to easily identify unmatched customers.For each customer, use drop-down menu in the Kaseya VSA-managed customer column to select the corresponding Kaseya VSA-managed customer.
Important
Any new customers added after the initial mapping must be mapped to ensure proper agent deployment. For customers that do not have a corresponding Kaseya VSA-managed customer, TrendAI Vision One™ does not install Endpoint Security agents on their endpoints. - In the Standard Endpoint Protection Manager and Server & Workload Protection Manager columns, select the appropriate Protection Manager to manage deployments.
- Click Save.
- Under Step 2, click the edit icon (
- Under Step 3, select the Protection type you want to use to create a deployment script and workflow.You can create deployment scripts and workflows for each of the TrendAI Vision One™ Endpoint Security agent protection types by repeating the following steps for Standard Endpoint Protection, Server & Workload Protection, and Sensor-only deployments.After selecting a Protection type, the information for device scope, deployment script, and workflow automatically populates for that protection type.
Important
When a step requires you to copy and paste a value from TrendAI Vision One™ for Service Providers to Kaseya VSA, copy all values exactly without any changes. Changing any values might cause deployment and management to fail. - Create a device scope to control which devices deploy agetns with the selected protection
type.You must create a device scope before creating the deployment script and workflow. These steps include the recommended process of creating a workflow for Custom Fields batch deployment, allowing the scope to be determined based on the Custom Field criteria.
- In the Kaseya console, go to and click Create Custom Field.
- Specify a Display Name that allows you to identify the Custom Field easily.
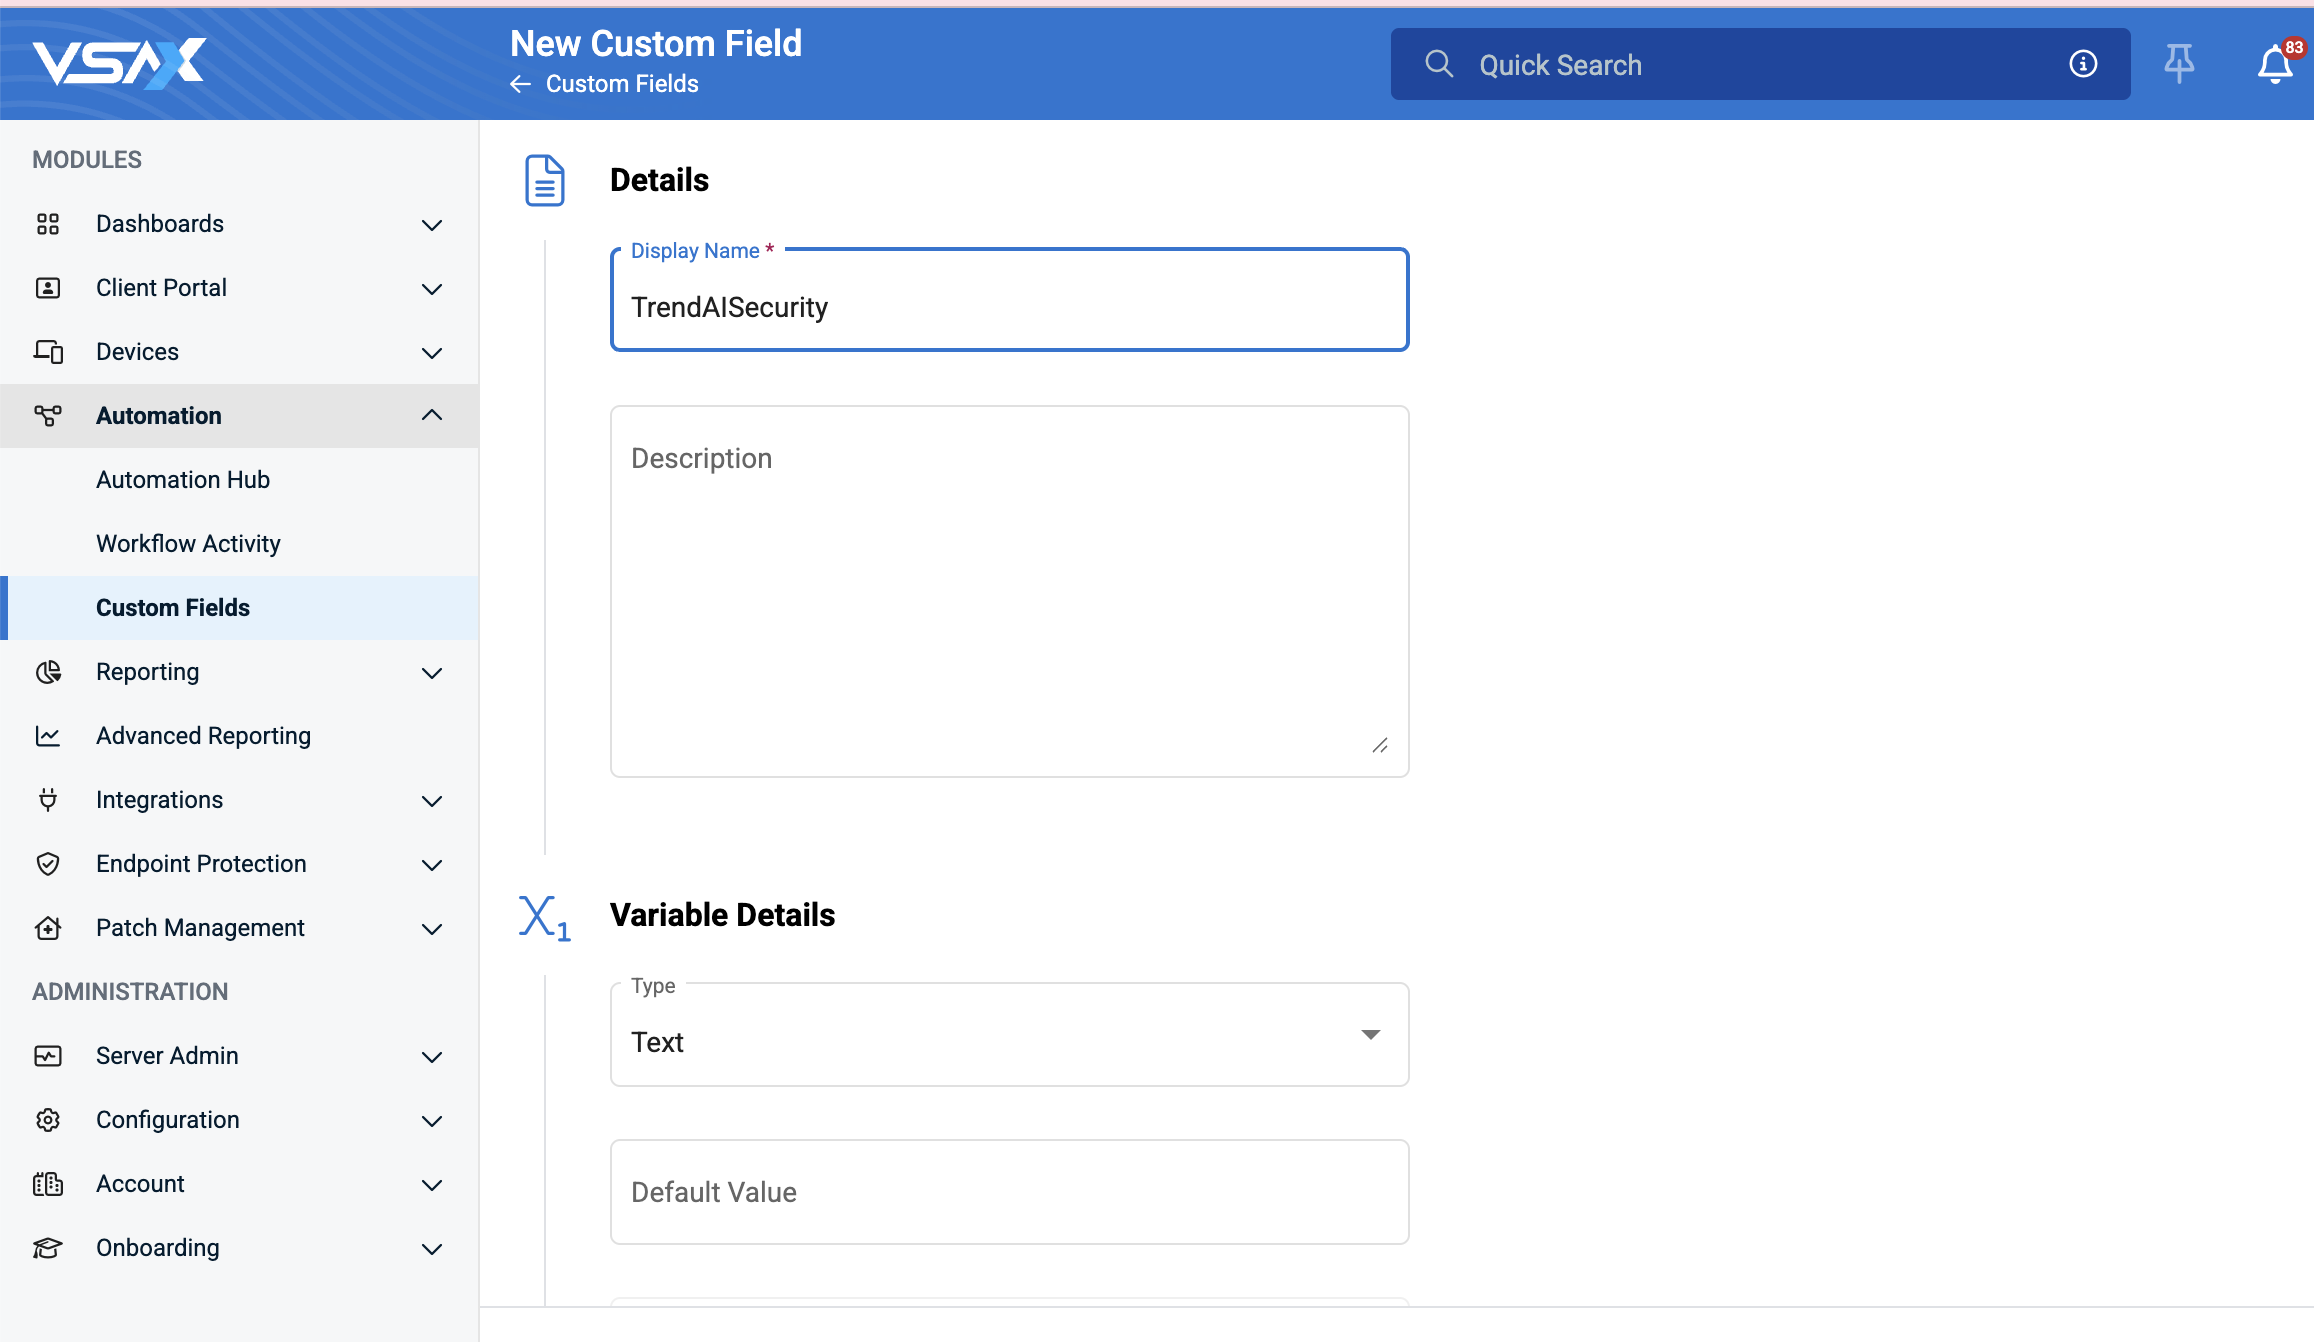
- Under Contexts, select System.
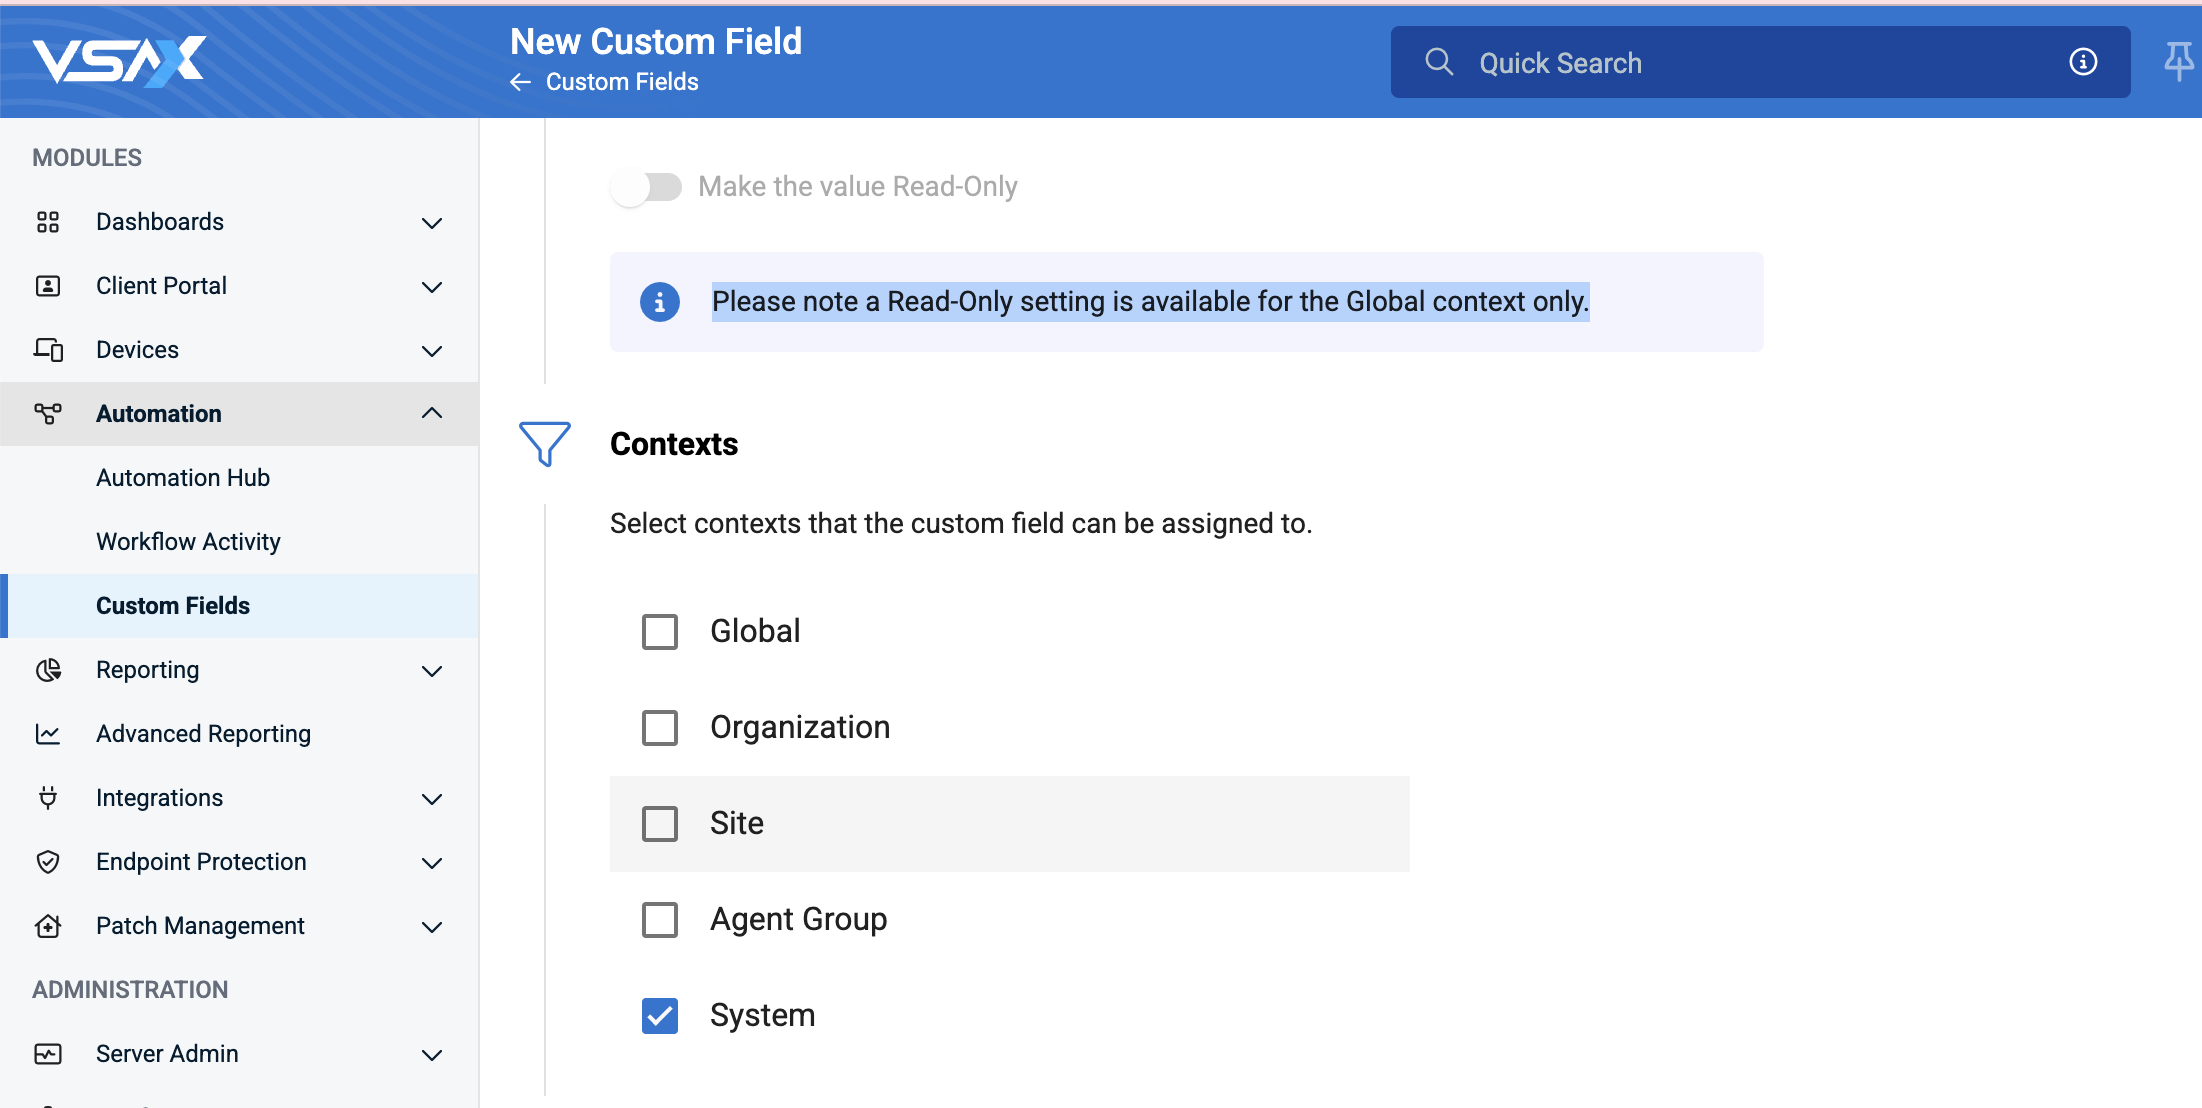
- Click Create.
- Go to .
- Click Create and select Create New.
- Specify a unique Name for the workflow.
- Set the Status to Active.
- For Trigger Type, select Ad-hoc and Scheduled.
- Click Next.
- Select Ad-hoc.
- Enable Skip if offline.
- Click + New Step and select Set Custom Field Value.
- For Name, select the name you specified for the Custom Field.
- For Context, select System.
- For Operation, select Set Value.
- For Value, specify which TrendAI Vision One™ Endpoint Security agent protection type the scope applies to.Such as Standard Endpoint Protection, Server & Workload Protection, or Sensor-only.
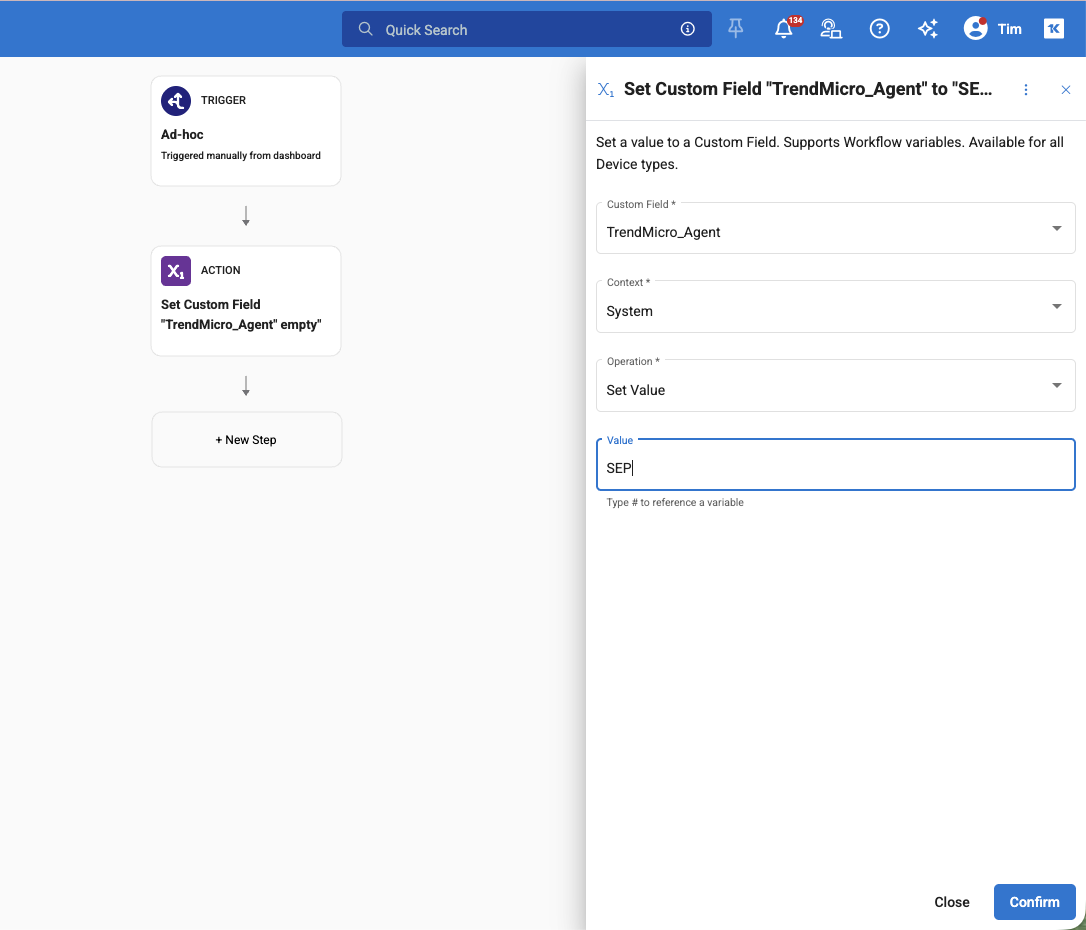
- Click Confirm, then click Save.
- Go to and click Create Scope.
- For Name, copy the Scope name provided by TrendAI Vision One™ for Service Providers.
- Locate Custom Fields and click Edit Custom Fields Rules.
- Select the Custom Field you created, set the operator to is equal to, and specify the Value you provided for the workflow.
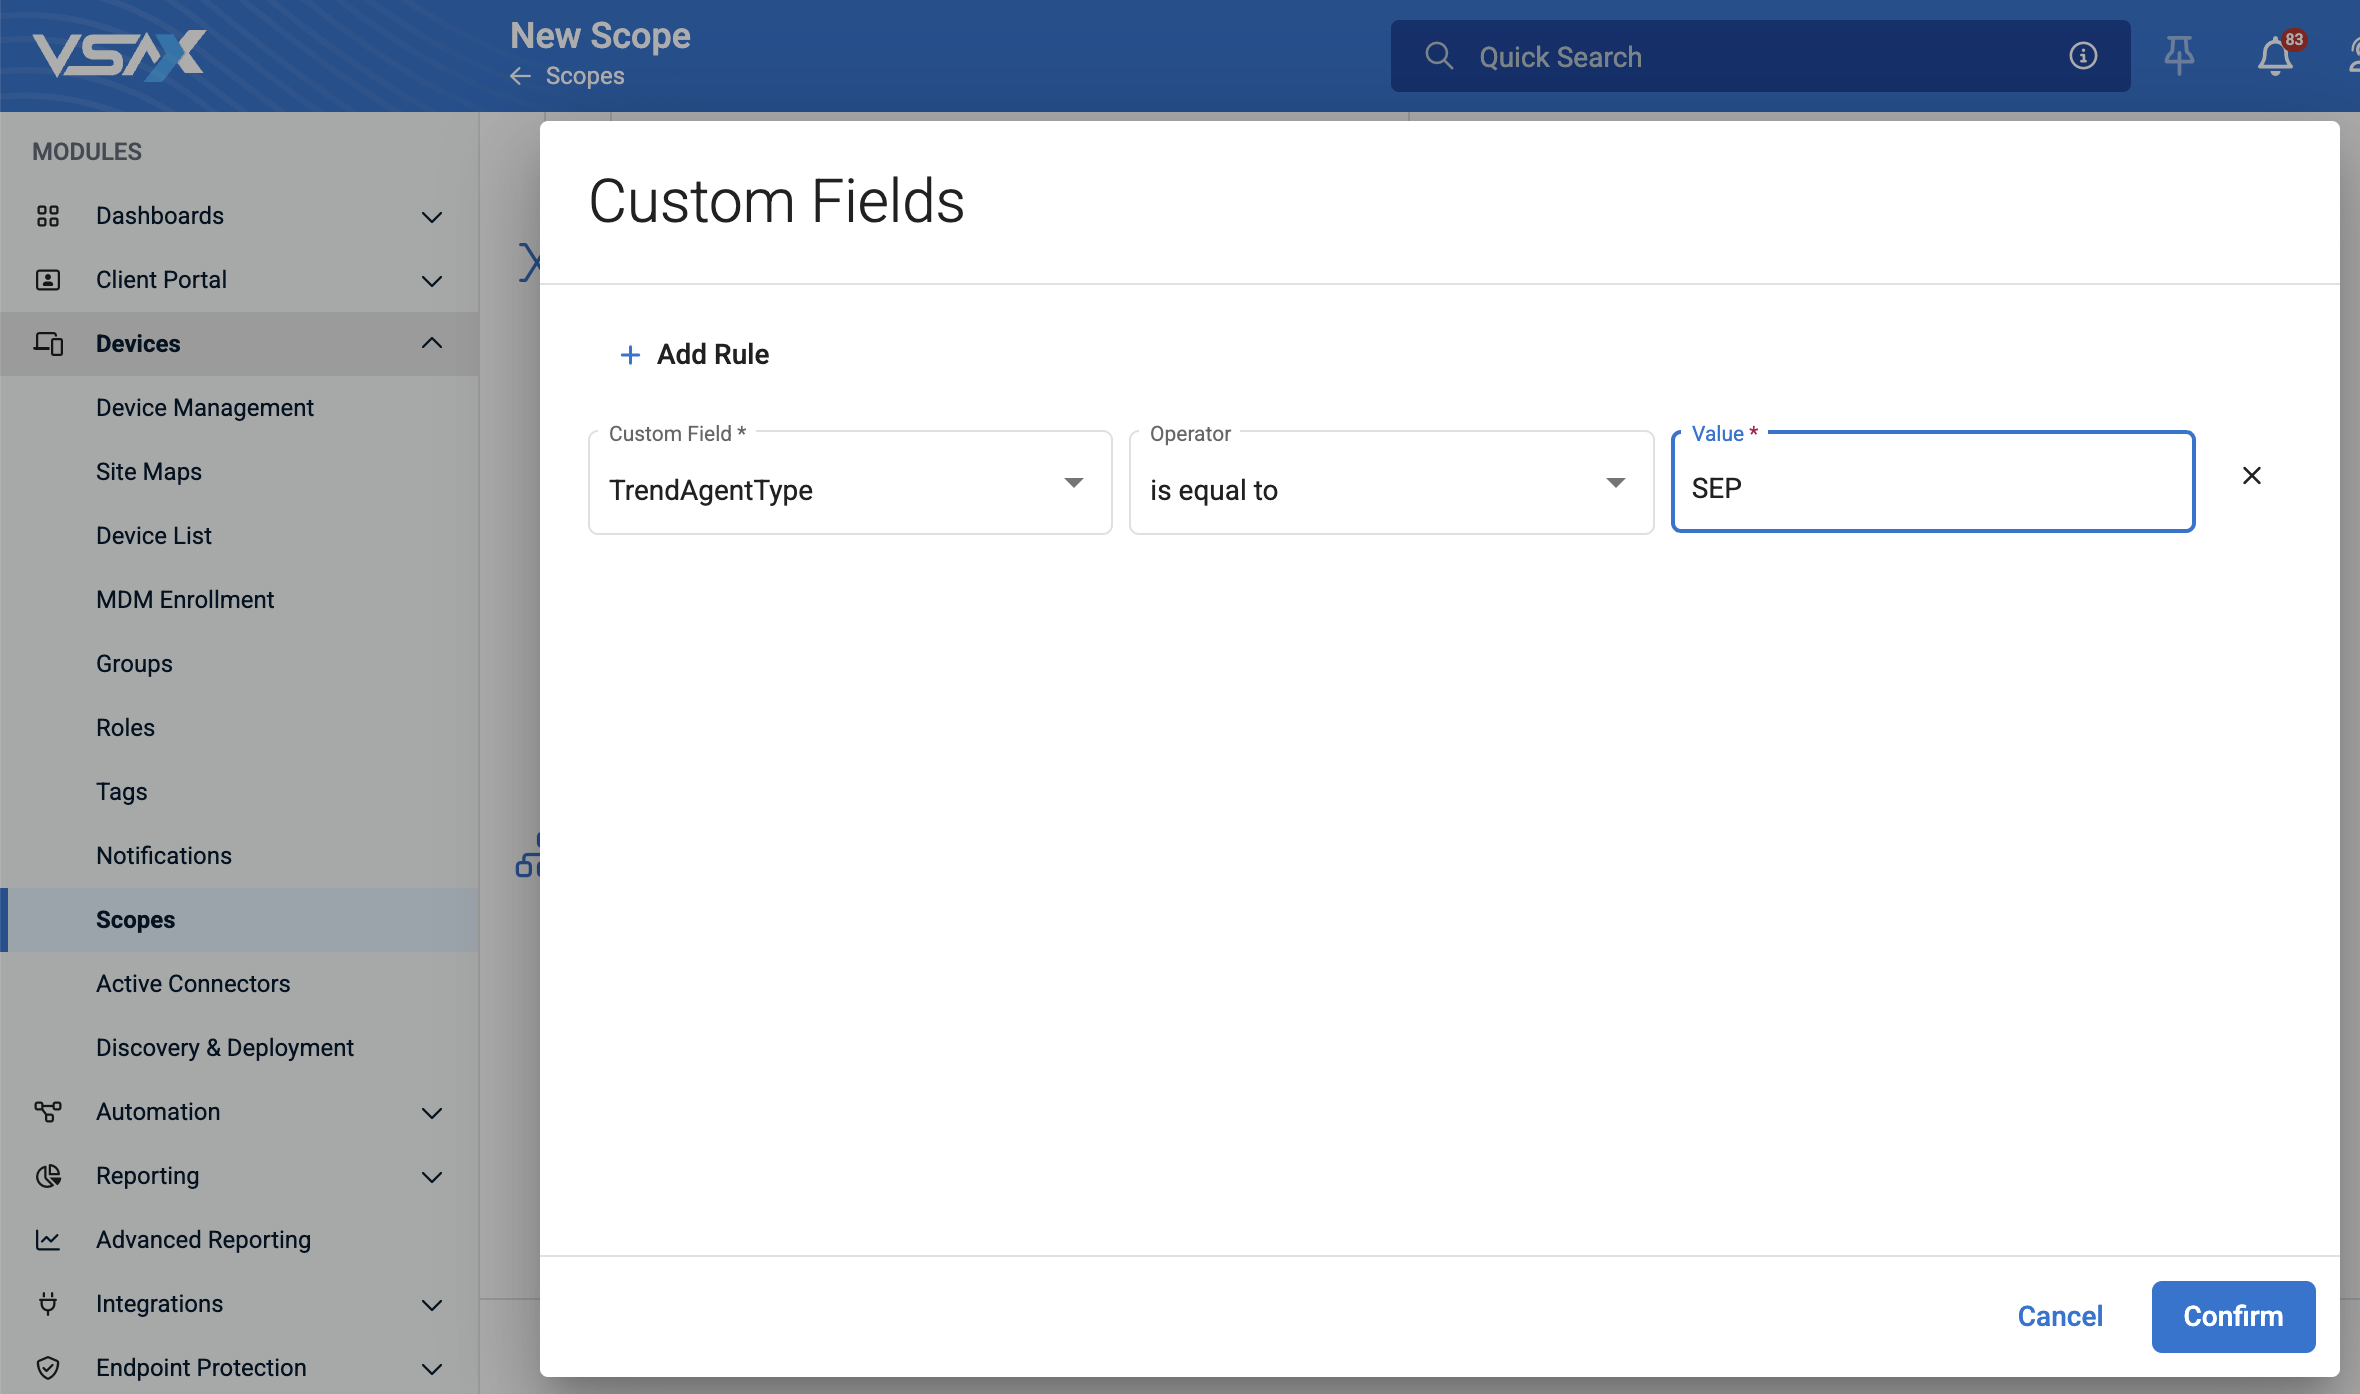
- Click Confirm.
- Complete any other required field such as Tags or Description as needed.
- Click Save.
- Create a script to deploy the agetns on supported OS platforms.
- In the Kaseya console, go to and click Create Script.
- For Name, copy the Kaseya script name provided by TrendAI Vision One™ for Service Providers.
- Enable each operating system select the Script type based on your protection typeSettingStandard Endpoint ProtectionServer & Workload ProtectionSensor-onlyWindows
-
Enable: On
-
Script type: PowerShell
-
Enable: On
-
Script type: PowerShell
-
Enable: On
-
Script type: PowerShell
Linux-
Enable: Off
-
Enable: On
-
Script type: Bash
-
Enable: On
-
Script type: Bash
macOS-
Enable: On
-
Script type: Bash
-
Enable: Off
-
Enable: On
-
Script type: Bash
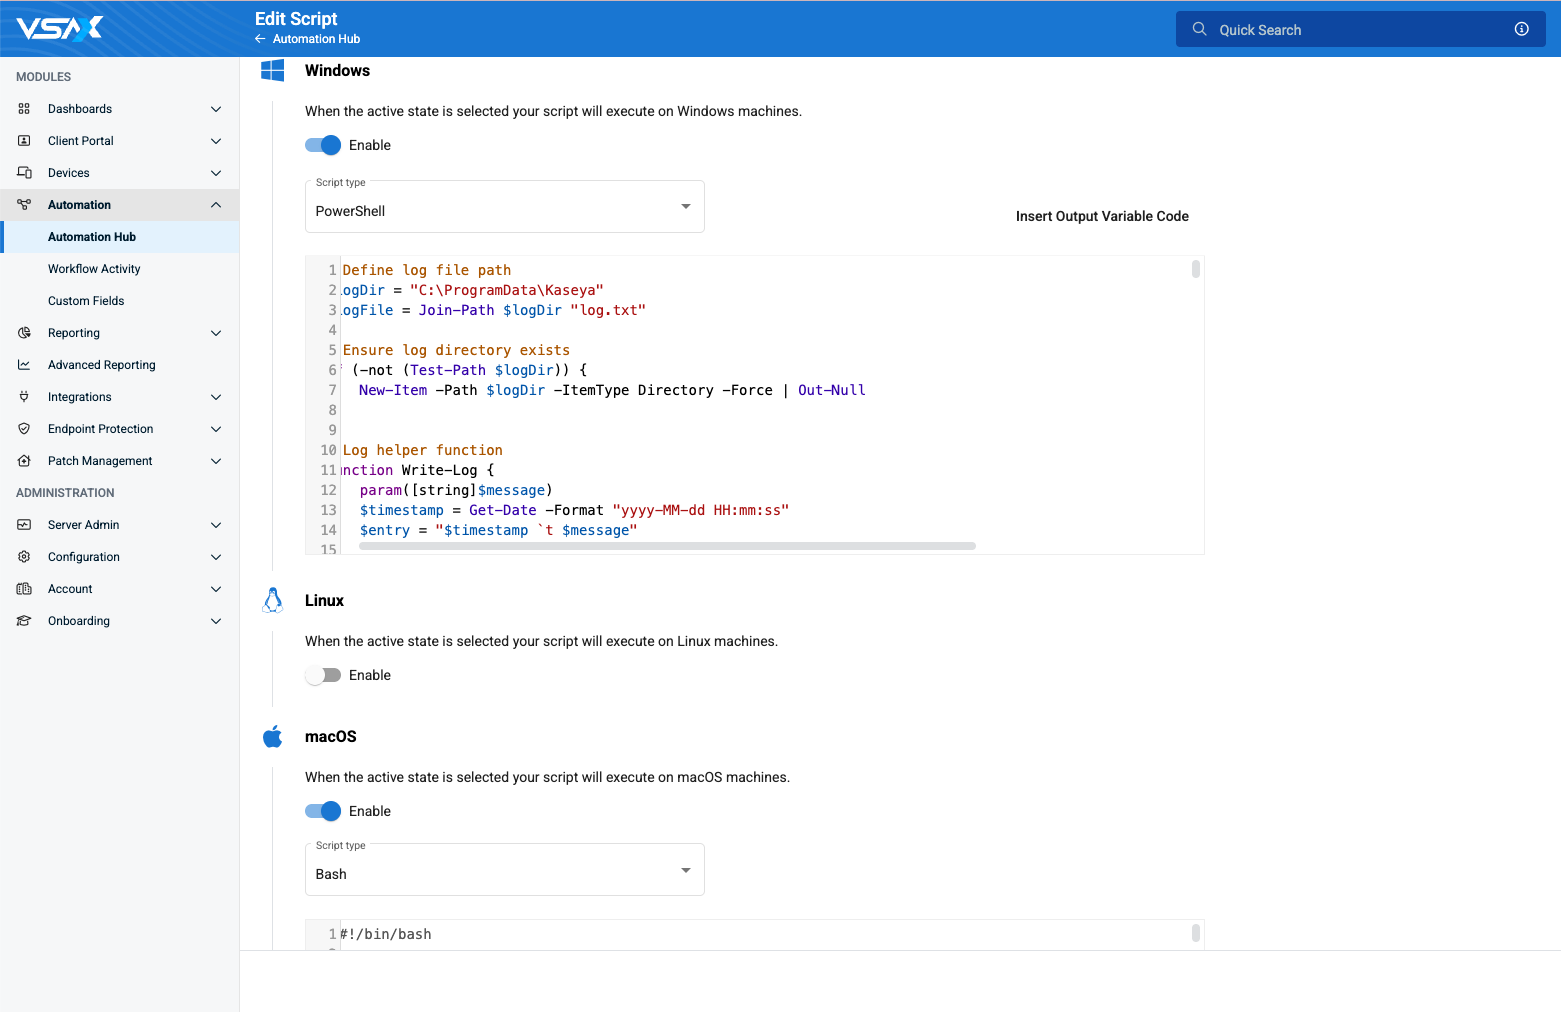
Example for Standard Endpoint Protection -
- For each enabled operating system, copy and paste the script provided by TrendAI Vision One™ for Service Providers.
- Click Save.
- Create a workflow that automates running the deployment script.
- In the TrendAI Vision One™ for Service Providers console, on the Kaseya VSA integration screen, click Download to download the deployment workflow.
- In your Kaseya VSA console, go to .
- Click Create and select Import Workflow.
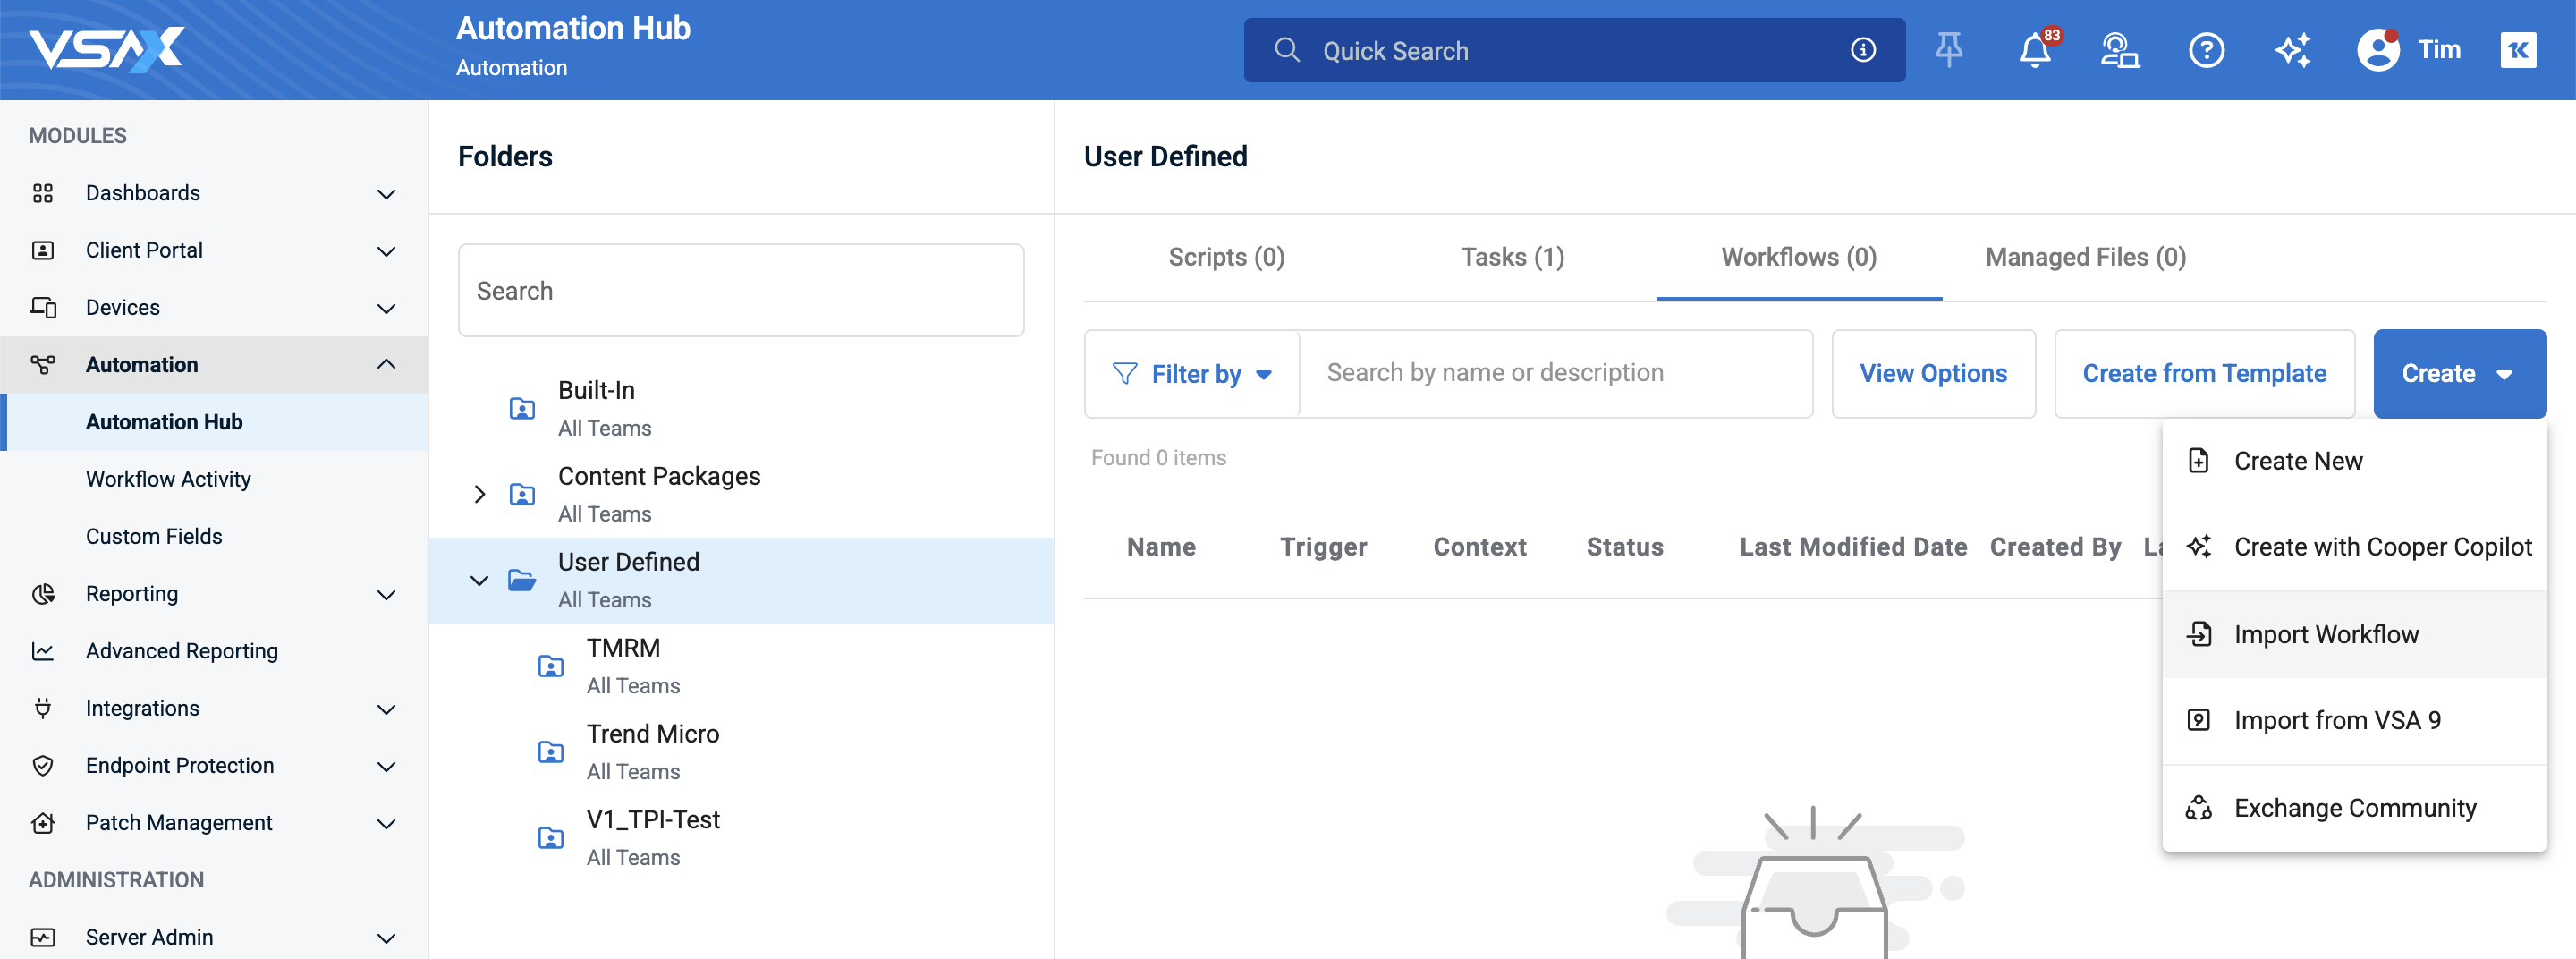
- Select the file you downloaded from TrendAI Vision One™ for Service Providers.
- Specify a unique Name that is identifiable.
- Set Status to Active.
- For Context, select Scope and select the scope you created for this deployment script.
- Click Save.
- Repeat the steps for scope, script, and workflow as needed for each protection type.