

To deploy the Trend Vision One Endpoint Security agent with Server & Workload Protection using a deployment script, configure and download the deployment script in Endpoint Inventory. For more information, see Deploy agents using the deployment script.
ImportantThe following steps are no longer considered valid and are included for reference
use only.
|
Adding a computer to your list of protected resources in Server & Workload Protection and implementing protection is a multi-step process. Almost all of these steps can
be performed from the command line on the computer and can therefore be scripted.
The Server & Workload Protection console contains a deployment script writing assistant which can be accessed from
the Support menu.
The deployment scripts generated through Server & Workload Protection do the following:
- install the agent on a chosen platform
- activate the agent
- assign a policy to the agent
Generate a deployment script 
The generated deployment script changes depending on your region, so you cannot use
the same deployment scripts across regions.
Before you begin, ensure the following:
- Your agent version control settings are configured as desired. See Configure agent version control for details.
- You have enabled agent-initiated activation (AIA). AIA is required if you want your deployment script to activate the agent after installation. See Activate and protect agents using agent-initiated activation and communication for details.
Procedure
- In the Server & Workload Protection console, go to .
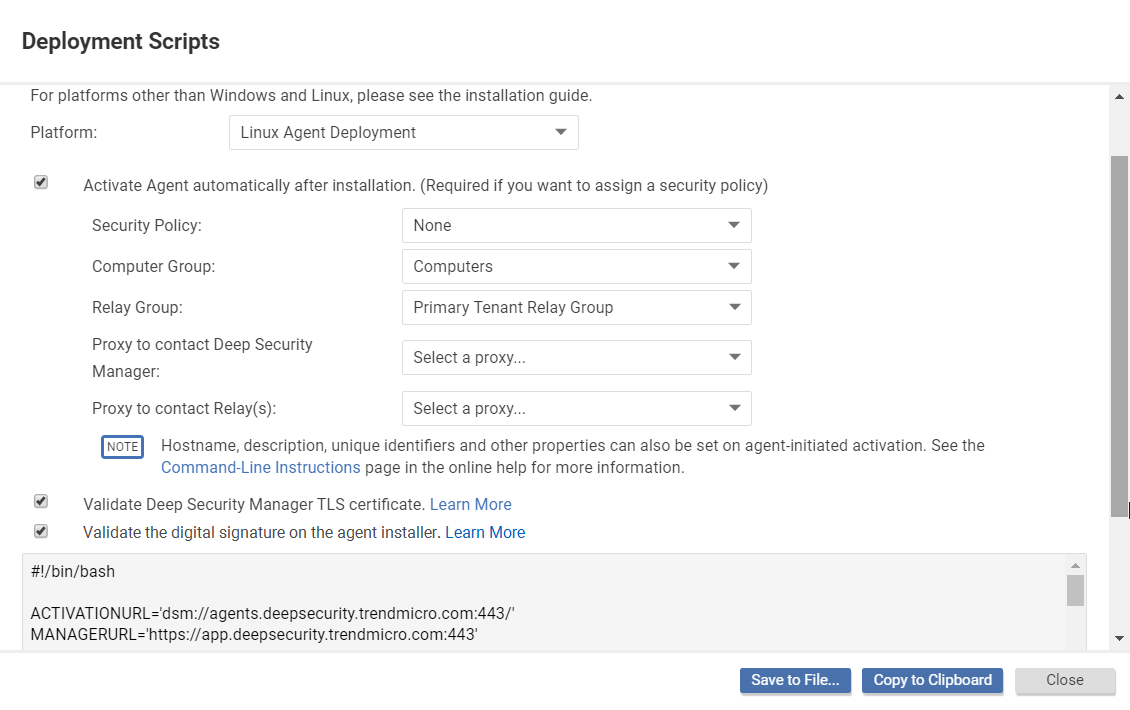
- Select the platform on which you are deploying the software.
- Select Activate agent automatically after installation. Agents must be activated before you apply a policy to protect the computer. Activation registers the agent with the manager during an initial communication.
- Optionally, define Security Policy, Computer Group, Relay Group, Proxy to contact Server & Workload Protection, and Proxy to contact Relays.
- Optionally (but highly recommended), select Validate Server & Workload Protection TLS certificate. When this option is selected, it checks that Server & Workload Protection is using a valid TLS certificate from a trusted certificate authority (CA) when downloading the agent software, which can help prevent a "man in the middle" attack. You can check if Server & Workload Protection is using a valid CA certificate by looking at the browser bar in the Server & Workload Protection console.
- Optionally (but highly recommended), select Validate the signature on the agent installer to have the deployment script initiate a digital signature check on the agent installer
file. If the check is successful, the agent installation proceeds. If the check fails,
the agent installation is aborted. Before you enable this option, consider the following:
- This option is only supported for Linux and Windows installers (RPM, DEB, or MSI files), and macOS (PKG files).
- On Linux only, this option requires that you import the public signing key to each agent computer where the deployment script will run. For details, see Check the signature on an RPM file and Check the signature on a DEB file.
- The deployment script generator displays the script. Click Copy to Clipboard and paste the deployment script in your preferred deployment tool, or click Save to File.
Next steps
The deployment scripts generated by Server & Workload Protection for Windows agent deployments require Windows PowerShell version 4.0 or later. You
must run PowerShell as an Administrator and you may have to run the following command
to be able to run scripts:
Set-ExecutionPolicy RemoteSigned
If you want to deploy an agent to an early version of Windows or Linux that does not
include PowerShell 4.0 or curl 7.34.0 at a minimum, make sure that early TLS is allowed
on the manager and relays. See Deuicontroline whether TLS 1.2 is enforced for details. Also edit the deployment script as follows:
- Linux: Remove the
--tls1.2tag. - Windows: Remove the
#requires -version 4.0line. Also remove the[Net.ServicePointManager]::SecurityProtocol = [Net.SecurityProtocolType]::Tls12;line so that early TLS (version 1.0) is used to communicate with the manager.
If you are using Amazon Web Services and deploying new Amazon EC2, Amazon WorkSpace,
or VPC instances, copy the generated script and paste it into the User Data field. This lets you launch existing Amazon Machine Images (AMIs) and automatically
install and activate the agent at startup. The new instances must be able to access
the URLs specified in the generated deployment script.
When copying the deployment script into the User Data field for a Linux deployment, copy the deployment script as-is into the User Data field and CloudInit
will execute the script with sudo. If there are failures, they are noted in the
/var/log/cloud-init.log file.The User Data field is also used with other services such as CloudFormation. For more information,
see: https://docs.aws.amazon.com/AWSCloudFormation/latest/UserGuide/aws-properties-waitcondition.html
Troubleshooting
- If you are attempting to deploy the agent from PowerShell (x86), you will receive
the following error :
C:\Program Files (x86)\Trend Micro\Deep Security Agent\dsa_control' is not recognized
                        as the name of a cmdlet, function, script file, or operable program. Check the spelling
                        of the name, or if a path was included, verify that the path is correct and try again.
The PowerShell script expects the environment variable forProgramFilesto be set to "Program Files", not "Program Files (x86)". To resolve the issue, close PowerShell (x86) and run the script in PowerShell as an administrator. - The deployment script can be modified to perform agent updates instead of new installs
by changing the
rpm -ihvtorpm -U. - If there is a need to control the specific agent version used by the deployment scripts
there are 2 options to meet this goal:
- Use agent version control. See Configure agent version control for details. This approach has the advantage that you do not have to hard-code the agent version itself into each script which can be a more flexible approach for some deployments.
- Either modify the deployment script, or write your own scripts, to meet requirements specific to your deployment. Details on the URL format to download agents can be found here URL format for download of the agent.
- Instead of using the deployment scripts generated by the manager, you can use your own automation method coupled with an agent download URL to automate the download and installation of the agent. For details, see URL format for download of the agent.