

Auto-remediation provides customers the ability to run self-healing Lambda functions
on
their infrastructure that can remediate security and governance failures in real-time.
Refer
to our GitHub page for a list of our supported auto-remediate Lambda functions.
For more information on implementing Auto-remediation for a large business and writing
custom Lambdas to fill security gaps, see: How to add Security and Compliance Auto-remediation with the Cloud Risk Management
Platform.
NoteExample Scenario: A user makes an S3 bucket publicly readable via S3
Access Control Lists (ACLs).
|
Content 
How does auto-remediation work
Procedure
- Cloud Risk Management identifies the risk as a rule failure
- Cloud Risk Management sends notifications to the specified SNS Channel.
- SNS topic triggers the Orchestrator lambda function which in turns calls S3 bucket auto-remediate function.
- AutoRemediateS3-001 function updates the S3 bucket ACL and resolves the rule failure thereby closing the security gap.
Next steps

Set up auto-remediation
Procedure
- Follow the instructions on the official Serverless documentation to install and provide access of your AWS
account to the Serverless Framework. Create a working copy of Auto-remediation
repository and followt the instructions below:
- Create a working copy of Auto-remediation repository:1. Install Git on Linux / Mac OS X / Windows if you don't have it on your system2. Run the following Git command:
git clone https://github.com/cloudconformity/auto-remediate.git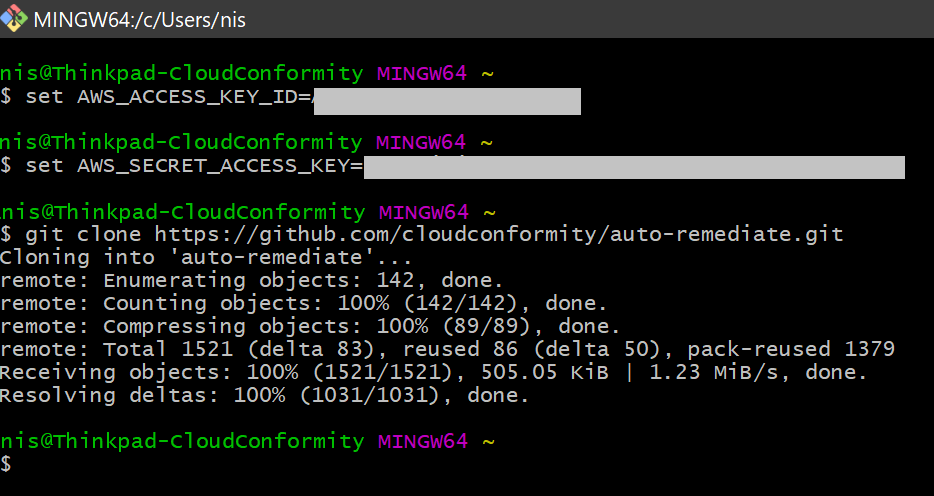 3. Change directory to functions within the auto-remediation folder:
cd
                              auto-remediate/functions
4. Access rule configurations using the command:nano config.js{.zoom}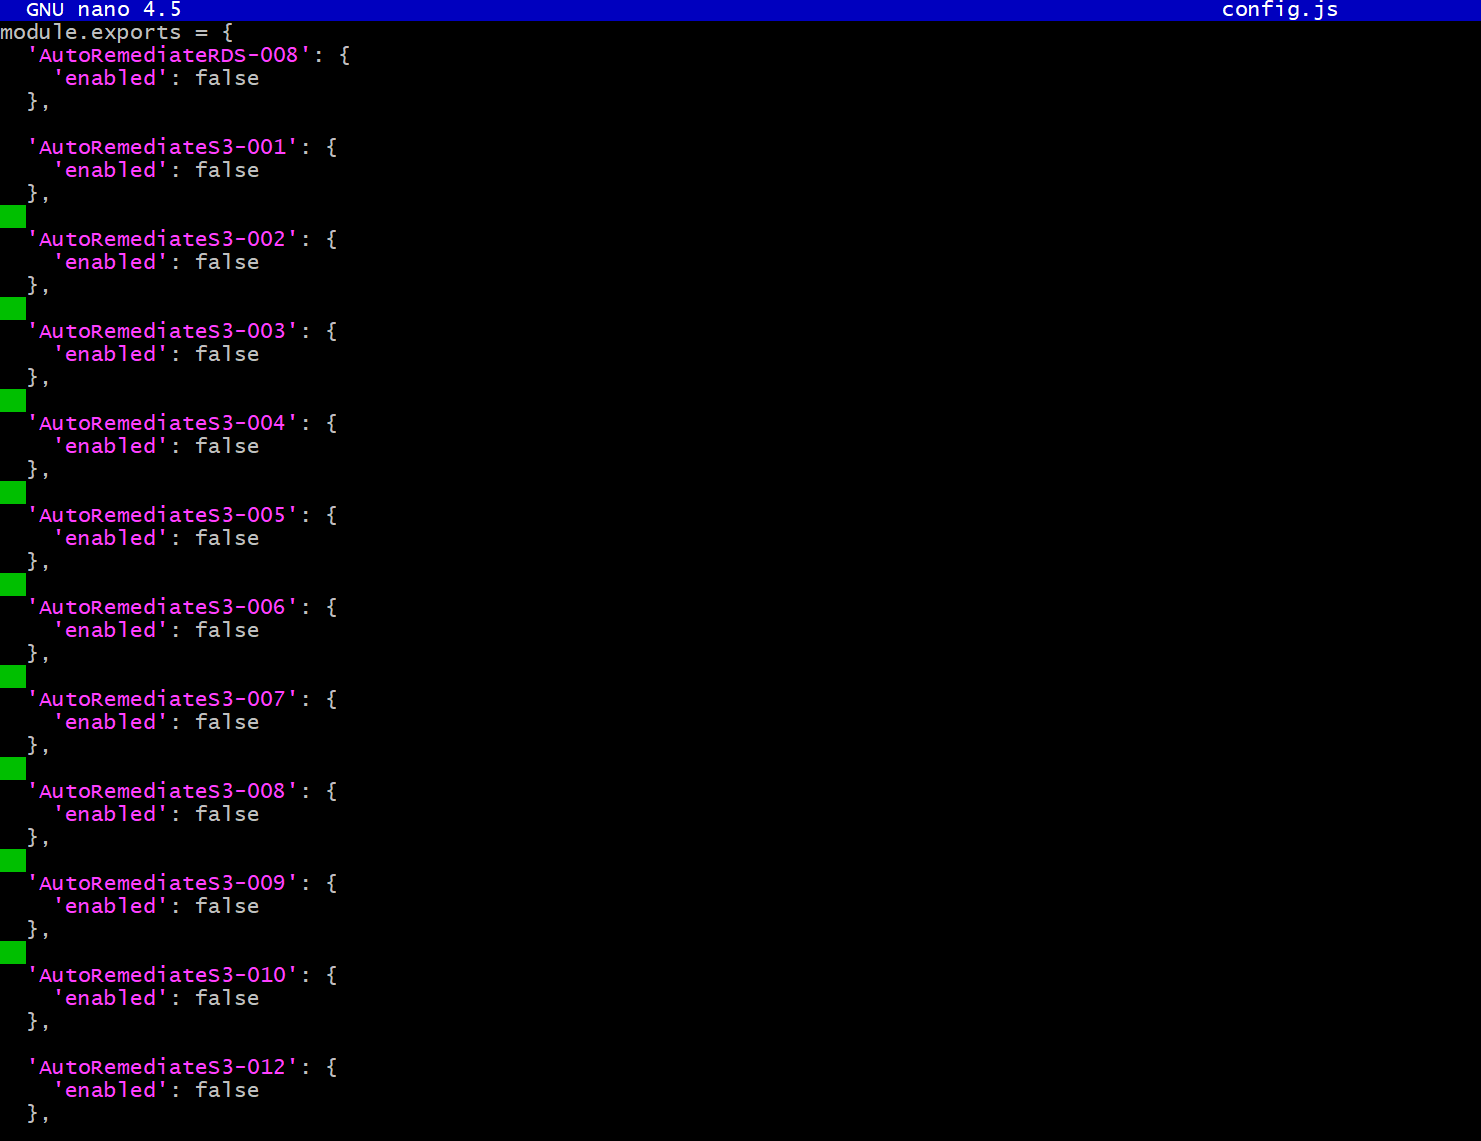 5. All rules in the config.js file are set to
'enabled': falseby default to prevent misconfigurations. You will need to enable the rules manually by changing the value to'enabled': true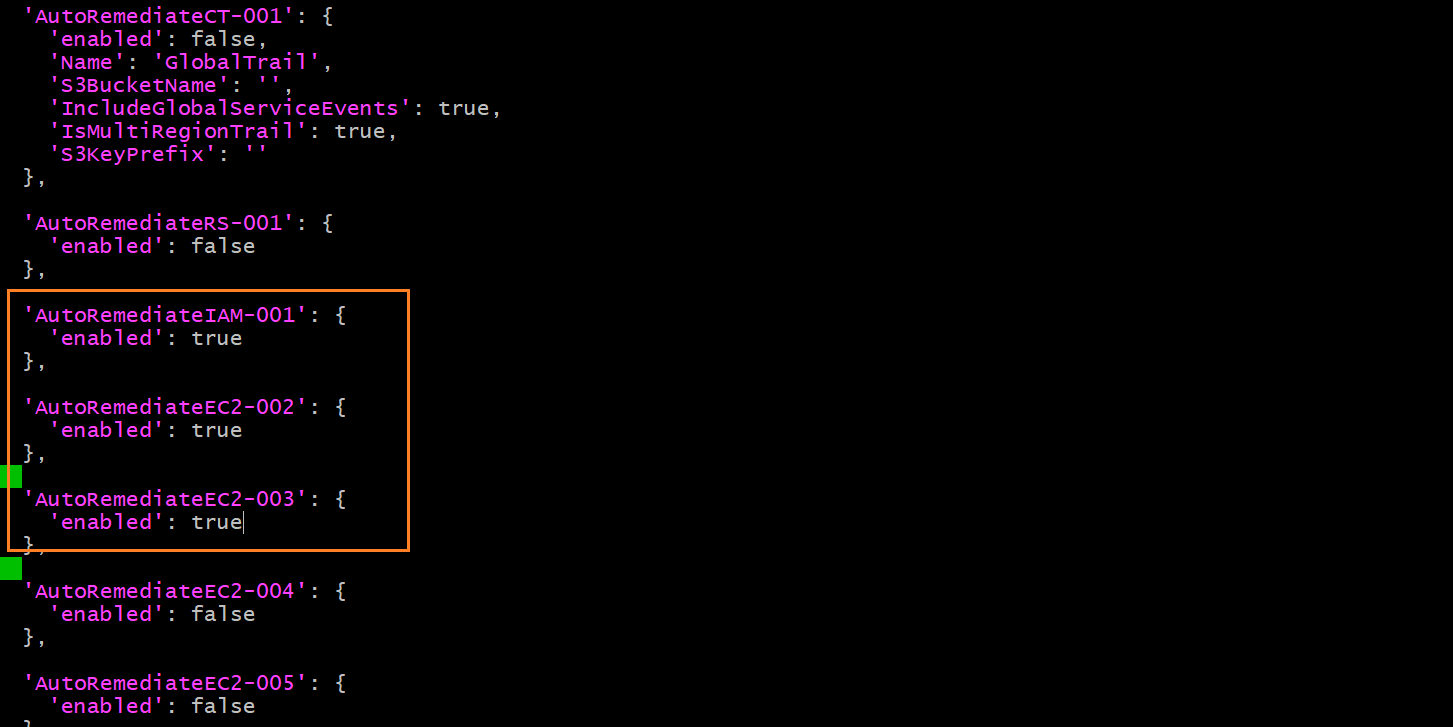 6. After making the changes:
- Take keyboard action Ctrl-O to Write Out the changes
- Press Enter to confirm the changes
- Exit the command-line editor by taking keyboard action Ctrl-X.
7. Run the following commands:- Move one level up to the "auto-remediate" folder using the command: `cd ..` - Make node:modules folder available to AWS using the command: `npm install` {.zoom}8. Deploy auto-remediation by running the following command:serverless deploy --region [your AWS account region]For exampleserverless deploy --region us-east-2
Note
!!! note "" For self-healing capabilities, we recommend deploying auto-remediation in the same region as your AWS account. Detection of Check failures is independent of the region of deployment as it is performed by RTM and Cloud Risk Management Bot.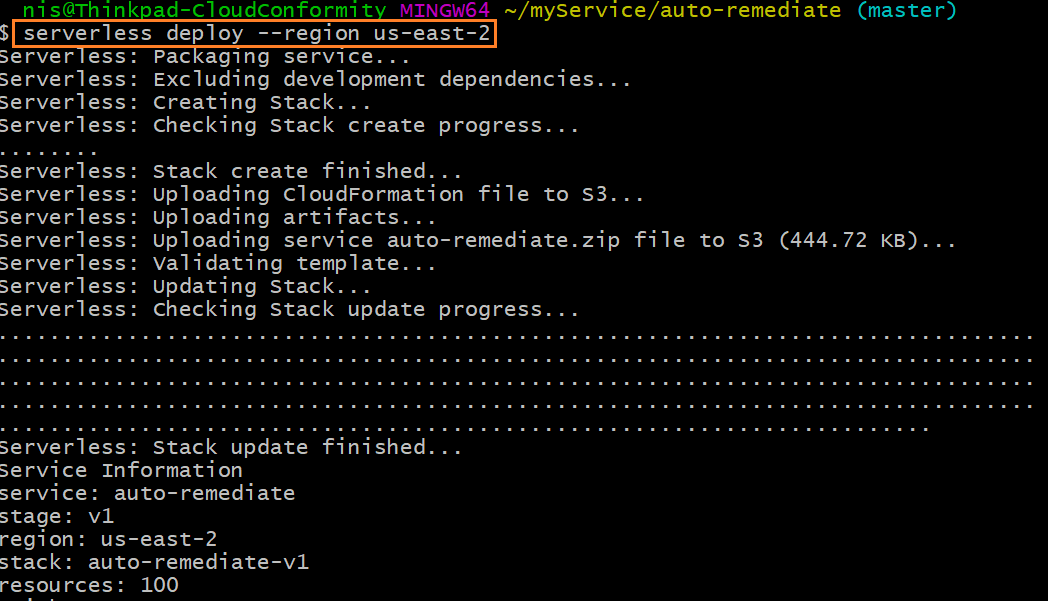 9. On successful deployment:
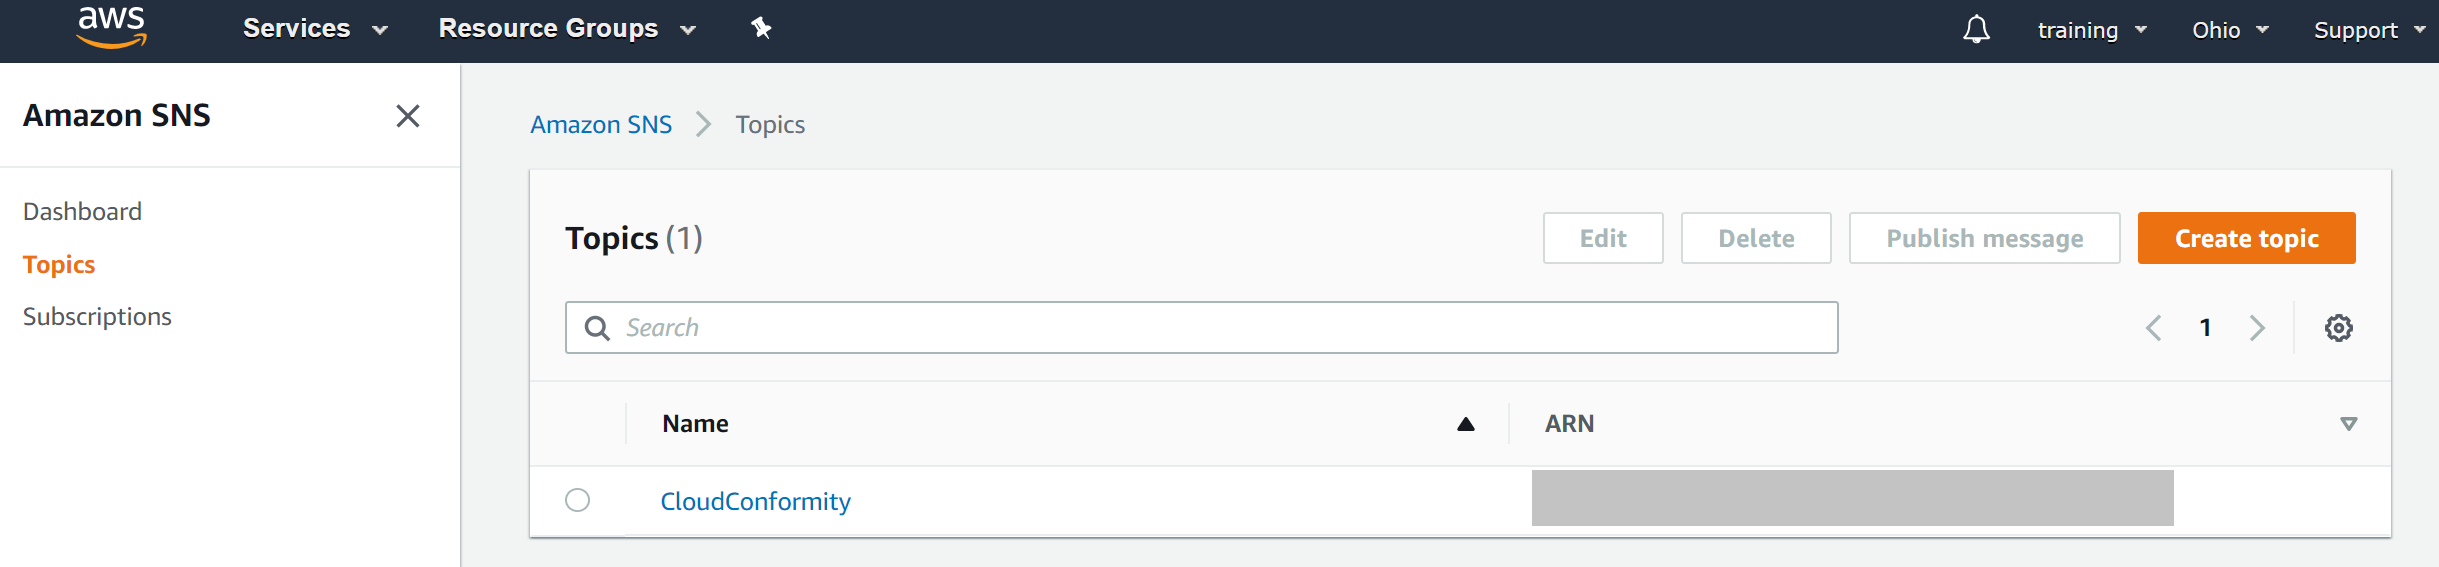
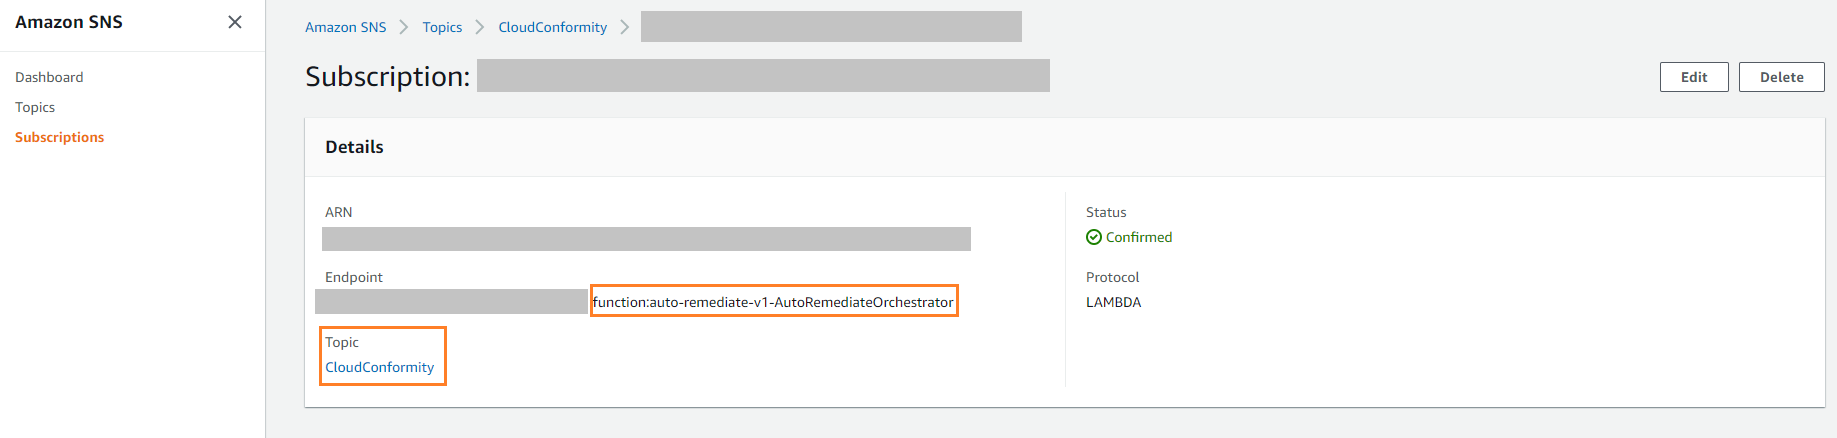
- An SNS topic named **CloudConformity** is automatically created in your AWS account.
- A Lambda function named autoremediate-v1-AutoRemediateOrchestrator is automatically subscribed to CloudConformity SNS topic.
 10. Integrate Amazon SNS Communication channel on the Cloud Risk Management platform and select the notifications you wish to enable:
- [Automatic notifications](toggle-automatic-notifications.xml) - failed checks are automatically resolved when a message is published to your SNS channel.
- [Manual notifications](toggle-manual-notifications.xml) - you can view the **Send via SNS** button on Check failures. Click on the button to resolve the failure.
Next steps
Enable or disable rules after deploying auto-remediation
Procedure
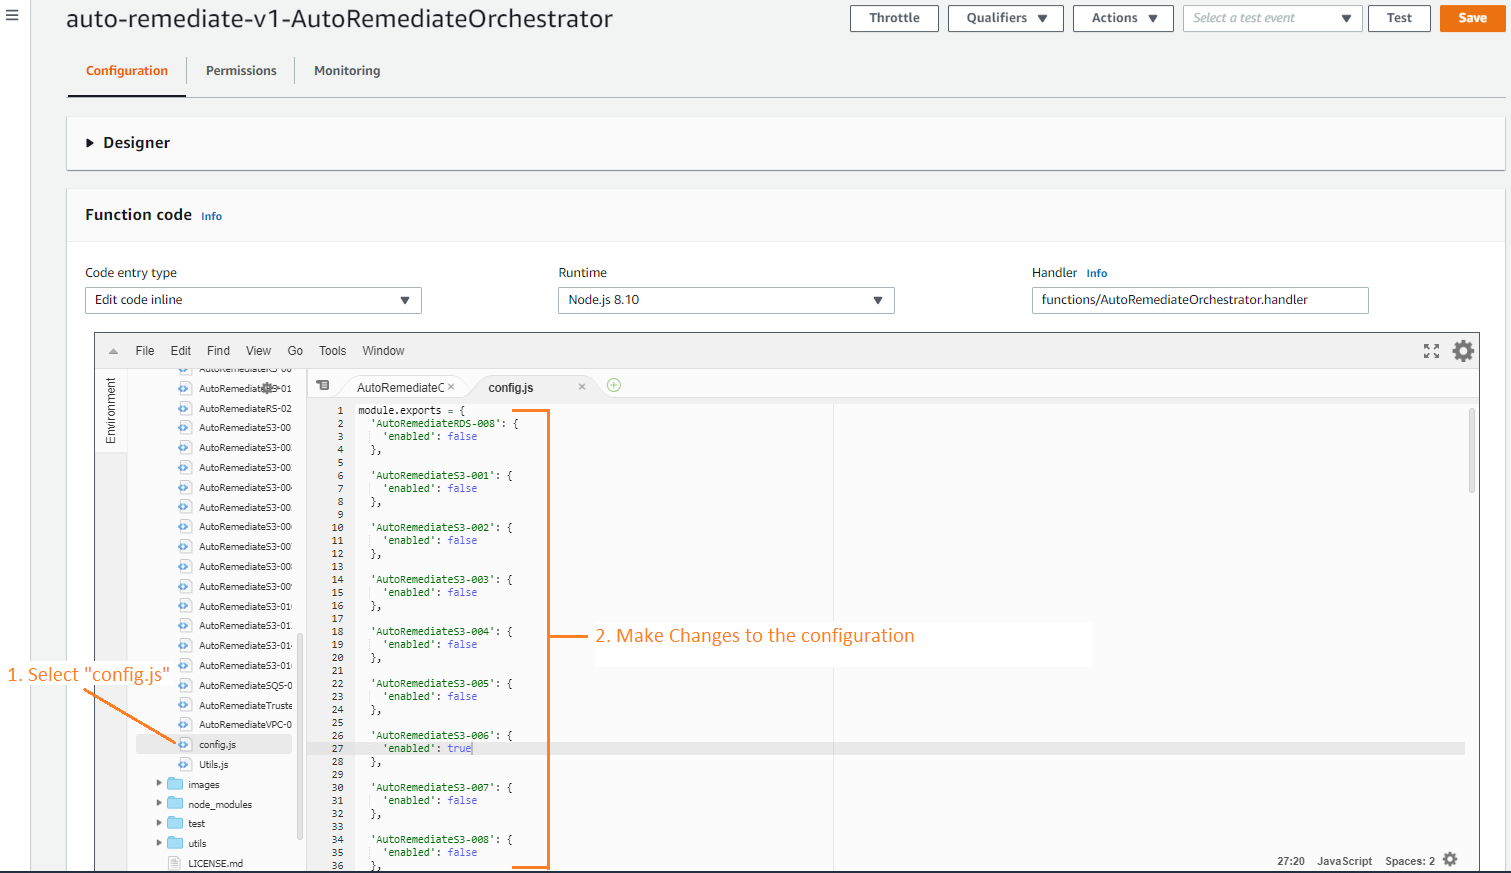
- On your AWS Console, go to:
- Search and select: auto-remediate-v1-AutoRemediateOrchestrator

- Make changes to the configuration: Go to
- Select config.js and modify your auto-remediate rule configurations.
Testing auto-remediation deployment
Procedure
- Verify that the Communication
trigger that you selected while configuring an Amazon SNS
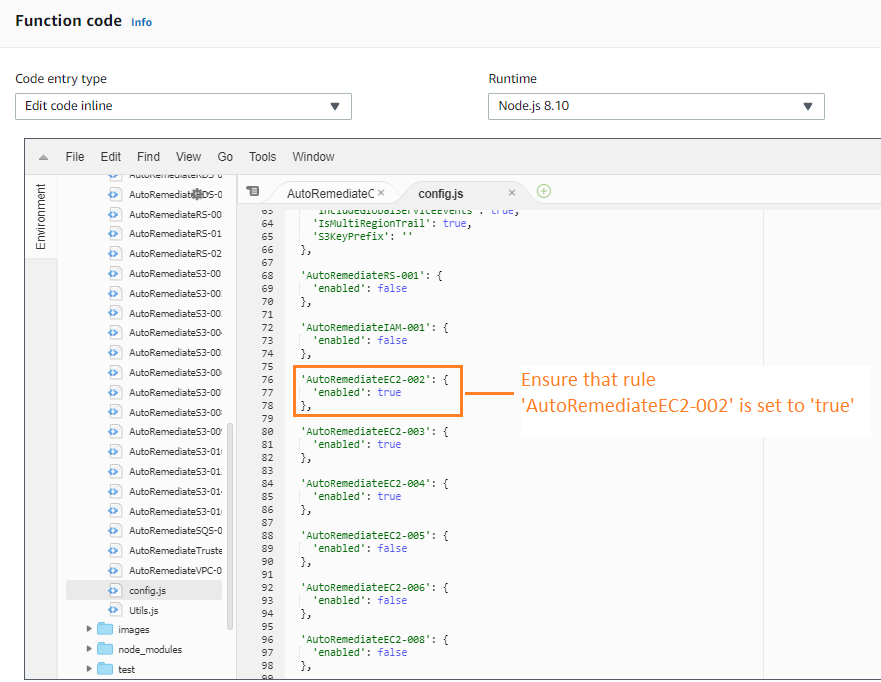
channel is: Either set to default to send notifications for All Checks, orYou can specifically select EC2-002 under Rules
- Verify that AutoRemediateEC2-002 rule is enabled by following the instructions on enabling a
rule.
- On your AWS Console, go to:
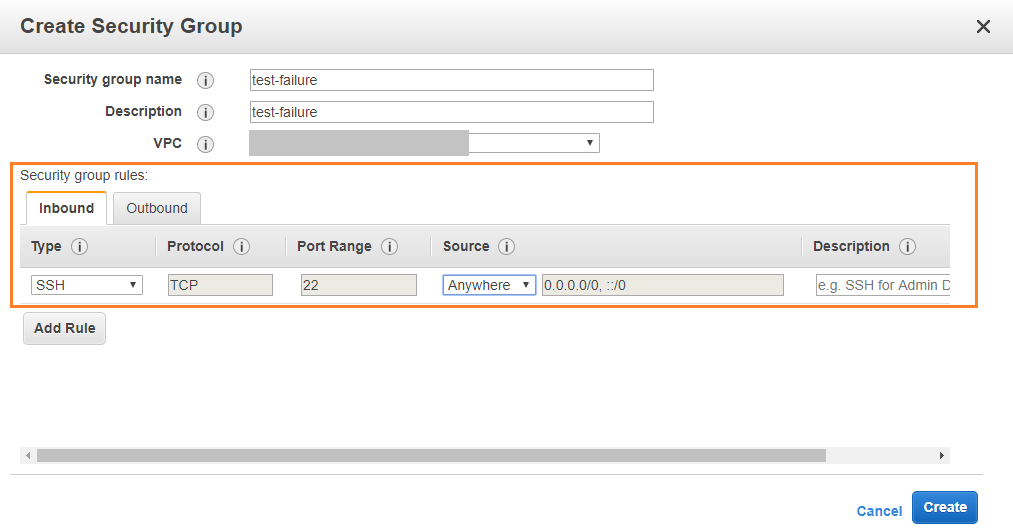
- Click Create Security Group
- Enter name, description, and select VPC
- Under click Add Rule:
- Select Type: SSH
- Source: Anywhere
- Click Create !!! note ""
- If you have enabled Real-Time Threat Monitoring you will instantly see an entry in the Activity Dashboard and Monitoring Dashboard when Auto-remediation kicks in.
- If you have only enabled Automatic notifications, the Check failure will be automatically resolved.
Resolution using Manual notifications
If you have only enabled Manual
notifications, follow the steps below to resolve the failure:
Procedure
- Go to All
Checks report and filter rules by:
- Rules: EC2-002 (Unrestricted SSH Access)
- Only show checks created less than: 1day
- On the Check failure, click on Send via SNS.
Verify the auto-remediation resolution
Procedure
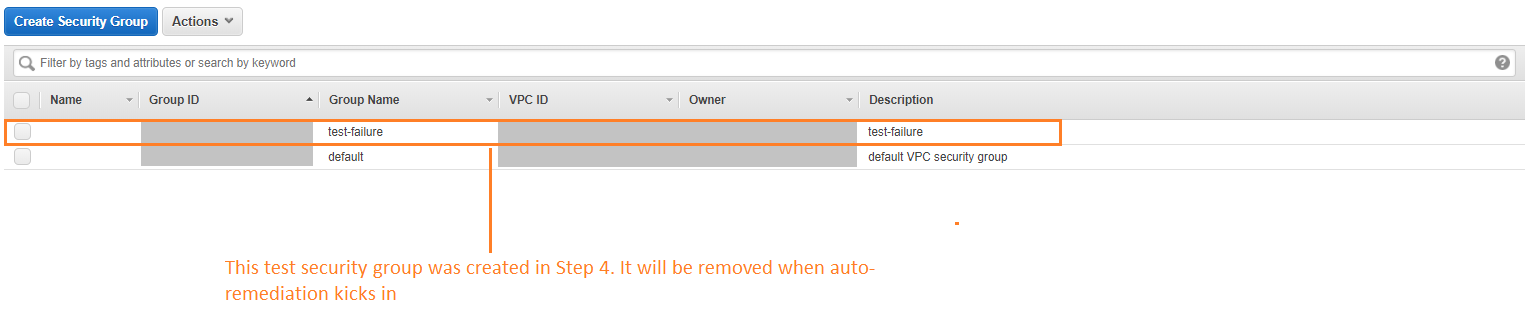
- On your AWS Console, go to
You'll see that the Security Group that you created on Step 4 is not
available anymore.
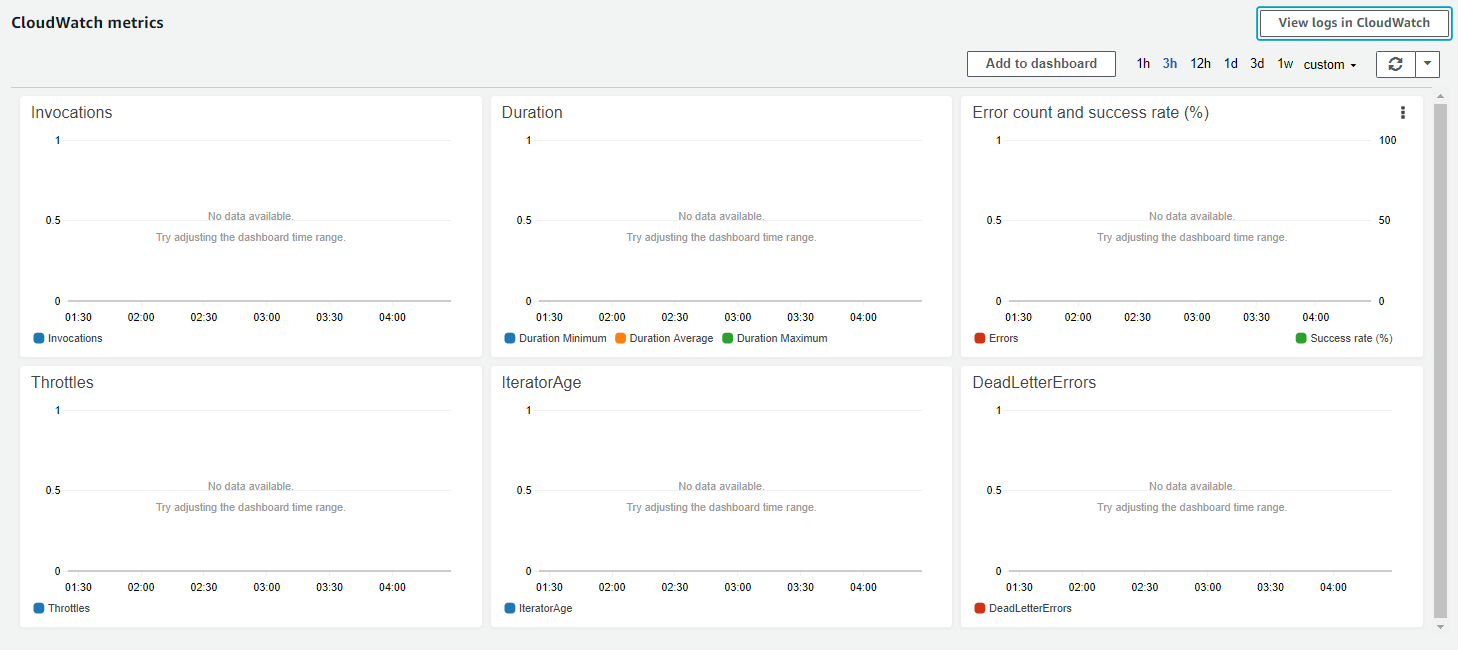
- On your AWS Console, go to **Services > Compute > Lambda > Functions >
Select {auto-remediate function} > Monitoring.**You can also check lambda monitoring
charts to understand whether auto-remediate-v1-AutoRemediateOrchestrator
and its sub-functions are getting triggered.
Contribution to Auto-remediation project
You can fork and modify our own auto-remediation code, but Cloud Risk Management will not provide support on forked
codes. However, you can submit pull requests to our auto-remediation code, and if
approved, the code will be supported by our Customer Success team.