

You can configure the following for EMC CAVA Scanner:
-
Enable Real-time Scan
-
Enable Damage Cleanup Services
-
Scan direction
-
Scan file type
-
Scan options
-
Compressed file scanning
-
Scan action
NoteThe EMC CAVA Scanner protects storage devices using Real-time Scan. If the Normal
Server is an EMC CAVA Scanner, the configuration of EMC CAVA Scanner will also
be applied to Real-time Scan.
|
Procedure
- Click a Normal Server with EMC CAVA Scanner on the domain browser tree.
- Do one of the following:
-
Click on the side bar.
-
Click on the main menu.
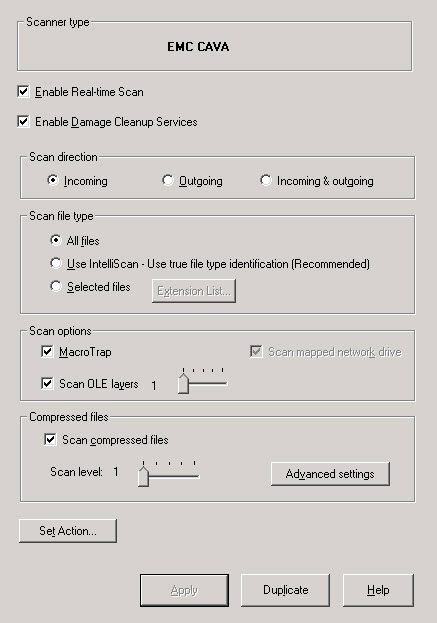
EMC CAVA Scanner Configuration dialog -
- Select the Enable real-time scan check box.
- Set the Enable Damage Cleanup Services check box so that the Virus Cleanup engine scans for and removes Trojans and Trojan processes. It supports 32-bit and 64-bit platforms. Clear the check box to disable the service.
- Under Scan direction choose one of the following:
-
Outgoing: Scans files being copied from the server
-
Incoming and Outgoing: Scans all incoming and outgoing files on the server

Note
The Incoming option is not supported by EMC CAVA/Huawei Antivirus Agent. Trend Micro recommends selecting Incoming and Outgoing, which scans files in both directions. -
- Under Scan file type, choose one of the following:
-
All files: Scans all file types
-
IntelliScan: Scans files using true file type identification. See IntelliScan.
-
Selected files: Scans only specified filesIf you choose Selected files, click Extension List to define the file types that you want to scan. Refer to Selecting File Types to Scan.
-
- Under Scan options, select one or more from the
following check boxes:
-
Scan OLE layers
-
MacroTrap
-
Scan mapped network drive
See Using Real-Time Scan for additional information on each scan option. -
- Select the Scan compressed files check box to scan
compressed files and then move the Scan level slider to
set the number of compressed layers that you want to scan. For information on
advanced settings, refer to the Compressed file scan topic in the
online help.
Note
If you choose to scan selected file types in step 5, make sure you select the extensions of compressed files in the extension list. - Click Set Action to configure how ServerProtect acts on infected files. See Defining Actions Against Viruses in RPC Scanner and EMC CAVA Scanner.
- Click Apply to save your changes.