

Use the Command Line Interface (CLI) to deploy a Service Gateway virtual appliance with VMware ESXi.
Verify that system requirements are met. For more information, see
Service Gateway appliance system
requirements.
Procedure
- Go to .
- Click Download Virtual Appliance.The Service Gateway Virtual Appliance panel appears.
- Select VMware ESXi (OVA).
- Select a virtual appliance specification and click Download Disk
Image to download an OVA file.

Tip
Copy the registration token for later steps. The registration token will expire within 24 hours if not used. - Create a virtual machine.
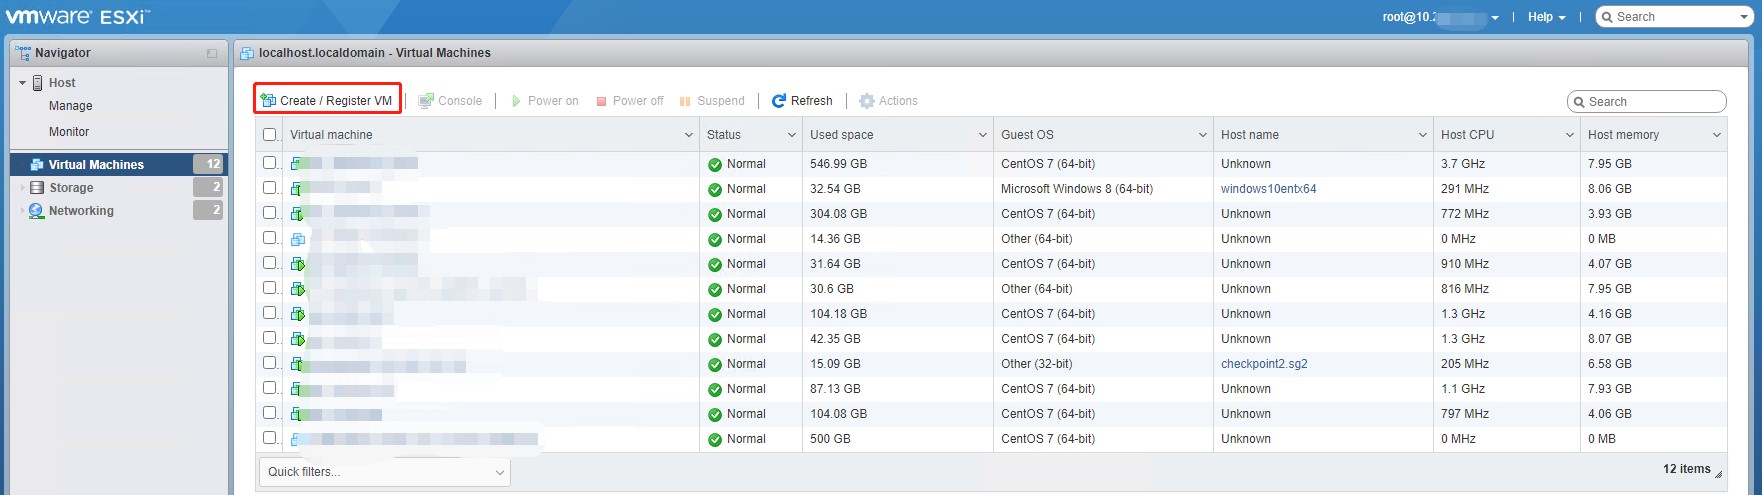
- On VMware ESXi, go to and click Create / Register VM.
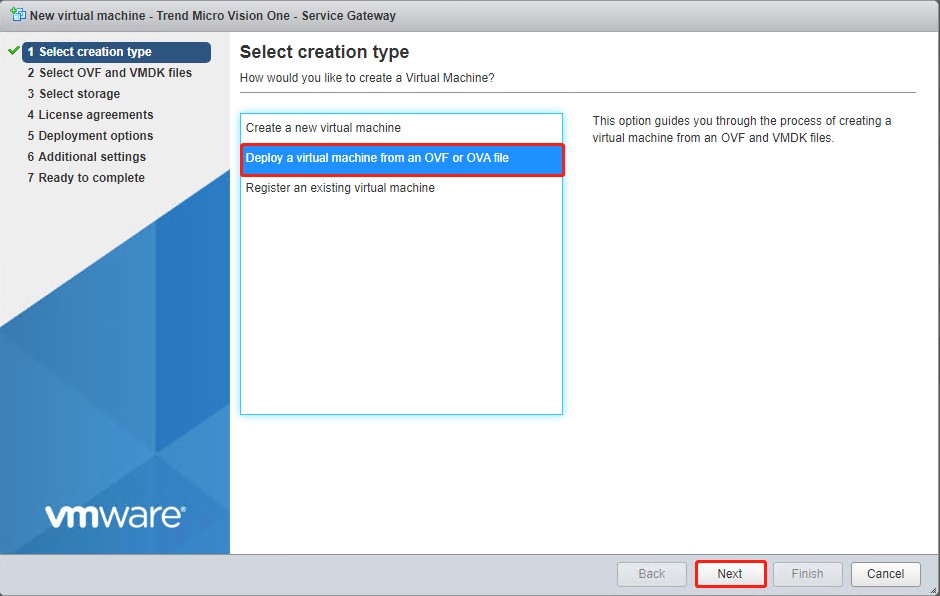
- Select Deploy a virtual machine from an OVF or OVA
file and click Next.
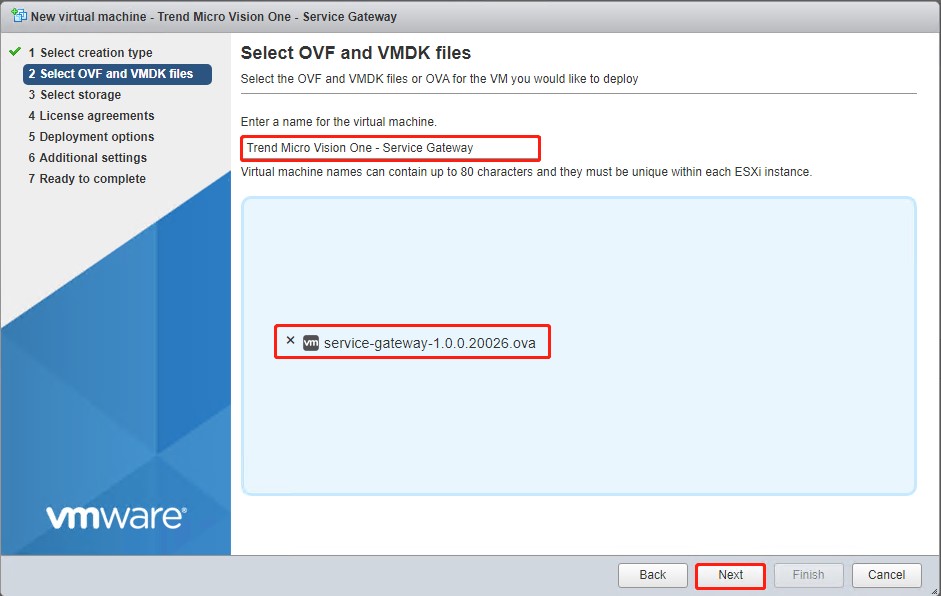
- Specify a name for the Service Gateway virtual appliance, select the OVA
file, and click Next.
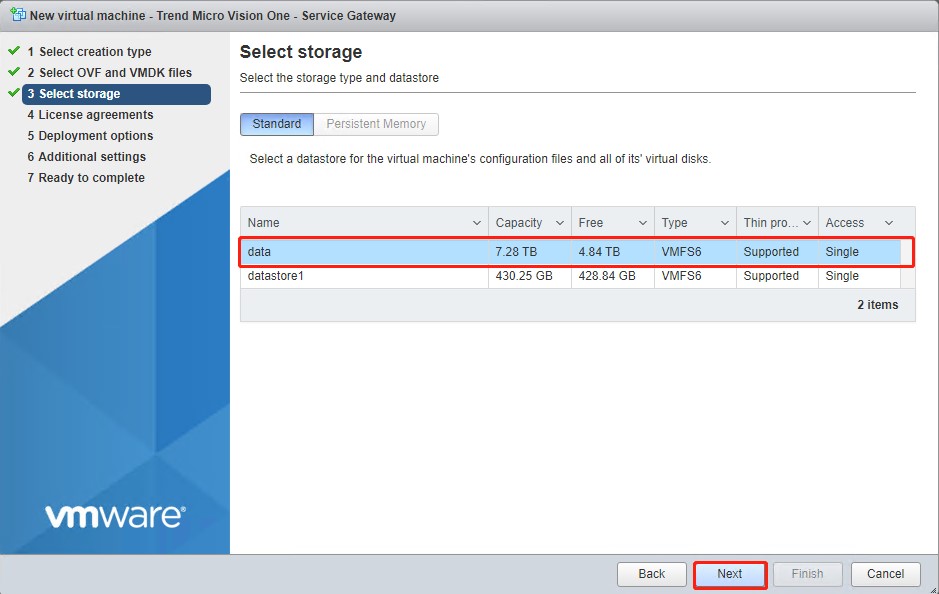
- Select the disk location and click Next.
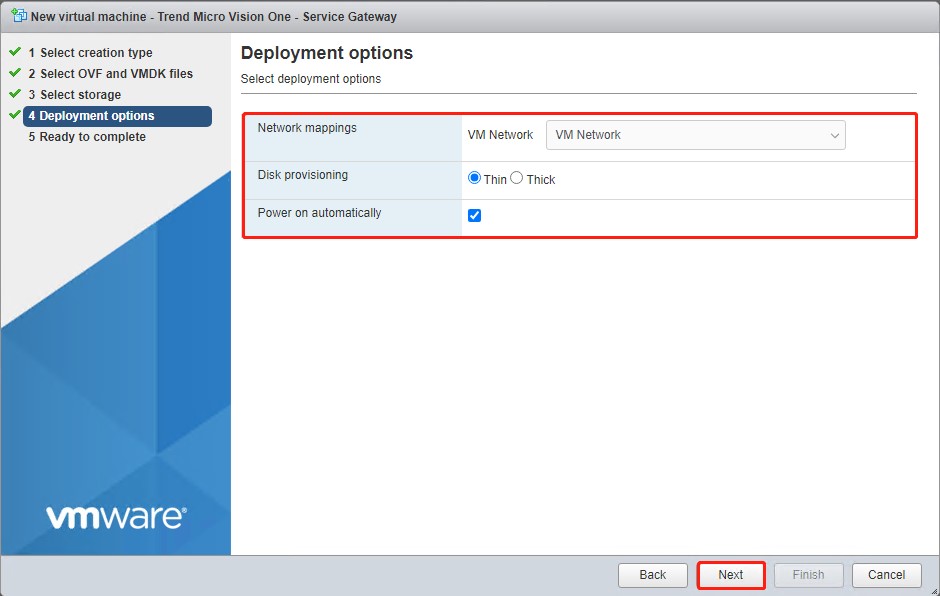
- Specify deployment options and click Next.
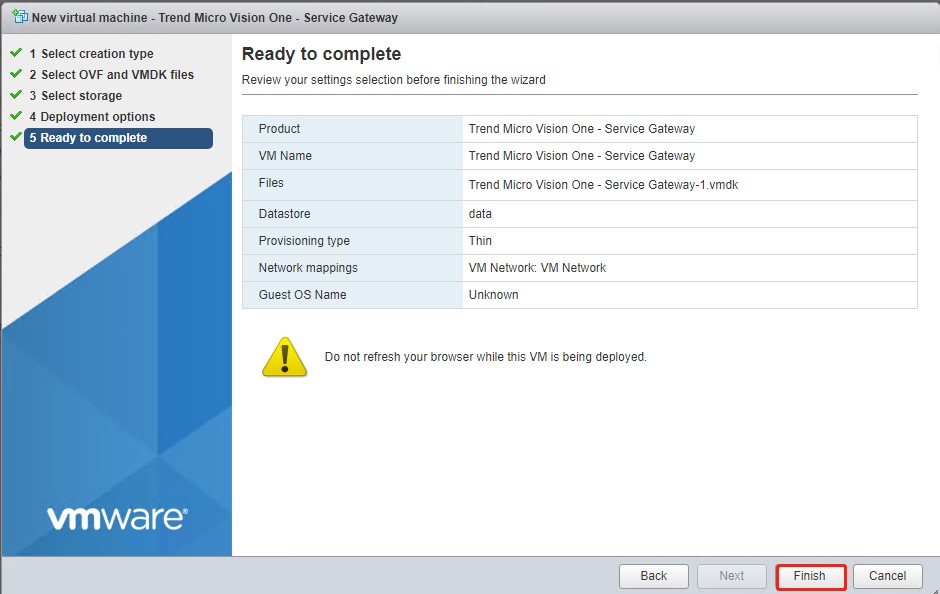
- Review the settings and click Finish.
- On VMware ESXi, go to and click Create / Register VM.
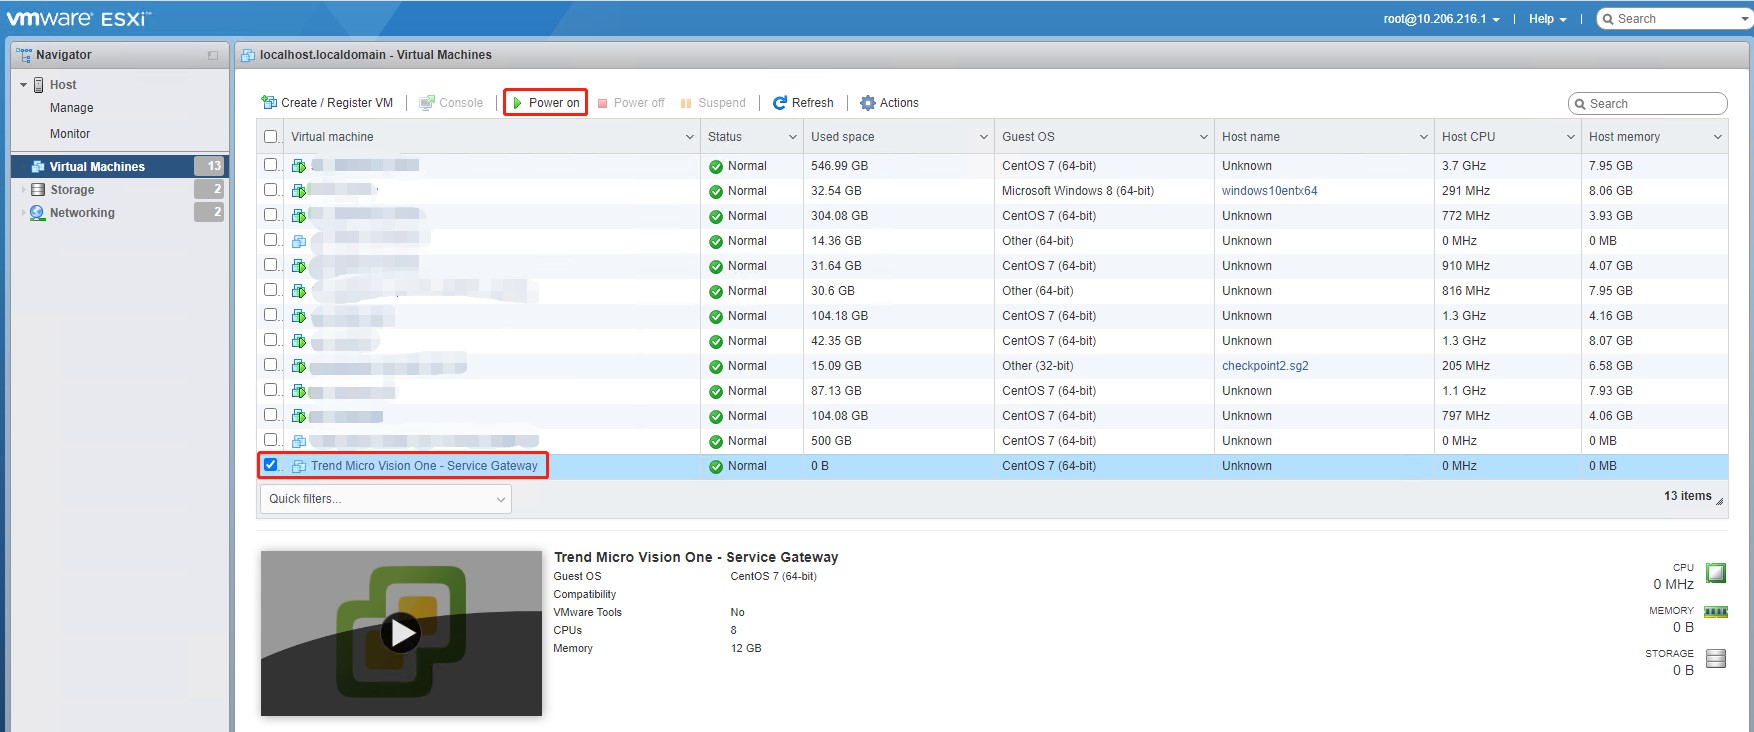
- Click Power on to start the virtual machine.Service installation during the first launch of the appliance takes approximately 10 minutes.
- After the service installation has completed, press the
ENTERkey to open the Command Line Interface (CLI) of the Service Gateway virtual appliance. - Sign in using the default credentials.User name: adminPassword: V1SG@2021
- Change your password.
- Type enable and press the
ENTERkey to enable administrative commands. Provide your password when asked.The command prompt changes from > to #. - Configure the required network settings using the following CLISH
commands.
Configure network primary ipv4.static <interface> <ip_cidr>
                              <gateway> <dns1> [dns2] [cni]
Configure static IPv4 network settings for the primary network interface<interface>: Name of the network interface (for example, eth0)<ip_cidr>: IPv4 address of the network interface in CIDR notation<gateway>: Gateway router address<dns1>: Primary DNS server address[dns2]: Secondary DNS server address[cni]: Internal network address pool (IP address ending in .0.0) - To register the Service Gateway virtual appliance to TrendAI Vision One™, use an SSH tool, such
as the latest version of PuTTY, and using an account with administrator privileges,
type
the following command.
register <registration_token>You can obtain the token from the same screen you download the virtual appliance on TrendAI Vision One™ (step 4).
Important
The virtual appliance only supports UTC time. Ensure your hypervisor is correctly configured.
Note
-
If your environment uses a local Network Time Protocol (NTP) server, make sure the NTP server synchronizes with the local time for successful registration.
-
TrendAI™ recommends using an SSH client to easily copy and paste the registration token.
-
- Use the CLI to configure other settings, if required.For more information on available commands, see Service Gateway CLI commands.For details on setting up a virtual appliance with two network cards, see Service Gateway Virtual Appliance dual network card configuration.