Procedure
- Open a Command Prompt window
(
cmd.exe) using an account with administrator privileges. - Perform the following tasks:TaskStepsEnable the
Administrator
accountTypenet user “Administrator” /active:yes.Set the logon password for theAdministrator
account to1111
Typenet user "Administrator" 1111.Configure automatic logon from the administrator account
Note
Each time the image starts, the logon prompt is bypassed and theAdministrator
account is automatically used to log on to the system.-
Type the following commands:
-
REG ADD "HKEY_LOCAL_MACHINE\SOFTWARE\Microsoft\Windows NT\CurrentVersion\Winlogon" /v DefaultUserName /t REG_SZ /d Administrator /f -
REG ADD "HKEY_LOCAL_MACHINE\SOFTWARE\Microsoft\Windows NT\CurrentVersion\Winlogon" /v DefaultPassword /t REG_SZ /d 1111 /f -
REG ADD
                                                         "HKEY_LOCAL_MACHINE\SOFTWARE\Microsoft\Windows
                                                         NT\CurrentVersion\Winlogon" /v AutoAdminLogon /t
                                                         REG_SZ /d 1 /f
Note
In Windows Server 2008/2008 R2, Windows Server 2012/2012 R2, Windows Server 2016, Windows Server 2019, and Windows Server 2022, launch the Local Security Policy snap-in (secpol.msc) to disable the Password must meet complexity requirements Local Security Setting.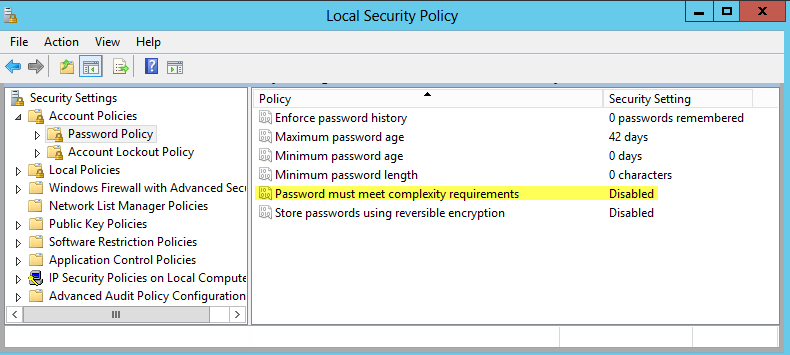
Disable Password must meet complexity requirements -
Restart the image.No logon prompt is displayed and the
Administrator
account is automatically used to log on.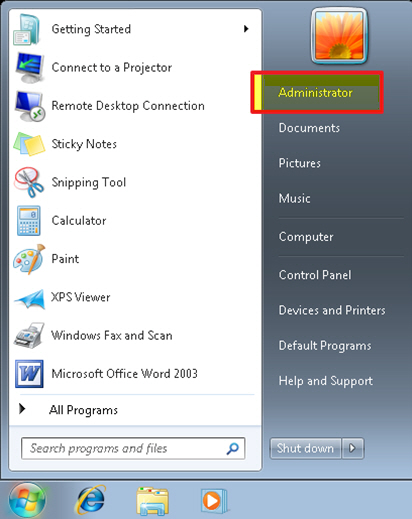
Windows 7 Administrator Account
-
View all user accountsTypenet user.Delete non-built-in user accounts one at a timeTypenet user “<username>” /delete.Example:net user “test” /deleteView all network adapters with an active linkTypewmic nic where "netconnectionstatus=2" get netconnectionid /value.Example output:NetConnctionID=Local Area ConnectionVerify the DHCP status of all installed network adaptersTypenetsh interface ip show config.The configuration of all installed network adapters displays. Verify that the value forDHCP enabled:isYes.Configure a network adapter to use DHCPTypenetsh interface ip set address name="<network adapter>" dhcp.Example:netsh interface ip set address name="Local Area Connection" dhcpDisable Windows FirewallTypenetsh advfirewall set allprofiles state off.
Note
Windows Firewall slows down the installation of Virtual Analyzer Sensors.(Optional) Install Adobe Flash in Windows Server 2016 and Windows Server 2019For Windows Server 2016: TypeC:\> dism /online /add-package /packagepath:”C:\Windows\servicing\Packages\Adobe-Flash-For-Windows-Package~31bf3856ad364e35~amd64~~10.0.14393.0.mum”For Windows Server 2019: TypeC:\> dism /online /add-package /packagepath:"C:\Windows\servicing\Packages\Adobe-Flash-For-Windows-Package~31bf3856ad364e35~amd64~~10.0.17763.1.mum" -
- Perform the following tasks using the Windows graphical
user interface:TaskStepsConfigure AutoPlay
- Open the Windows Start menu,
type
Control Panelinto the search box and press ENTER. -
In the Control Panel, go to .
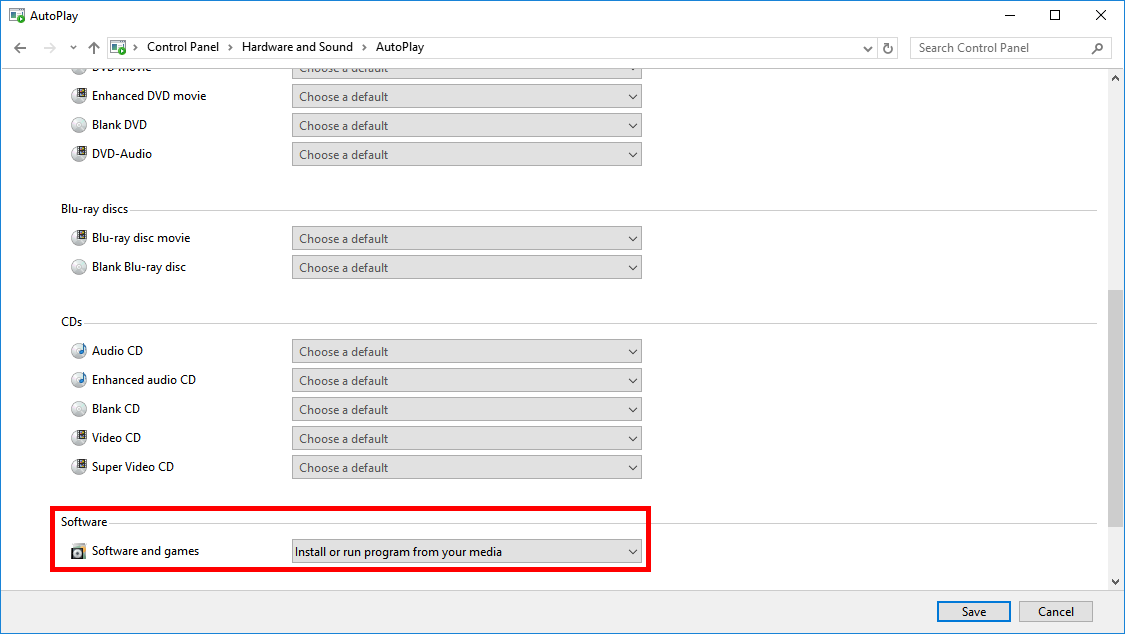
AutoPlay -
For Software and games, select Install or run program from your media.
-
Click Save.
Configure default web browser on Windows 10/11The Virtual Analyzer supports both Microsoft Edge (Chromium) and Internet Explorer. One of these browsers must be manually set as the default web browser in Windows 10/11 before running the Virtual Analyzer. To configure the default web browser, perform the following:
Note
The Virtual Analyzer does not support Microsoft Edge Legacy. You can quickly check which version of Microsoft Edge is installed by comparing the icon:-
Microsoft Edge (Chromium):

-
Microsoft Edge Legacy:

-
Open the Windows Start menu, type
Default appsand press ENTER. -
Under Web browser, select the current web browser.
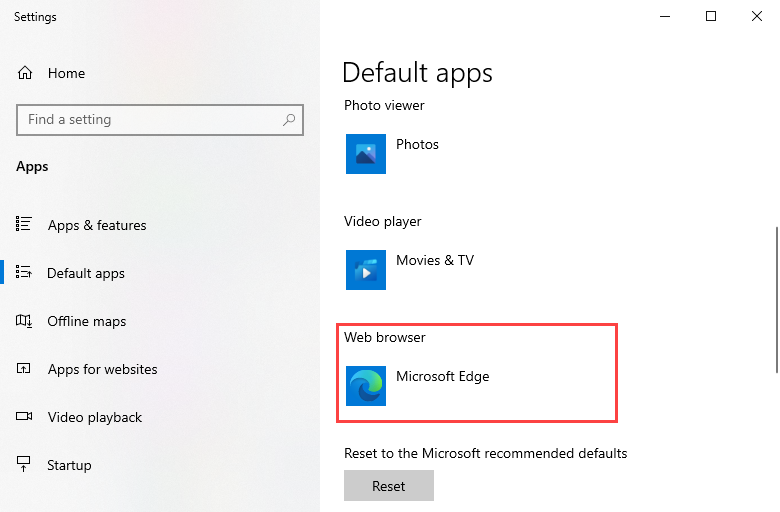
Default apps -
In the Choose an app context menu, select Internet Explorer or Microsoft Edge.
-
If the Before you switch dialog appears, select Switch anyway.
(Optional) Change the display resolutionTrend Micro recommends settings the screen resolution to at least1152 x 864to avoid triggering the anti-virtual machine functions of some malware.-
Open the Windows Start menu, type
Display settingsand press ENTER. -
Under Resolution, select
1152 x 864or any higher resolution. -
In the prompt that appears, click Keep changes.
- Open the Windows Start menu,
type
- For Windows 11 21H2 and 23H2, perform the following tasks using the Windows graphical
user interface:TaskStepsDisable Tamper Protection

Important
Tamper Protection must be disabled to ensure normal operation and performance of Virtual Analyzer.- Open the Windows Start menu, type
Windows Securityinto the search box and press ENTER. -
In Windows Security, go to .
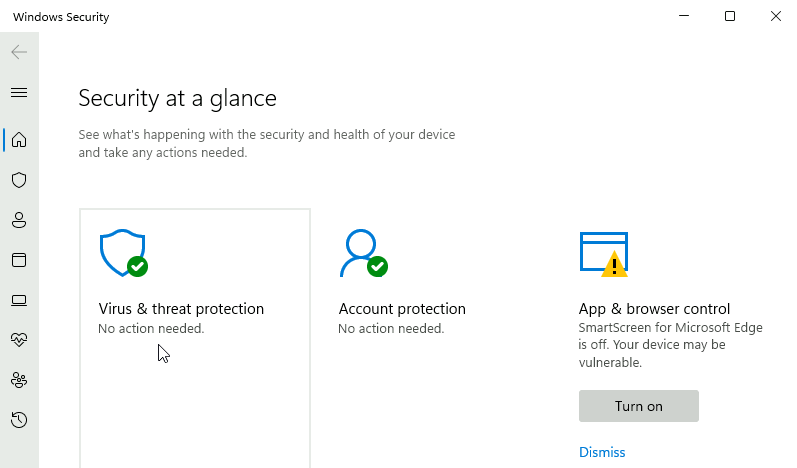
Windows Security -
Under Virus & threat protection, click Manage settings.
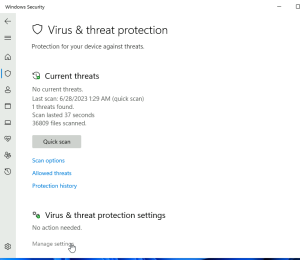
Virus & Threat Protection -
Turn Tamper Protection off.
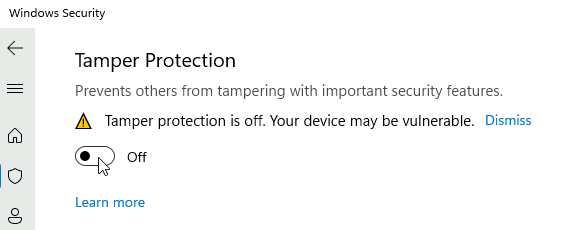
Tamper Protection
(Optional) Disable Windows Defender Antivirus-
Open the Windows Start menu, type
msconfiginto the search box and press ENTER. -
In the System Configuration window, go to the Boot tab.
-
Under Boot options, enable Safe boot and select Minimal.
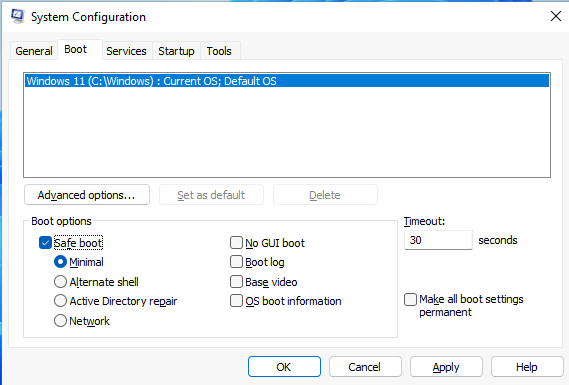
System Configuration - Boot -
Click OK.Windows 11 prompts to restart now. Click Restart.
-
After the Windows 11 virtual machine restarts, run Command Prompt (cmd.exe) with administrator privileges and run the following commands.
-
REG ADD "HKEY_LOCAL_MACHINE\SYSTEM\CurrentControlSet\Services\Sense" /v Start /t REG_DWORD /d 4 /f -
REG ADD "HKEY_LOCAL_MACHINE\SYSTEM\CurrentControlSet\Services\WdBoot" /v Start /t REG_DWORD /d 4 /f -
REG ADD "HKEY_LOCAL_MACHINE\SYSTEM\CurrentControlSet\Services\WdFilter" /v Start /t REG_DWORD /d 4 /f -
REG ADD "HKEY_LOCAL_MACHINE\SYSTEM\CurrentControlSet\Services\WdNisDrv" /v Start /t REG_DWORD /d 4 /f -
REG ADD "HKEY_LOCAL_MACHINE\SYSTEM\CurrentControlSet\Services\WdNisSvc" /v Start /t REG_DWORD /d 4 /f -
 REG ADD "HKEY_LOCAL_MACHINE\SYSTEM\CurrentControlSet\Services\WinDefend" /v Start
                                                         /t REG_DWORD /d 4 /f
-
-
Open the Windows Start menu, type
msconfiginto the search box and press ENTER. -
In the System Configuration window, go to the Boot tab.
-
Under Boot options, disable Safe boot and click OK.Windows 11 prompts to restart now. Click Restart.
-
After the Windows 11 virtual machine restarts, open the Windows Start menu, type
Task Schedulerinto the search box and press ENTER. -
In the Task Scheduler window, go to .
-
Disable all Windows Defender tasks.
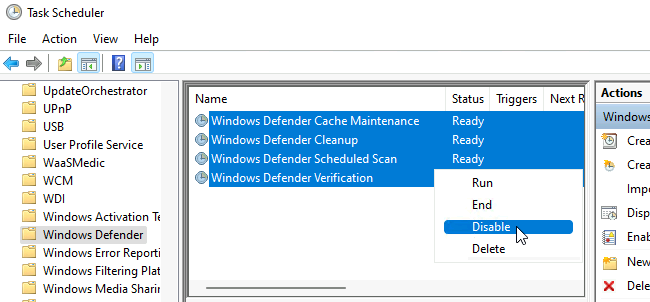
Task Scheduler
(Optional) Disable startup applications-
Open the Windows Start menu, type
Task Managerand press ENTER. -
In Task Manager, go to the Startup tab.
-
Disable the following applications. To disable, right-click the name of the application and select Disable.
-
Cortana
-
Java Update Scheduler
-
Microsoft Edge
-
Windows Security notification icon
-
Windows Terminal
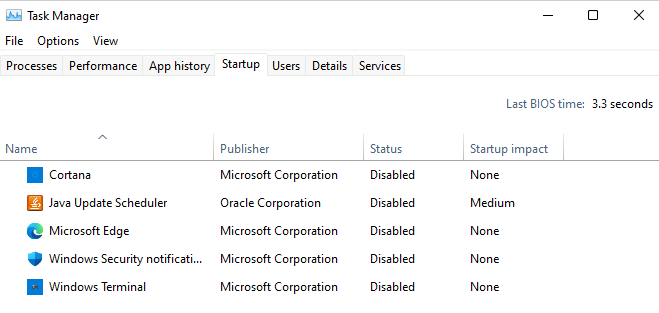
Task Manager -
- Open the Windows Start menu, type
- Restart the virtual machine.

