

Update the agent program on virtual desktops created using a golden image.
Use the following steps to install the latest version of the agent program on your
source desktop and export to an updated golden image.
ImportantTo update your golden image, you must have a snapshot of the
source desktop created before running the Image Setup Tool and exporting the
golden image. If you do not have a snapshot available, follow the steps in Creating a golden image with the agent
software to create a new
snapshot and golden image.
TrendAI™ only
maintains updates for six months. If it has been more than six months since you
created or updated the golden image, you might have to create a new image using
the most recent agent installer package.
|
Procedure
- Load, power on, or revert to the source desktop snapshot.
- Make sure the source desktop is able to connect to the
internet and restart the source desktop virtual machine.The agent program automatically checks for updates on start up.
- Check the program logs to verify the update completed
successfully.The logs are located in the Endpoint Basecamp installation folder.
- After the update completes successfully, create a new
snapshot.

Important
The Image Setup Tool disables updates for the endpoint agent. To maintain the ability to update the agent program in the future, you must create a snapshot of the source desktop before installing and running the Image Setup Tool. - Prepare and export the golden image as normal.
-
For Linux and macOS images, export the source desktop as a golden image template. Your template is now ready to deploy to your virtual machines. Do not continue the following steps.When signing into a desktop created using the golden image template, the newly-provisioned endpoint appears in the Endpoint Inventory list.
-
For Windows images, use the following steps to run the Image Setup Tool and then export the golden image template.
Important
The Image Setup Tool is designed for use with Windows images. Linux and macOS agents have built-in features that do not require the tool. If you are updating a Linux or macOS agent, your image is now ready for export. Do not continue. The following steps are only for Windows deployments. -
- In the TrendAI Vision One™ console, go to and click Agent Installer.
- Click the Download Image Setup
Tool icon (
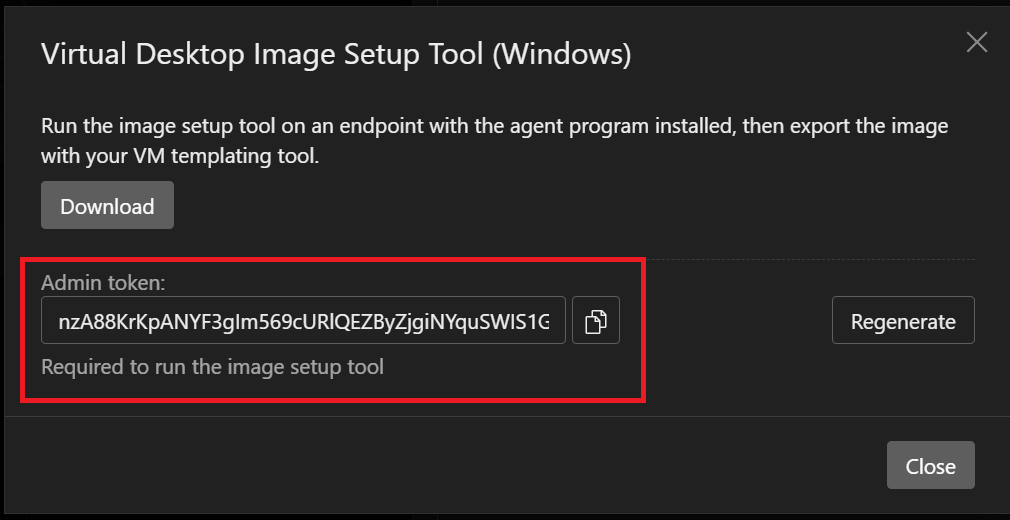
 ) for your agent type.The Virtual Desktop Image Setup Tool screen appears.
 - Click Download to download the Image
Setup Tool.
Important
The downloaded Image Setup Tool package is specific to your organization. - Copy the Admin token.
- Extract the contents of the
ImageSetupTool.zippackage onto the source desktop. - For customers installing the Standard Endpoint Protection
agent, run the TCacheGen tool found in
<ImageSetupTool
                           folder>\TCacheGen
before running the Image Setup Tool.-
Use the graphics user interface:
-
Double-click the executable (TCacheGen.exe or TCacheGen_x64.exe).
-
Select Generate the pre-scan template and remove the GUID or Remove the GUID from the pre-scan template.
-
Click Next.
-
-
Use the command line:
-
Unload the Agent.
-
Put a copy of the following files under <Agent installation folder>:
-
32-bit platform: TCacheGen.exe and TCacheGenCli.exe
-
64-bit platform: TCacheGen_x64.exe and TCacheGenCli_x64.exe
-
-
Start the Agent again from the Start Menu.
-
Run one of the following commands as an administrator:
-
To scan and remove the GUID:
-
TCacheGenCli Generate_Template -
TcacheGenCli_x64
                                                   Generate_Template
-
-
To only remove the GUID:
-
TCacheGenCli Remove_GUID -
TcacheGenCli_x64 Remove_GUID
-
-
-
Provide the agent unload password.
-

Note
The TCacheGen executable is automatically deleted after generating the template to avoid unexpectedly triggering this tool again. Running the tool again re-creates the agent GUID and causes the agent to register as a new entry, breaking the association to current settings and logs. -
- Run
ImageSetupTool.exeas an administrator on the source desktop to prepare the agent.Important
You must specify if your cloned machine is physical/persistent or non-persistent.CommandUse CaseSupported FeaturesImageSetupTool.exe --persistent-
Persistent virtual desktops
-
Physical desktop clones
-
Standard agent auto-removal
-
Vulnerability Assessment available
-
In-place upgrades
ImageSetupTool.exe --non-persistent-
Non-persistent virtual desktops
-
Non-persistent agent auto-removal available from Endpoint Inventory
-
Vulnerability Assessment disabled
-
In-place upgrades disabled
ImageSetupTool.exe --persistent --no-loginImageSetupTool.exe --non-persistent --no-login-
Do not require a login for the newly provisioned machine
-
Citrix ICA virtual channels
-
- Paste the admin token copied from the Endpoint Inventory app when prompted.
- Delete the Image Setup Tool from the source desktop once image setup completes.
- Export your source desktop as a golden image template.When signing into a desktop created using the golden image template, the newly-provisioned endpoint appears in the Endpoint Inventory list.