

Deploy the TrendAI Vision One™ Endpoint Security agent with Server & Workload Protection and XDR for Endpoints (EDR) features to your endpoints using Microsoft Intune.
ImportantThe steps are valid for Microsoft Intune as of December,
2023.
This deployment method has only been tested for
64-bit Windows agents.
|
Configure your agent installation packages to ensure that
your newly-deployed agents:
-
Report to the correct Protection Manager or Endpoint Inventory
-
Automatically apply the correct default settings
NoteIf your network includes virtual desktops, you can set up the agent for VDI environments.
For Server & Workload Protection agents, Trend
Micro recommends that you configure a default policy and use the agent-initiated activation feature before deploying agent packages
to simplify the connection process.
|
Procedure
- In the TrendAI Vision One™ console, go to .
- Click Agent Installer.
- Specify the Server & Workload
Protection package settings.
- Select the Windows operating system.
- Specify the package type.
-
If you want the installer to automatically detect the Windows version of the target endpoint, select Auto-detect. Otherwise, select the specific Windows version for the installer.
-
Option removed
-
- Select the Agent installer proxy for the agent installer to use.
- Click the Download
installer icon (
 ).
).
- On your local machine, unzip the agent installer package to a folder that is easy to find.
- Locate where you have downloaded and unzipped the Microsoft Win32 Content Prep Tool.
- Run
IntuneWinAppUtil.exeand specify the information when prompted.PromptSettingSource folderSpecify the directory where the agent installer is locatedThe following example usesD:\TMStandardAgent_Windows_x86_64_WindowsSetup fileType the full file path with EndpointBasecamp.exeOutput folderSpecify the destination for the created packageThe following example uses the same location as the unzipped agent installer package.Specify catalog folderType N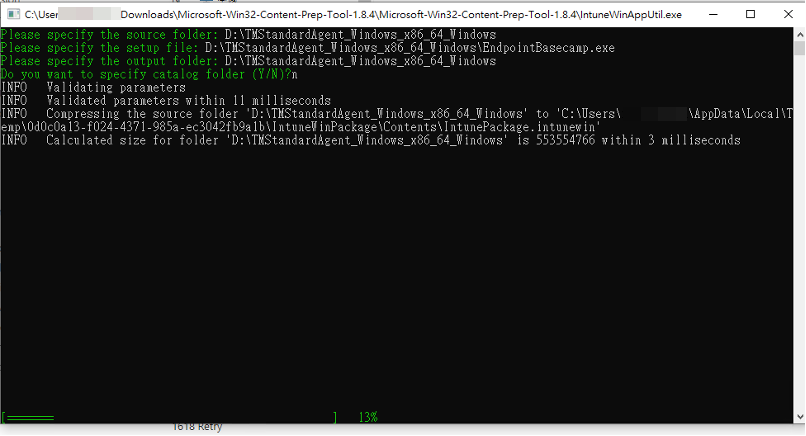
Microsoft Win32 Content Prep Tool Example The tool creates a deployment package namedEndpointBasecamp.intunewin. - In Microsoft Intune, go to and click Add.The Select app type window appears.
- Select Windows app (Win32).The Add App window appears.
- On the App information tab, click Select app package file.
- In the App package file screen,
click the folder icon to locate the
EndpointBasecamp.intunewinpackage. - Click OK.
- Specify a unique Name for the
app.TrendAI™ recommends using a name which includes the agent information, such as TrendAI Vision One Endpoint Security Agent.
- Specify a Description to easily identify the purpose of the app.
- For Publisher, type Trend Micro.
- Click Next.
- Configure the Program tab and
click Next.
-
Install command: Type EndpointBasecamp.exe
-
Uninstall command: Type EndpointBasecamp.exe /qn
-
- Configure the Requirements
tab and click Next.
-
Operating system architecture: Select 64-bit.
-
Minimum operating system: Refer to the TrendAI Vision One™ Endpoint Security agent system requirements for your agent and security environment needs.
-
- Configure the Detection rules tab.
- For Rules format, select Manually configure detection rules.
- Click Add to add new detection
rules.Rule TypeSettingsRegistry
-
Key path: Type HKLM\SOFTWARE\TrendMicro\Deep Security Agent
-
Value name: Type InstalledVersion
-
Detection method: Select Value exists.
-
Associated with a 32-bit ap on 64-bit clients: Select No.
File-
Path: Type %ProgramFiles%\Trend Micro\Cloud Endpoint
-
File or folder: Type CloudEndpointService.exe
-
Detection method: Select File or folder exists.
-
Associated with a 32-bit app on 64-bit clients: Select No.
File-
Path: Type %ProgramFiles(x86)%\Trend Micro\Endpoint Basecamp
-
File or folder: Type EndpointBasecamp.exe
-
Detection method: Select File or folder exists.
-
Associated with a 32-bit app on 64-bit clients: Select No.
-
- Click Next, then click Next again to go to the Scope tags tab.
- Click Select scope tags to assign a scope tag for the agent installer.
- Click Next to go to the Assignments tab.
- Add the groups or users you wish to deploy the agent installer to, then click Next.
- Review the settings and then click Create.