

Deploy the Server & Workload Protection agent to your endpoints using Microsoft Intune.
ImportantThe steps are valid for Microsoft Intune as of December,
2023.
This deployment method has only been tested for
64-bit Windows agents.
|
Configure your agent installation packages to ensure that
your newly-deployed agents:
-
Report to the correct Protection Manager or Endpoint Inventory
-
Automatically apply the correct default settings
NoteFor Server & Workload Protection agents, Trend
Micro recommends that you configure a default policy and use the agent-initiated activation feature before deploying agent packages
to simplify the connection process.
|
Procedure
- In the Trend Vision One console, go to .
- Click Agent Installer.
- Specify the Server & Workload
Protection package settings.
- Select the Windows operating system.
- Specify the package type.
-
Auto detect: The installation package is light-weight, and downloads and installs additional components after detecting the operating system type (requires more network bandwidth)
-
Full package: The installation package contains all necessary components and automatically installs the correct components after detecting the operating system version
-
- Select the Server & Workload Protection Manager that the newly-deployed agents report to.
- Click the Download
installer icon (
 ).
).
- On your local machine, unzip the agent installer package to a folder that is easy to find.
- Locate where you have downloaded and unzipped the Microsoft Win32 Content Prep Tool.
- Run
IntuneWinAppUtil.exeand specify the information when prompted.PromptSettingSource folderSpecify the directory where the agent installer is locatedThe following example usesD:\TMStandardAgent_Windows_x86_64_WindowsSetup fileType the full file path with EndpointBasecamp.exeOutput folderSpecify the destination for the created packageThe following example uses the same location as the unzipped agent installer package.Specify catalog folderType N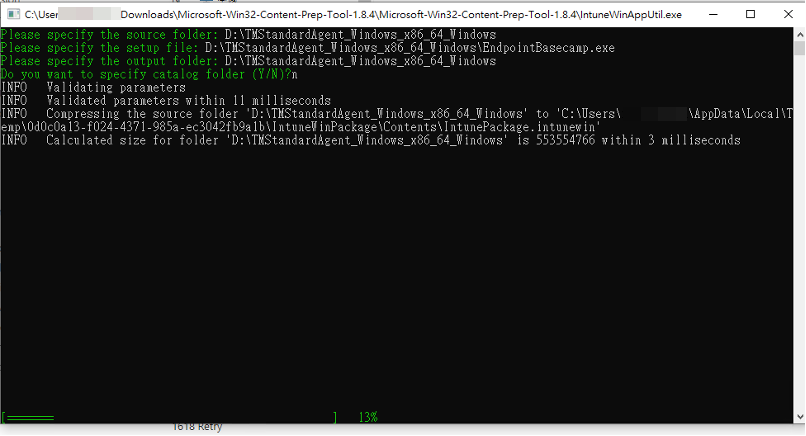
Microsoft Win32 Content Prep Tool Example The tool creates a deployment package namedEndpointBasecamp.intunewin. - In Microsoft Intune, go to and click Add.The Select app type window appears.
- Select Windows app (Win32).The Add App window appears.
- On the App information tab, click Select app package file.
- In the App package file screen,
click the folder icon to locate the
EndpointBasecamp.intunewinpackage. - Click OK.
- Specify a unique Name for the
app.Trend Micro recommends using a name which includes the agent information, such as Trend Vision One Server & Workload Agent.
- Specify a Description to easily identify the purpose of the app.
- For Publisher, type Trend Micro.
- Click Next.
- Configure the Program tab and
click Next.
-
Install command: Type EndpointBasecamp.exe
-
Uninstall command: Type EndpointBasecamp.exe /qn
-
- Configure the Requirements
tab and click Next.
-
Operating system architecture: Select 64-bit.
-
Minimum operating system: Refer to the Trend Vision One Endpoint Security agent system requirements for your agent and security environment needs.
-
- Configure the Detection rules tab.
- For Rules format, select Manually configure detection rules.
- Click Add to add new detection
rules.Rule TypeSettingsRegistry
-
Key path: Type HKLM\SOFTWARE\TrendMicro\Deep Security Agent
-
Value name: Type InstalledVersion
-
Detection method: Select Value exists.
-
Associated with a 32-bit ap on 64-bit clients: Select No.
File-
Path: Type %ProgramFiles%\Trend Micro\Cloud Endpoint
-
File or folder: Type CloudEndpointService.exe
-
Detection method: Select File or folder exists.
-
Associated with a 32-bit app on 64-bit clients: Select No.
File-
Path: Type %ProgramFiles(x86)%\Trend Micro\Endpoint Basecamp
-
File or folder: Type EndpointBasecamp.exe
-
Detection method: Select File or folder exists.
-
Associated with a 32-bit app on 64-bit clients: Select No.
-
- Click Next, then click Next again to go to the Scope tags tab.
- Click Select scope tags to assign a scope tag for the agent installer.
- Click Next to go to the Assignments tab.
- Add the groups or users you wish to deploy the agent installer to, then click Next.
- Review the settings and then click Create.