

ImportantYou can now use Cloud Accounts to add your Google Cloud projects to Trend Vision One.
To get the latest cloud security features to protect your environment, get started
by going to .
For more information, see Google Cloud projects.
The content below is kept for your reference. The ability to add Google Cloud projects
to Server & Workload Protection is planned to be retired soon.
|
When you add a Google Cloud Platform (GCP) account to Server & Workload Protection, all GCP VM instances associated with that account are imported into Server & Workload Protection and become visible in the Server & Workload Protection console in
Once imported, the GCP VM instances can be managed like any other computer.
NoteAdding a GCP account to Server & Workload Protection is equivalent to adding a GCP connector through the Server & Workload Protection API.
|
What are the benefits of adding a GCP account? 
The benefits of adding a GCP account (through ) instead of adding individual GCP VMs (through ), are:
- Changes in your GCP VM inventory are automatically reflected in the Server & Workload Protection console. For example, if you delete a number of VM instances in GCP, those instances disappear automatically from the manager. By contrast, if you use , GCP instances that you've deleted remain visible in the manager until you manually delete them.
- VMs are organized into projects in the manager, which lets you easily see which GCP VMs are protected and which are not. Without the GCP account, all your GCP VMs appear at the same root level under Computers.
- Your smaller-sized GCP instances will be billed at a lower rate (if you are using metered billing). By contrast, if you use , all your GCP instances regardless of size are billed at the highest 'Data Center' rate.
Configure a proxy setting for the GCP account
Optionally, you can configure Server & Workload Protection to use a proxy server to access resources in GCP service accounts. For details, see
Connect to cloud accounts via proxy.
Add a GCP account to Server & Workload Protection
To add a GCP account to Server & Workload Protection:
Procedure
- If you have not done so already, Create a Google Cloud Platform service account for Server & Workload Protection.
- In the Server & Workload Protection console, go to .
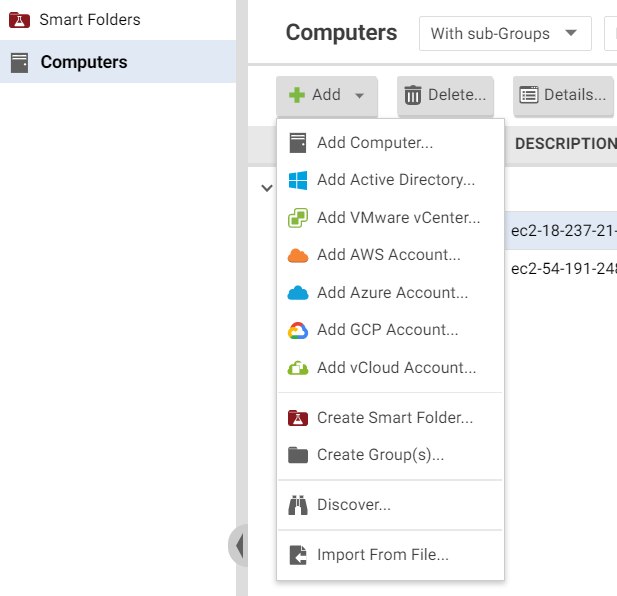
- Enter a Display Name. We recommend using the GCP service account name. Examples:
GCP Server & Workload Protection,Finance GCP Server & Workload Protection,Marketing GCP Server & Workload Protection. - Choose the Service Account Key. The key is a JSON file that you saved earlier, when creating the GCP service account.
See Create a Google Cloud Platform service account for details.
- Click Next.
- Review the summary information, and then click Close. The following occurs:
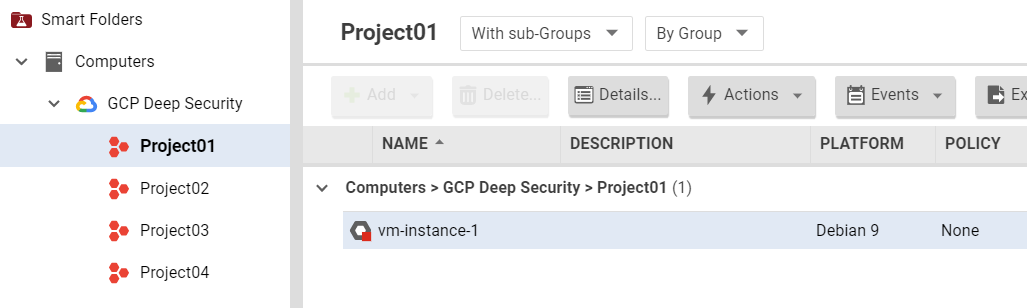
- The Server & Workload Protection console displays your GCP service account and its associated projects in their own branch on the left side of the Computers page (see image below). Associated VMs are displayed in the main pane. You can right-click your GCP service account name and select Synchronize Now to see the latest set of GCP VMs.
- If you previously added VM instances from this service account through the option (instead of the option described here), these VMs are moved to the correct project under the service
account you just added. This move occurs only for VMs that have agent version 12.0 or later installed. VMs with pre-12.0 agents remain listed under the root Computers folder.The following image shows the imported GCP service account, projects, and
a VM.
- Repeat the steps in this procedure for each GCP service account you want to add.You
have now added a GCP service account to Server & Workload Protection. Proceed to Install the agent on Google Cloud Platform VMs if you have not done so already.
Next steps
Remove a GCP account
Removing a GCP account from the Server & Workload Protection console is permanent, but it does not affect the GCP account. VM instances with agents
continue to be protected, but do not receive component updates. If you later reactivate
agents on these VM instances, the agents will download the latest component updates
at the next scheduled update.
To remove a GCP account:
Procedure
- In the Server & Workload Protection console, click Computers at the top.
- Right-click the GCP account in the tree view on the left, and select Remove Cloud Account.
- Confirm that you want to remove the account.The account is removed from Server & Workload Protection.
Next steps
Synchronize a GCP account
When you synchronize (sync) a GCP account, Server & Workload Protection connects to the GCP API to obtain and display the latest set of GCP VMs.
To force a sync immediately:
Procedure
- In the Server & Workload Protection console, click Computers.
- On the left, right-click your GCP account and select Synchronize Now.
Next steps
NoteThere is also a background sync that occurs every 10 minutes, and this interval is
not configurable. If you force a sync, the background sync is unaffected and continues
to occur according to its original schedule.
|