Configure network settings in VMware ESXi to allow Virtual Network Sensor to monitor data.
ImportantThe following instructions are valid as of June 2023.
|
Procedure
- On the VMware ESXi console, go to .

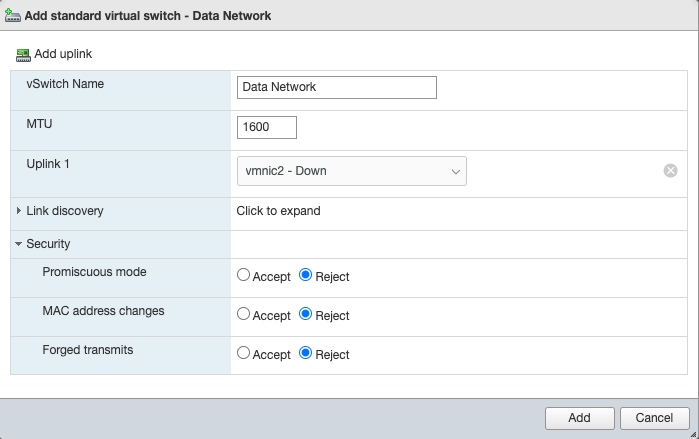
- Click Add standard virtual switch, and specify the
following settings:
-
Type Data Network in the vSwitch name field.
-
Type
1600in the MTU field. -
Select the NIC for the data network from the Uplink 1 dropdown.
-
Click Security to expand the settings, and select Reject for Promiscuous mode, MAC address changes, and Forged transmits.


Note
Send the network traffic you want to scan to the data port. The following instructions use promiscuous mode to enable Virtual Network Sensor to scan your network traffic. -
- Click Add.
- Go to the Port groups tab.

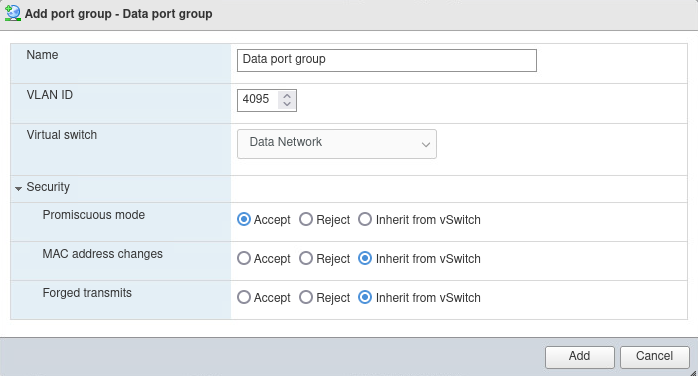
- Click Add port group, and specify the following
settings:
-
Type
Data Port Groupin the Name field. -
Type
4095in the VLAN ID field. -
Select Data Network from the Virtual switch dropdown.
-
Click Security to expand the settings, and select Accept for promiscuous mode.
-
Select Inherit from vSwitch for both MAC address changes and forged transmits.

-
- Click Add.
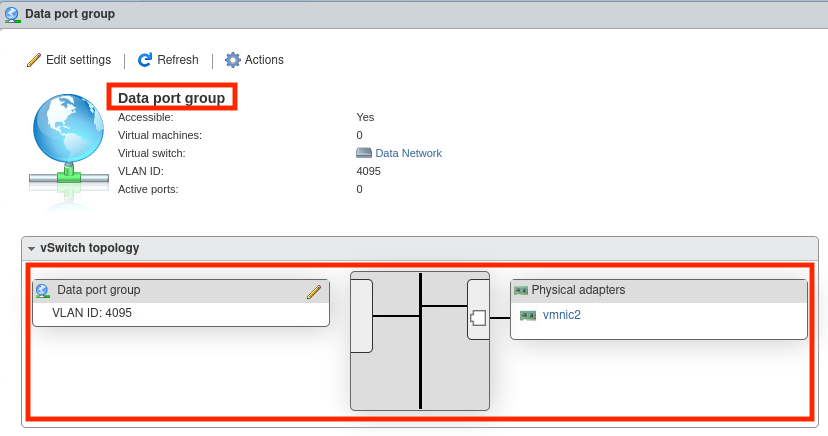
- On the Port groups tab, click Data port
group and verify the connection to Data Network.


