

Connect your AWS applications with Zero Trust Secure Access Private Access and prevent unauthorized intrusions.
Private Access Connectors connect your internal applications with Zero Trust Secure
Access Private Access, which allows you to control access to sensitive corporate
resources. To ensure high availability (HA) and facilitate load-balancing on high
traffic apps, install and group together at least 2 connectors in each environment.
Before attempting to deploy the Private Access Connector, ensure that your
environment meets the minimum system
requirements.
Procedure
- In the Trend Vision One console, go to .
- For customers that need to create a new connector group, click Add
Private Access Connector Group.
- Provide a unique name and description for the group.
- Click Save.
- Locate your Connector group name in the list and click
the New connector (
 )
icon.The Private Access Connector Virtual Appliance panel appears.
)
icon.The Private Access Connector Virtual Appliance panel appears. - Select Amazon AWS from the Platform list.
- Copy the Registration token for later use.
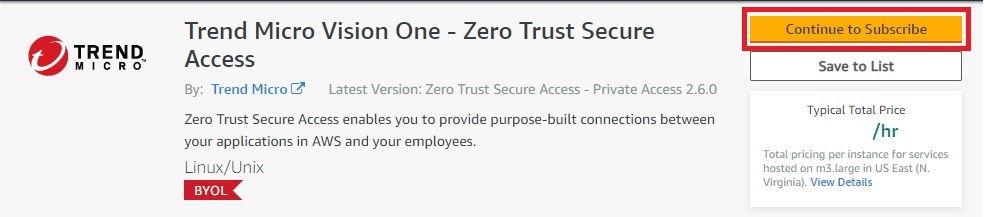
- Sign in to the AWS Marketplace and locate the Trend Micro Vision One
- Zero Trust Secure Access app.

Important
The steps and screens contained in these instructions were valid as of October 2022. - Click Continue to Subscribe.
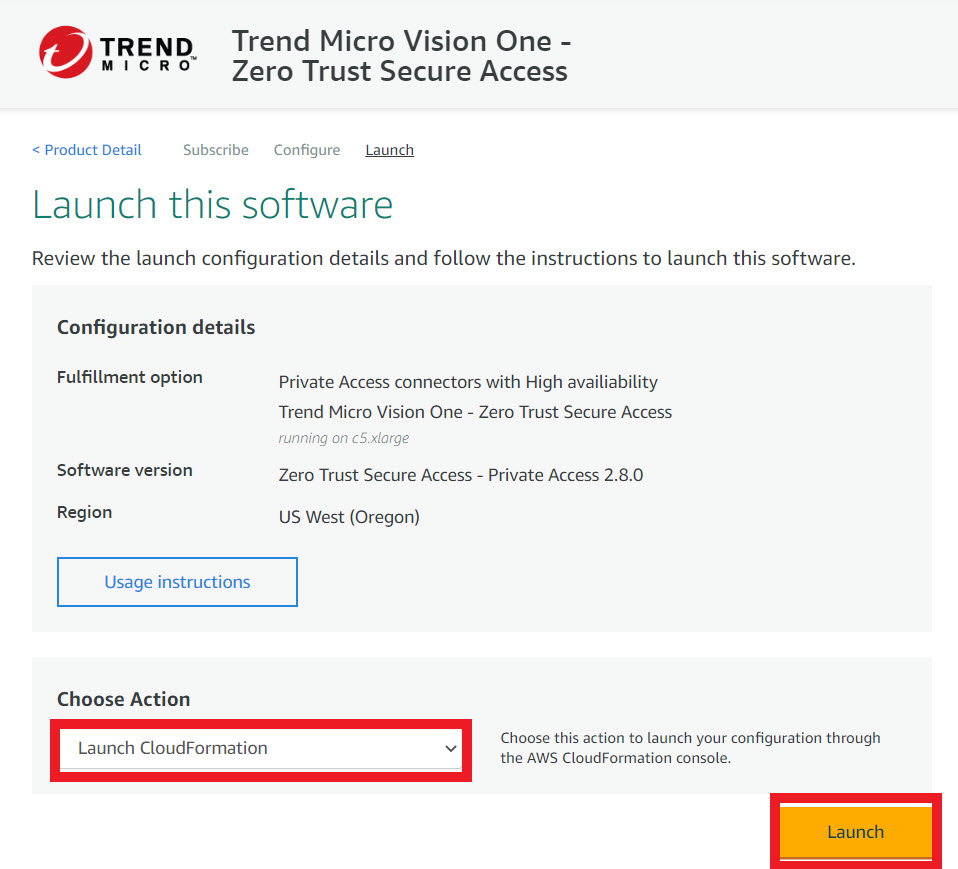
- Click Continue to Configuration.

- Select your fulfillment options and software version, and click
Continue to Launch.


Note
Make sure that you always select the latest software version. - In the Choose Action field, select Launch
CloudFormation and click Launch.
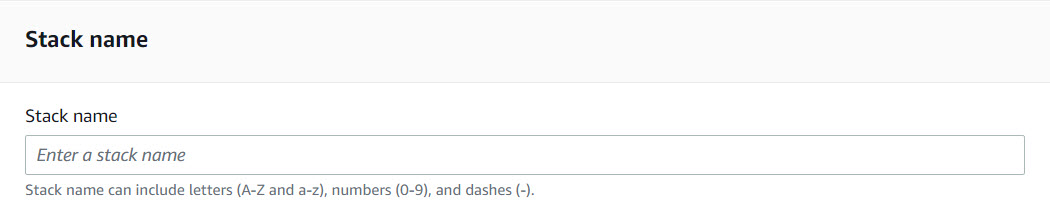
 The Create stack screen opens.
 - Keep the default settings and click Next.
- In the Stack name section, specify a Stack
name for the CloudFormation stack of your Private Access
Connector.
- In the Parameters section, specify each field, and then
click Next.

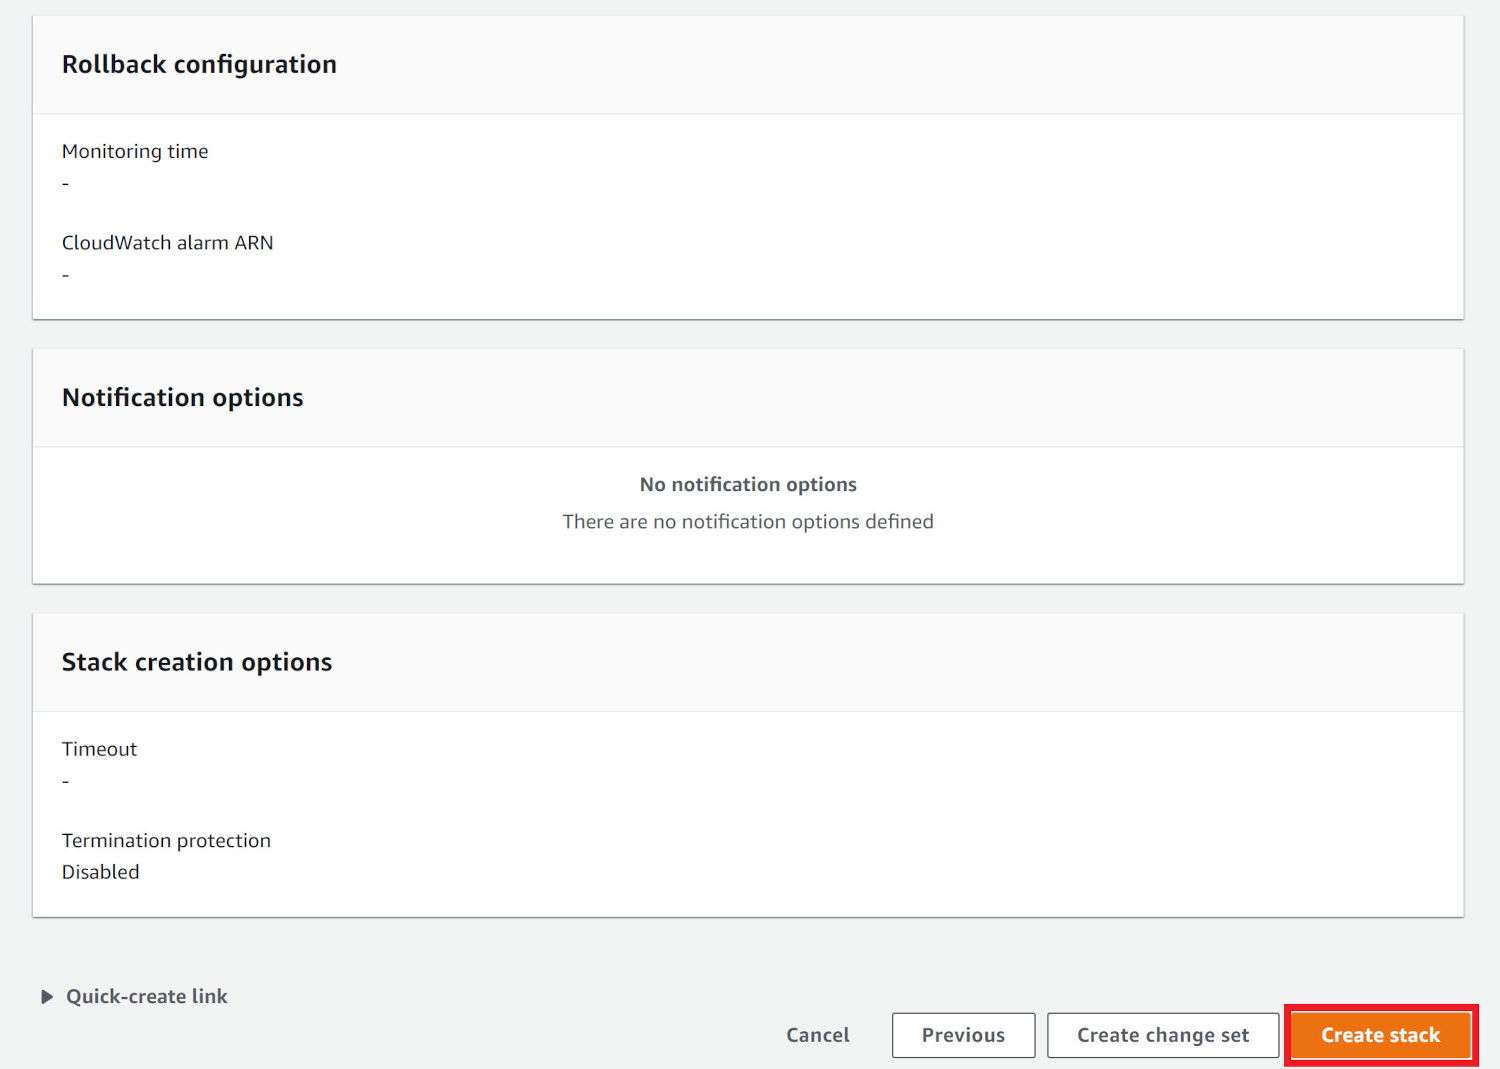
Important
To use automatic scaling of the VM instances via dynamic scaling policies, you must set MonitoringGranularity to 1 min for EC2 detailed monitoring. Detailed monitoring incurs charges. For more information, see Amazon CloudWatch documentation. - Keep the default settings and click Next.
- Click Create stack.
Note
The system launches two instances when creating the stack. Allow some time for the process to complete. - (Optional) Scale the VM instances either by manually specifying a fixed Auto Scaling group size or via dynamic scaling policies.
- (Optional) Launch and configure a Private Access Connector
VM.
- On the auto scaling group screen, click the Instance Management tab.
- Click the instance ID of an instance you just launched and copy the public IPv4 address of the instance.
- Open a command prompt and run the following
sshcommand to log on to the Connector virtual appliance with the default credentials.ssh -i <path_of_the_private_key_file> admin@<public_IP_address_of_the_instance>Important
AWS automatically creates a user for the VM. Make sure you use admin rather than the created user to log on. - Set your password for the
enablecommand by running the following command and pressing the ENTER key:passwdThe admin user and privileged mode share the same password. - Switch to privileged mode by typing the
enable command, pressing the ENTER key, and provide the
updated password.The command prompt changes from > to #.
- Run the following command to change the time zone
of the connector:
configure timezone
                                    <timezone>
The default time zone is America/Los_Angeles. - Check whether the Connector can connect
to the NTP server 0.pool.ntp.org.The Connector requires connectivity to an NTP server to synchronize its clock. By default, Trend Vision One uses the public NTP server 0.pool.ntp.org. You can also configure the Connector to connect to another public NTP server or a local NTP server within your organization.Run the following command to configure the NTP server:
configure ntp server <address>Note
To use public NTP servers, make sure that your firewall configuration allows outbound UDP traffic on port 123.
- Use the CLI to configure other settings, if
required.For more information on available commands, see Private Access Connector CLI commands.IMDSv2 Required option is supported in AWS connectors. For deployment details, seeConfigure IMDSv2 in AWS deployments .After successful deployment, the connector virtual appliance appears under the corresponding connector group on the Private Access Connectors tab.