

Use Microsoft Endpoint Configuration Manager (SCCM) to deploy the agent package to your managed endpoints.
ImportantThe steps contained in this topic reference Configuration Manager version 2207
and are valid as of December, 2023. If you are using a different version of
Configuration Manager, refer to the documentation for your version.
This deployment method only supports Windows agents.
|
Configure your agent installation packages to ensure that your newly-deployed
agents:
-
Report to the correct Protection Manager or Endpoint Inventory
-
Automatically apply the correct default settings
NoteFor Server & Workload Protection deployments, Trend Micro recommends that you configure
a default policy and use the agent-initiated activation feature before deploying agent packages to simplify the connection process.
For Standard Endpoint Protection agents and Endpoint Sensor only agents, you can set
up the agent for VDI environments if your network includes virtual desktops.
|
Procedure
- Go to .
- Click Agent Installer.
- Locate the Agent Installer type you want to use and select the Windows operating system.
- For Standard Endpoint Protection, specify the following package settings.
- Select the OS architecture.
- Select the Endpoint Group Manager that the newly-deployed agents report to.
- Click the Download installer icon (
 ).
).
- For Server & Workload Protection, specify the following package settings.
- Specify the package type.
-
Auto detect: The installation package is light-weight, and downloads and installs additional components after detecting the operating system type (requires more network bandwidth)
-
Full package: The installation package contains all necessary components and automatically installs the correct components after detecting the operating system version
-
- Select the Server & Workload Protection Manager that the newly-deployed agents report to.
- Click the Download installer icon ().
- Specify the package type.
- For Endpoint Sensor, specify the OS
architecture and click the Download
installer icon ().
- Unzip the Agent Package and move the contents to the Configuration Manager server.
- Create the package.
- In the Configuration Manager console, go to .
- Right-click Packages and click Create
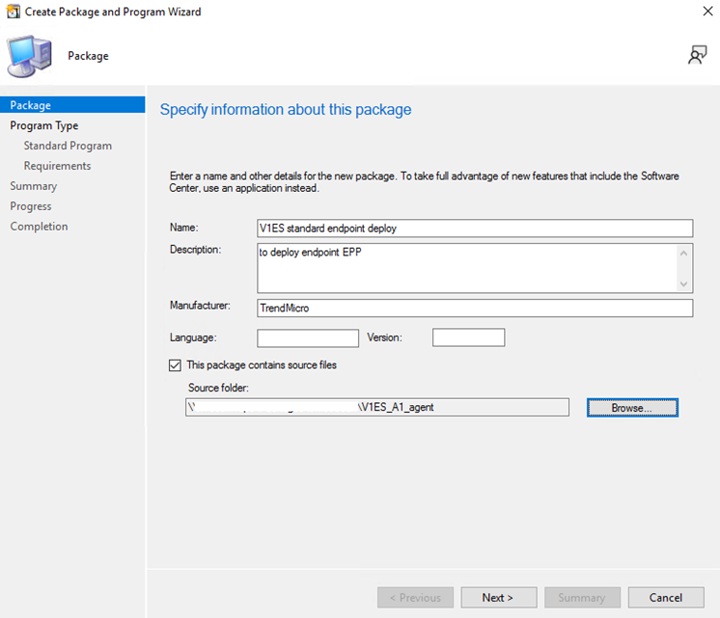
Package.The Create Package and Program Wizard appears.
- Configure the settings in the Package tab.
-
Provide a readable package name and description. Trend Micro recommends including the agent type in the package name.
-
Select This package contains source files.
-
- Next to the Source folder field, click Browse....
- Select Local folder on site server and click Browse...
- Select the folder containing the Agent Package and click OK.
- Click Next.
- Select Standard program and click Next.
- Configure the settings in the Standard Program
tab.SettingConfigurationNameProvide a readable and descriptive software nameThis is not the same name you provided in the Package tab.Command lineClick Browse... and select the installation program
EndpointBasecamp.exeStartup folderLeave blankRunSelect HiddenProgram can runSelect Whether or not a user is logged onRun modeSelect Run with administrative rightsDrive modeSelect Runs with UNC name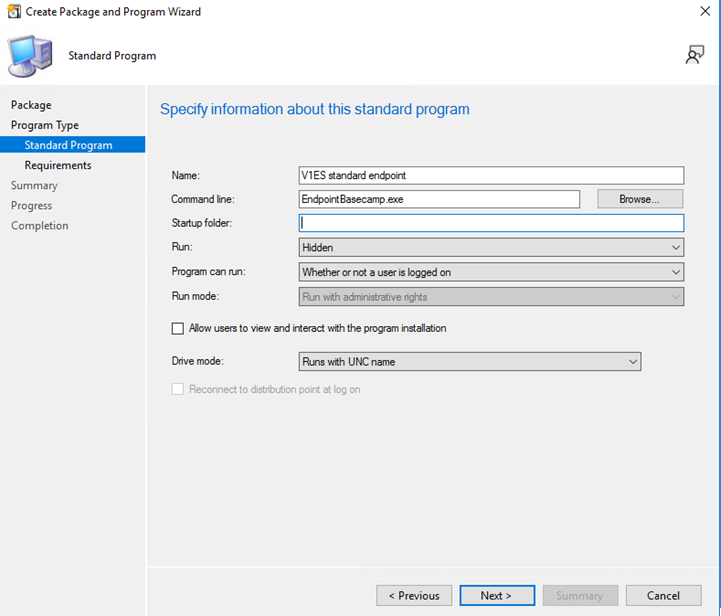
- Click Next.
- In the Platform requirements section, select This program can run only on specified platforms.
- Select the specified platforms based on the system requirements of the agent you are deploying and the needs of your security environment.
- Click Next.
- Review the settings and click Next to create the package.
- Once the wizard finishes creating the package, click Close.
- Upload the package to distribution points.
- Right-click on the package you created and select Distribute
Content.The Distribute Content Wizard appears.
- Select the package name in the Content
field.
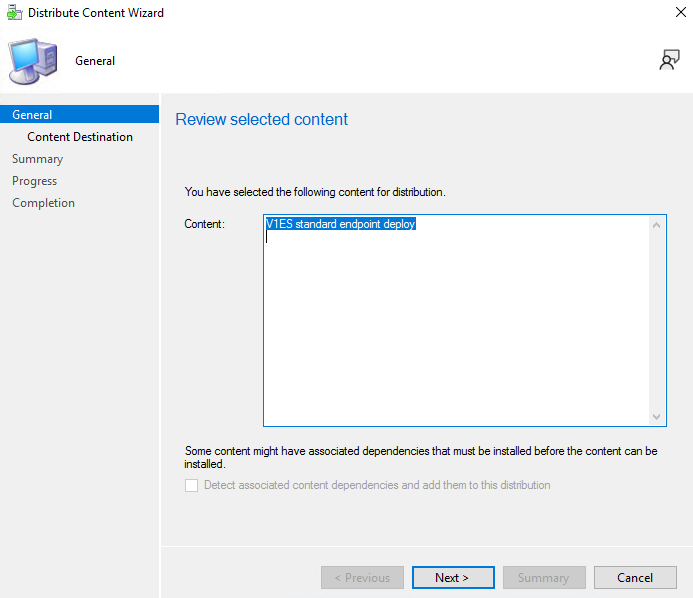
- Click Next.
- Click Add and select Distribution Point to add distribution points to the Content destination list.
- Click Next, and in the Summary screen, click Next again to process the task.
- Click Close once the task completes.
- Right-click on the package you created and select Distribute
Content.
- Deploy the package.
- Right-click on the package you created and select
Deploy.The Deploy Software Wizard appears.
- Verify the software is already selected.The Software field should display
Package Name (Software Name)based on the names you provided in the Create Package and Program Wizard.
- For Collection, click Browse..., then Select Device Collections and select the collection to deploy the agent installer to.
- Click OK, then click Next.
- In the Content screen, verify the content
destination.If you want to add more distribution points, click Add and select Distribution Point.
- Click Next.
- In the Deployment Settings screen, select Required for Purpose.
- Click Next.
- In the Scheduling screen, click New to create the deployment schedule.
- Click Next.
- Review the User Experience screen and change the settings based on the best fit for your environment and users.
- Click Next.
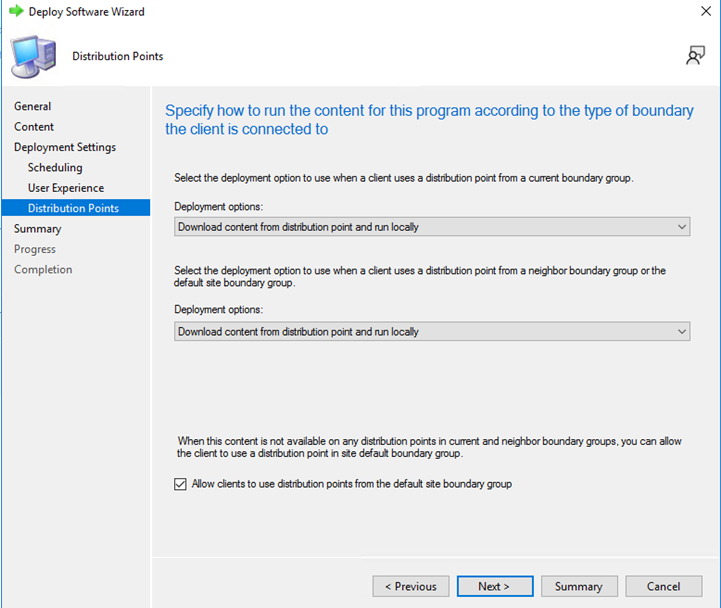
- Configure settings in the Distribution Points
screen.
-
For Deployment options, select Download content from distribution point and run locally for both scenarios.
-
Select Allow clients to use distribution points from the default site boundary group.
-
- Click Next.
- Review the Summary and click Next to create the deployment task.
- After the wizard completes, click Close.
- Go to .
- Right-click on the collection you selected to deploy to, select Client Notification and click Download Computer Policy and Evaluate Application Deployments.
- Right-click on the package you created and select
Deploy.