

Connect your Microsoft Hyper-V applications with Zero Trust Secure Access Private Access and prevent unauthorized intrusions.
Private Access Connectors connect your internal applications with Zero
Trust Secure Access Private Access, which allows you to control access to sensitive
corporate resources. To ensure high availability (HA) and facilitate load-balancing
on high traffic apps, install and group together at least 2 connectors in each
environment. Before attempting to deploy the Private Access Connector, ensure that
your environment meets the minimum system
requirements.
Procedure
- Download the Private Access Connector virtual appliance
image.
- In the Trend Vision One console, go to .
- To deploy to a new group, create a Private Access
Connector group.
-
Click Add Private Access Connector Group.
-
Provide a unique name and description for the group.
-
Click Save and Continue.
-
- To deploy to an existing group, find the
Connector group in the list and click the
New connector (
 )
icon.
)
icon. - In the Private Access Connector Virtual Appliance panel, select Microsoft Hyper-V from the Platform list.
- Click Download Disk Image to download the ZIP file.
- Verify that the file name and extension are:
TrendMicroVisionOne-PrivateAccessConnector.zip - Copy the Registration token.
- Create a virtual machine from the Private Access Connector image.
- On the device you downloaded the image to, extract the Private Access Connector image from the ZIP file.
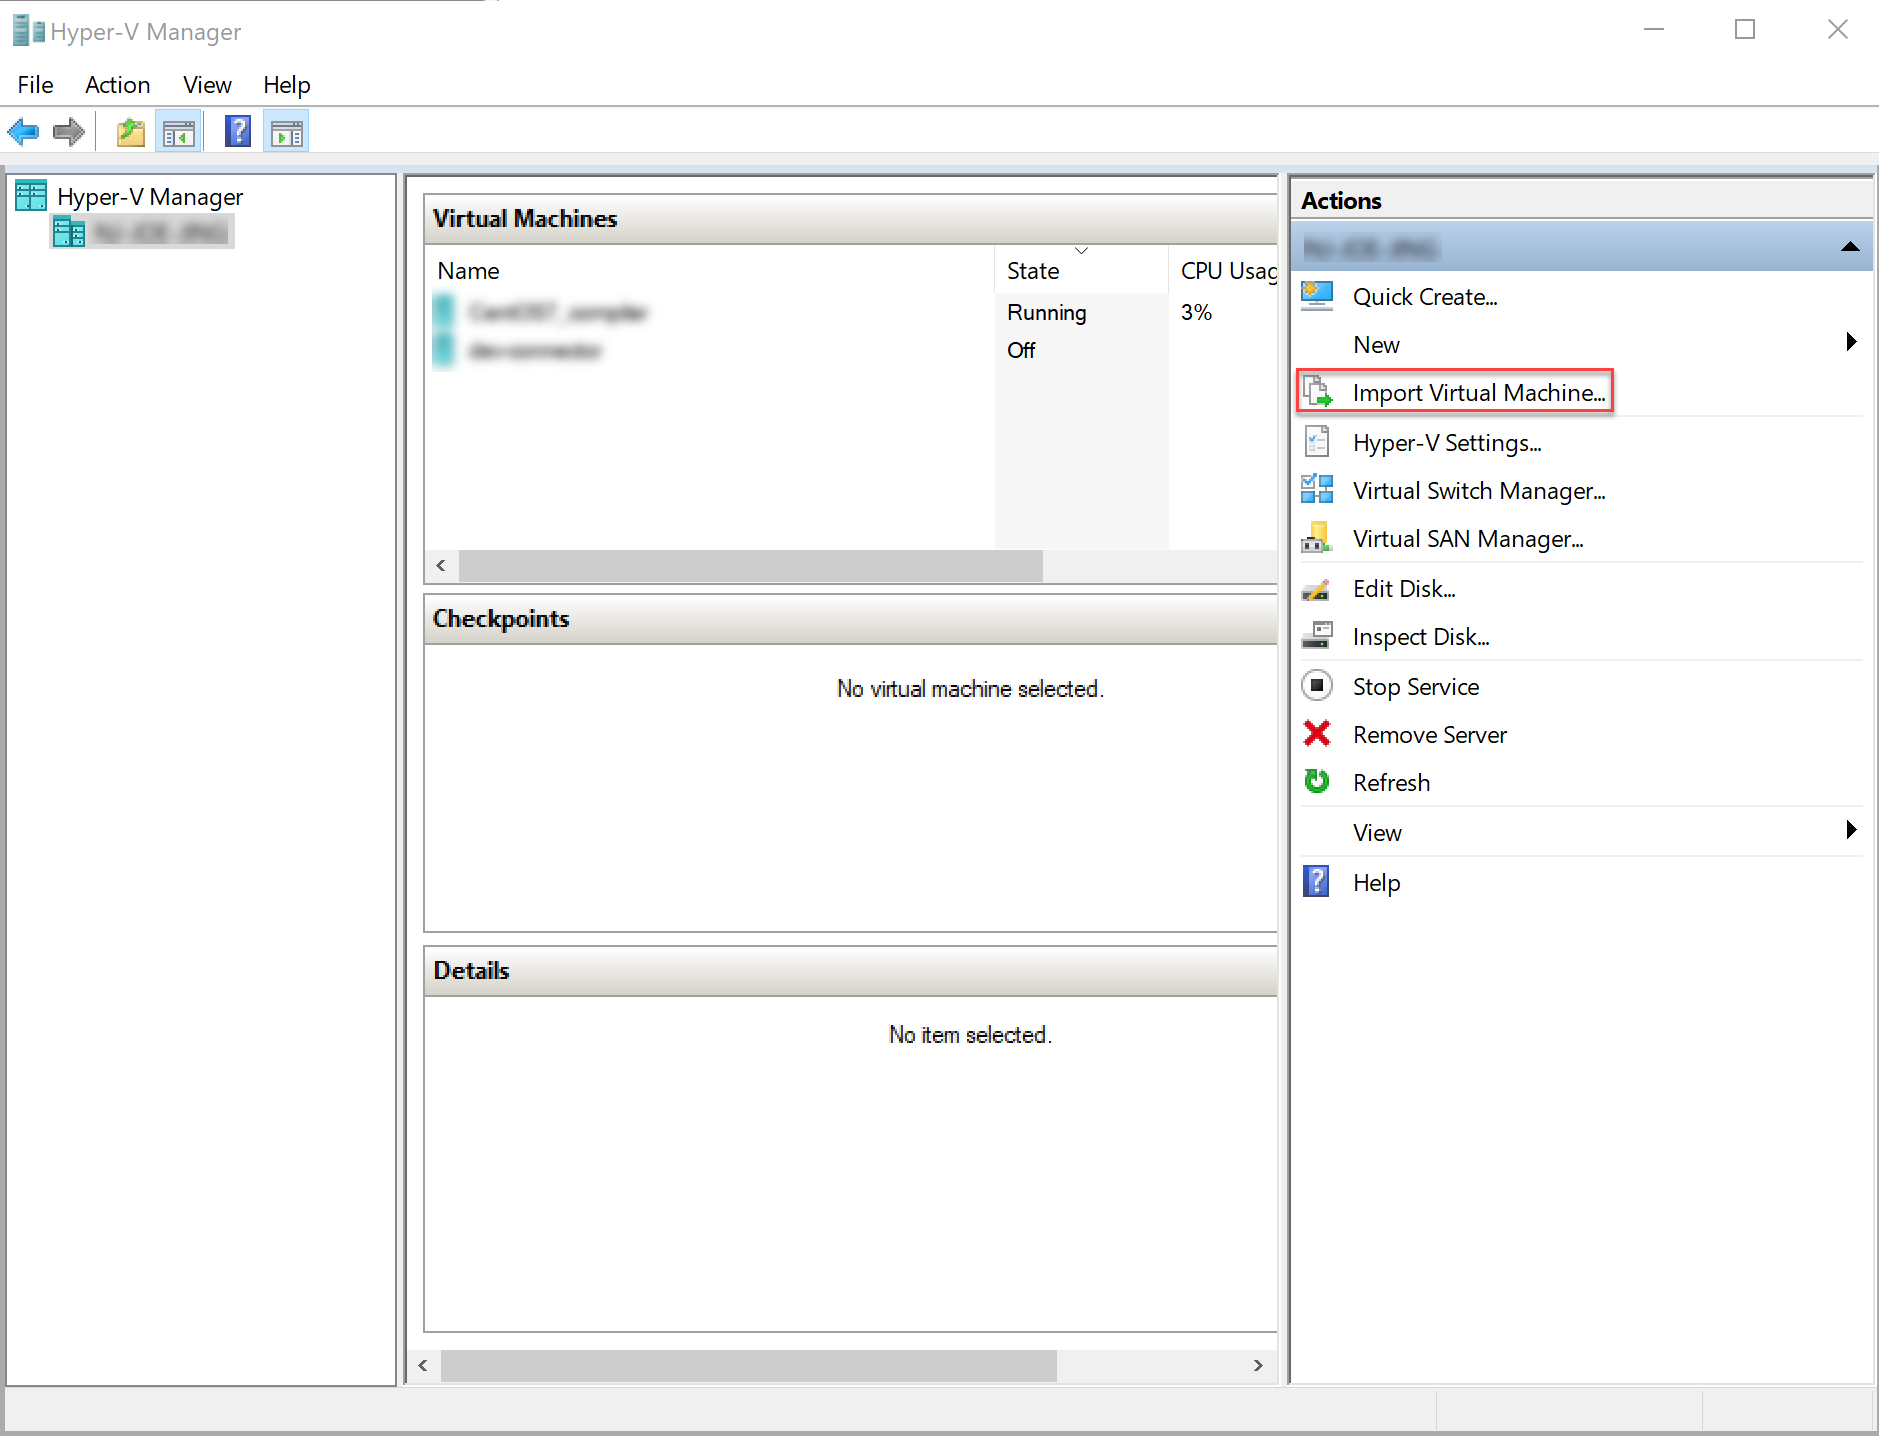
- Open your Microsoft Hyper-V Manager console.
- In the Actions panel, click Import
Virtual Machine....
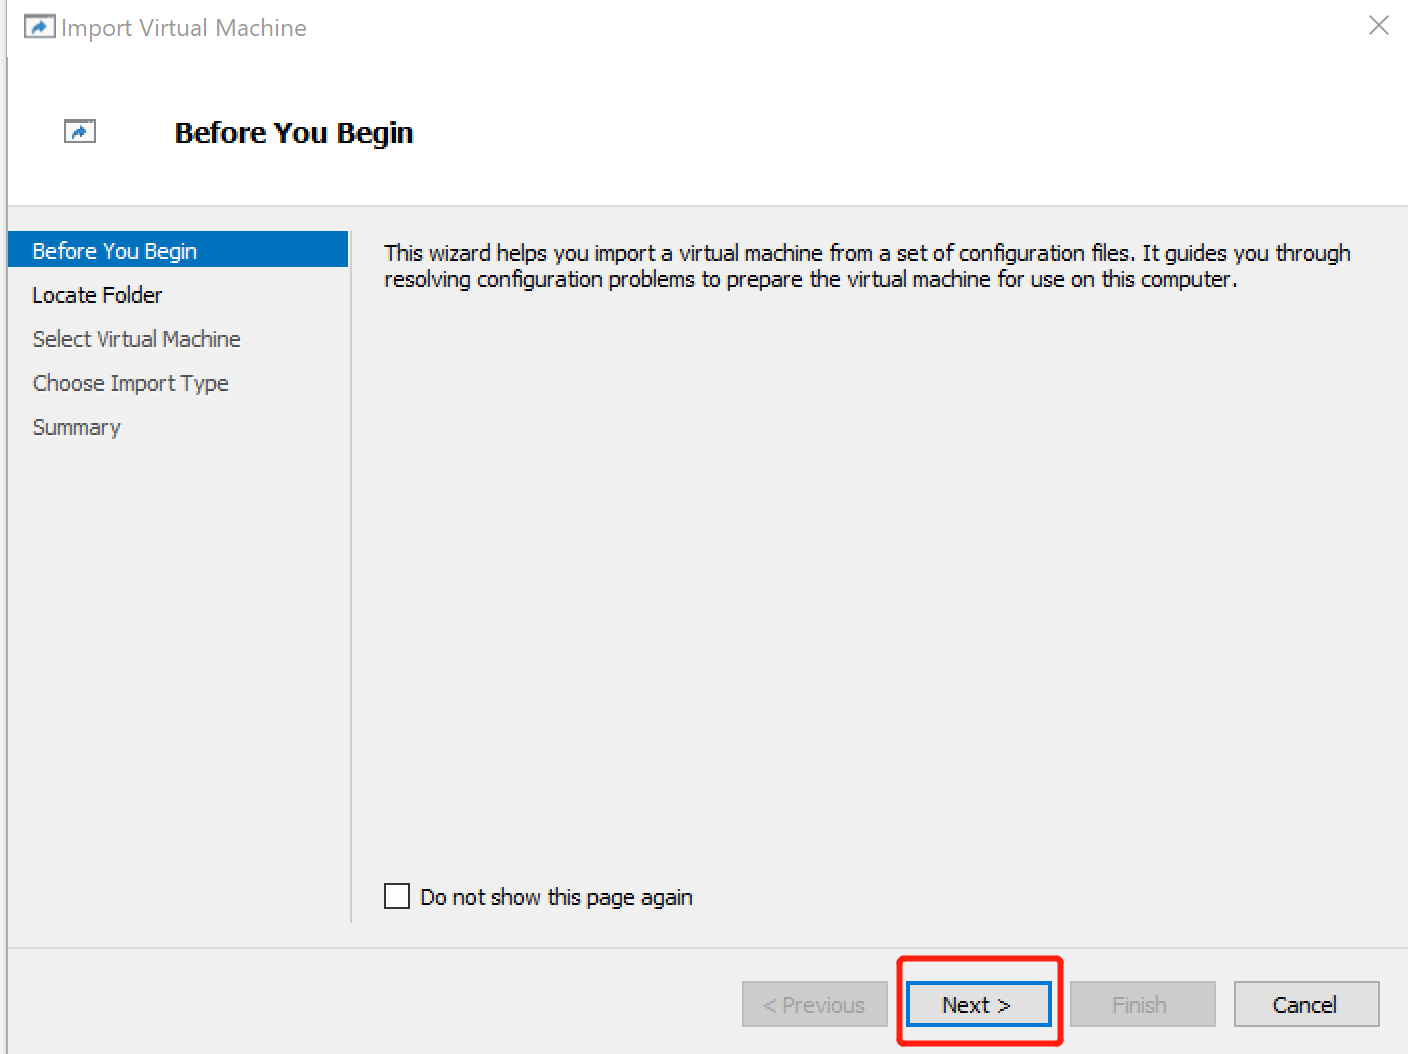
- In the screen that appears, click Next.
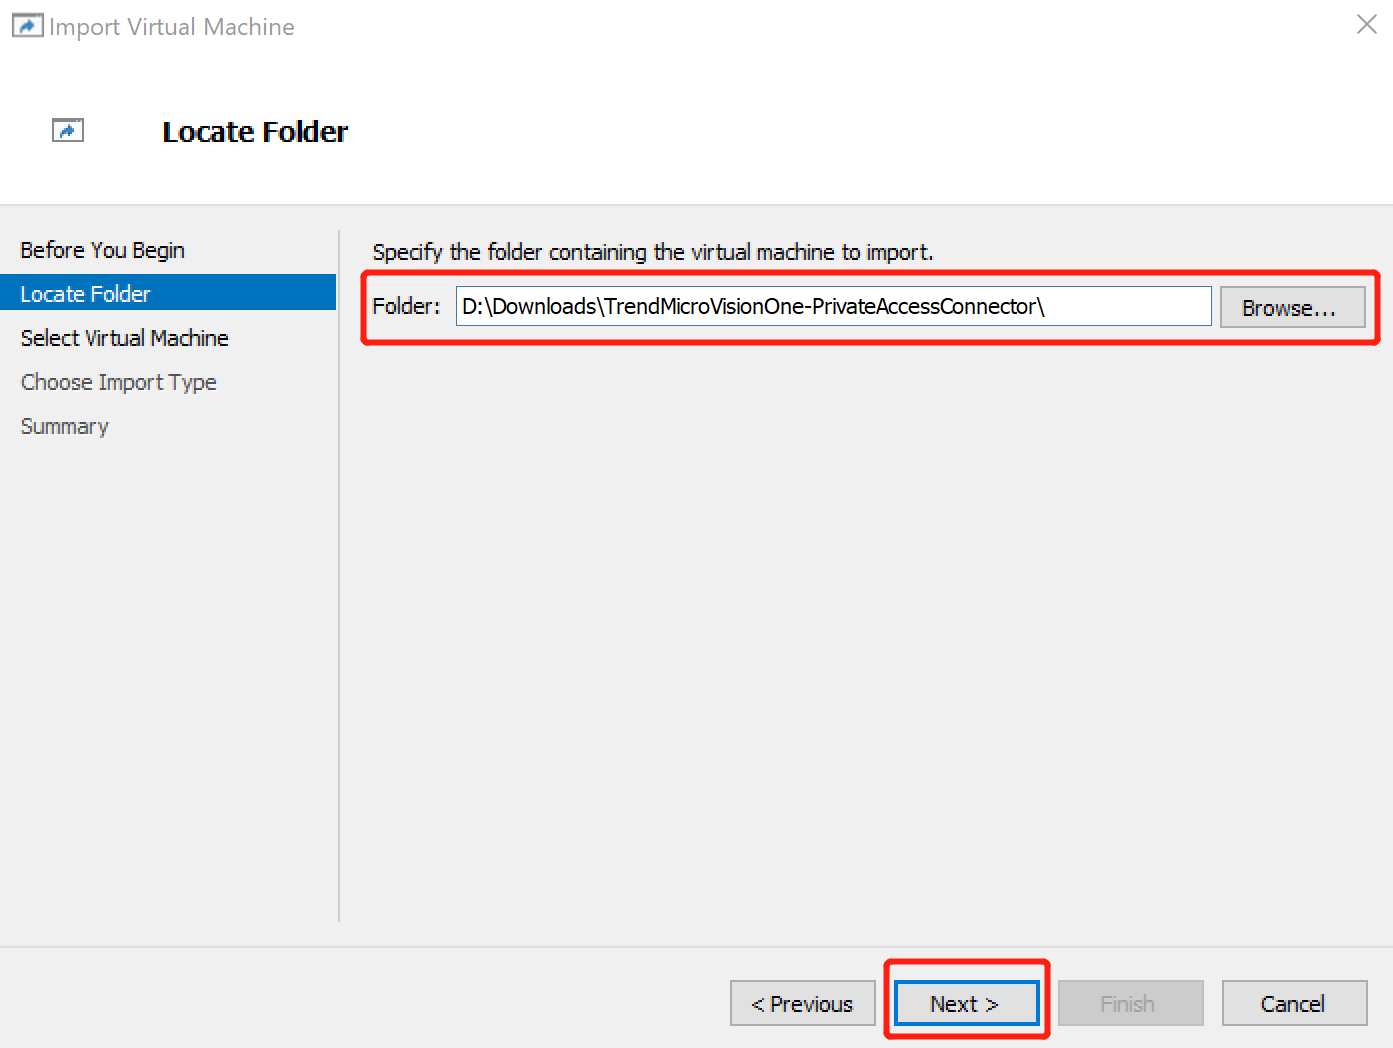
- Find and select the location of the extracted image, then click
Next.
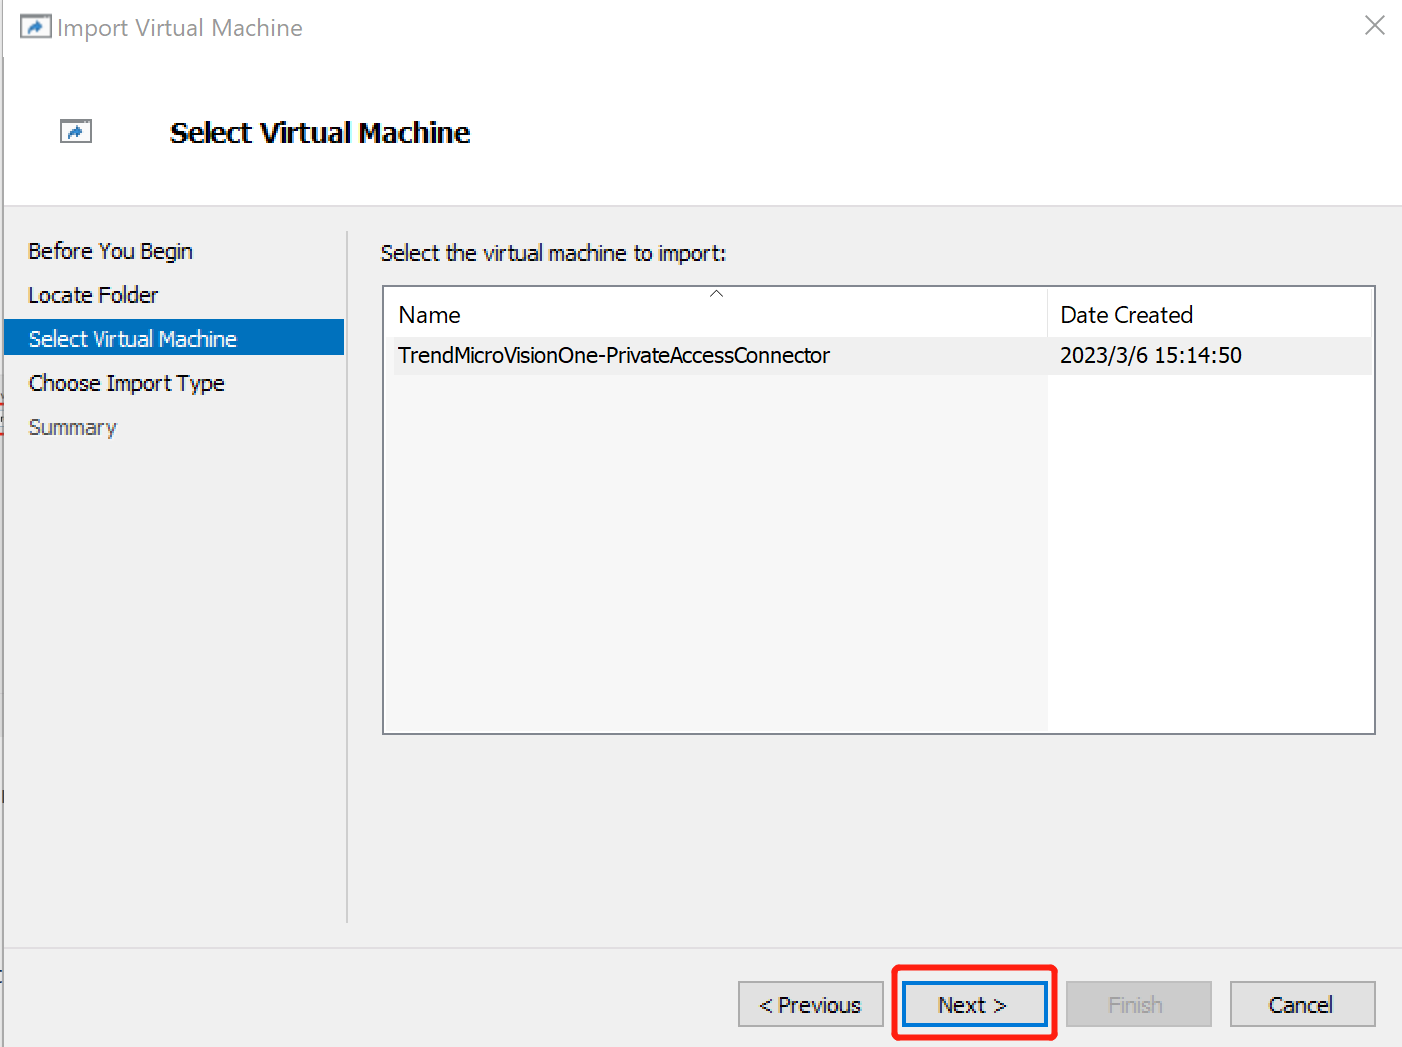
- Select the Private Access Connector image and click
Next.
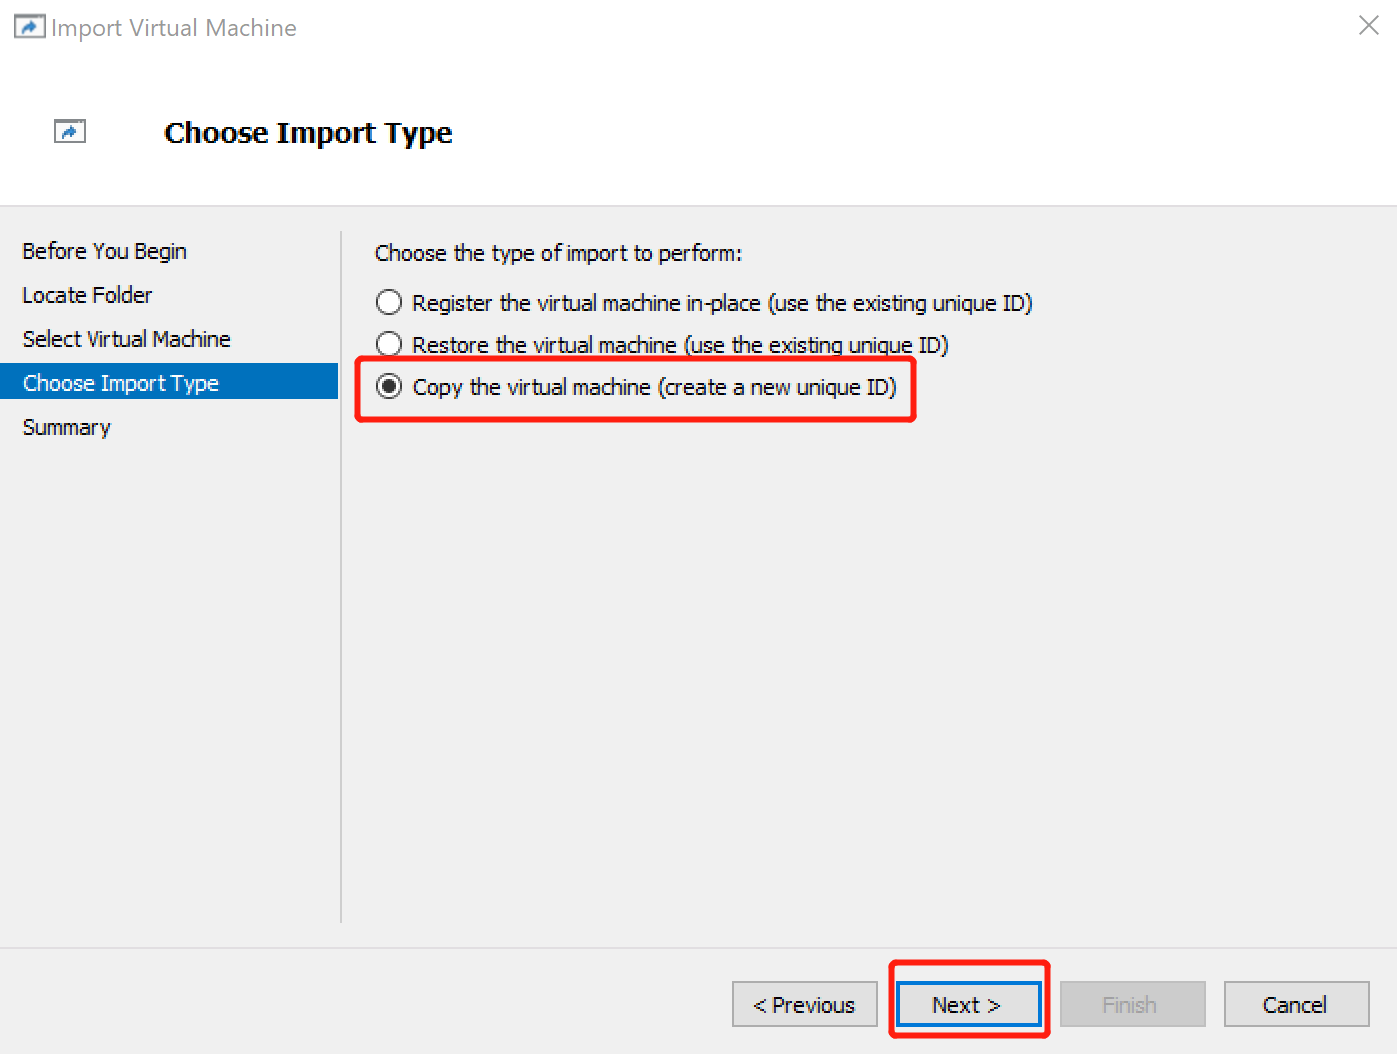
- Select Copy the virtual machine (create a new unique
ID) and click Next.
- If you want to choose a destination other than the default, specify the
location on the Choose Folders for Virtual Machine
Files screen.
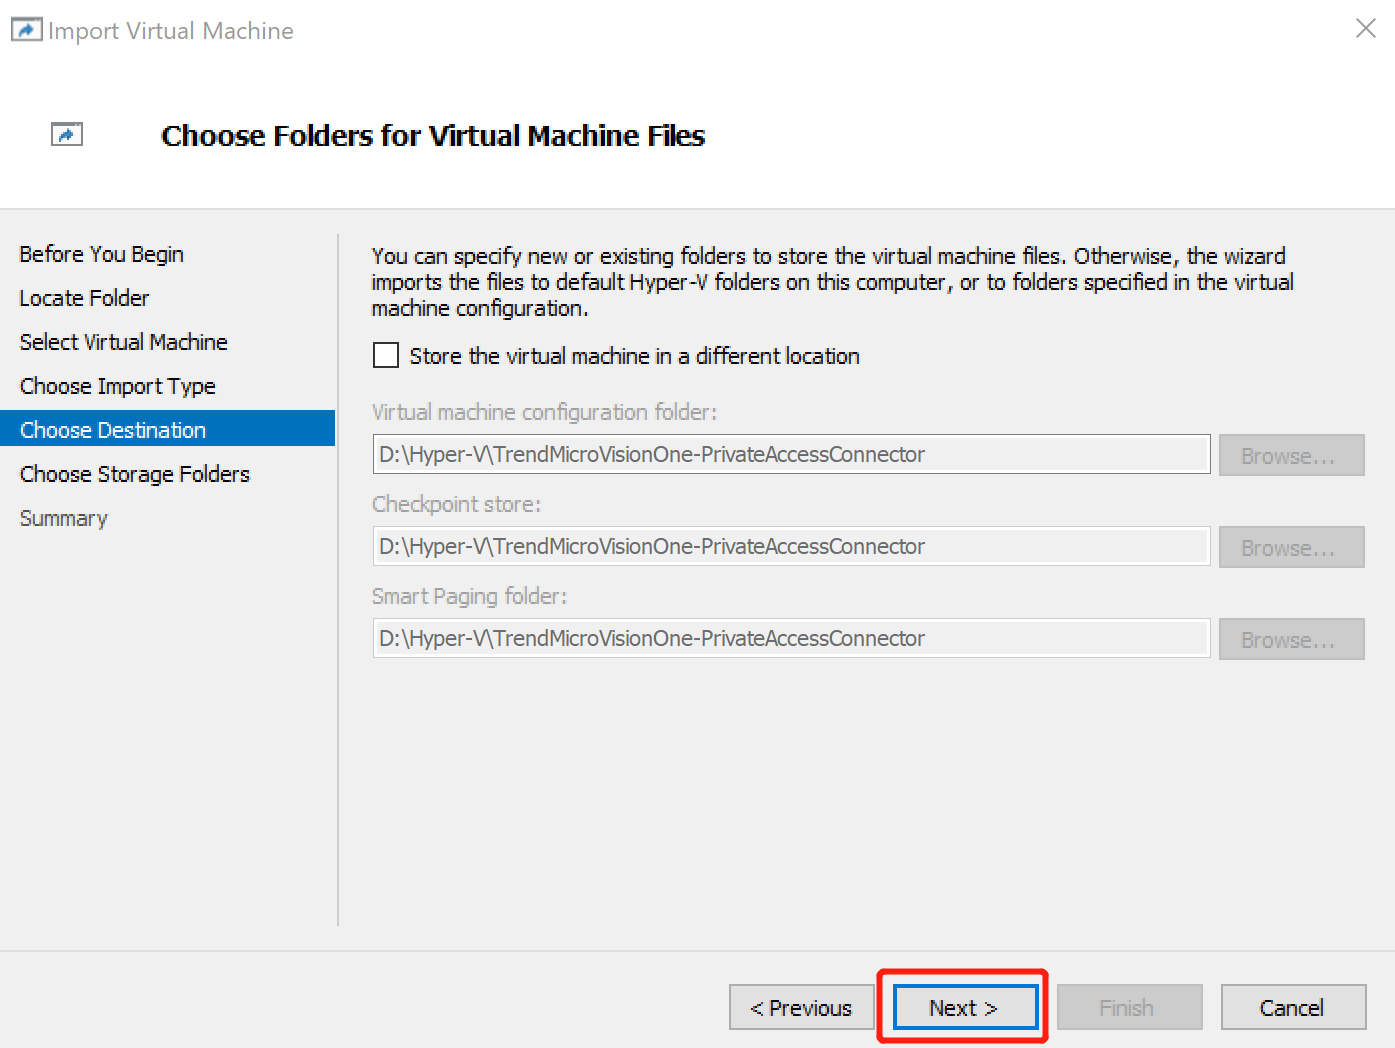
- Click Next.
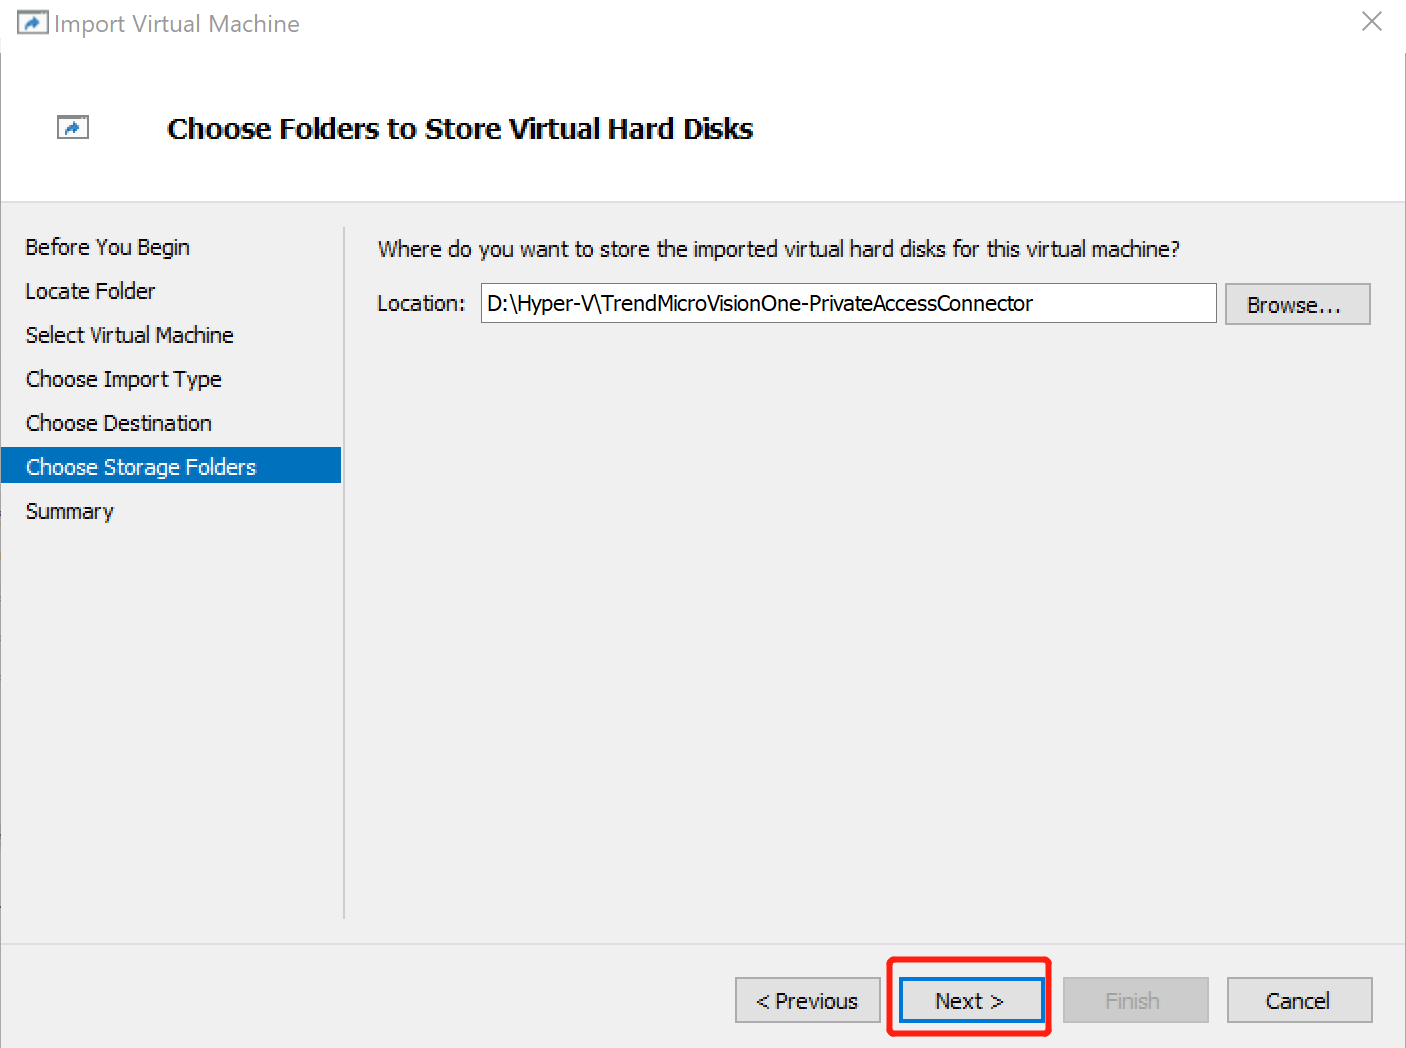
- Specify the location to store the virtual hard disks and click
Next.
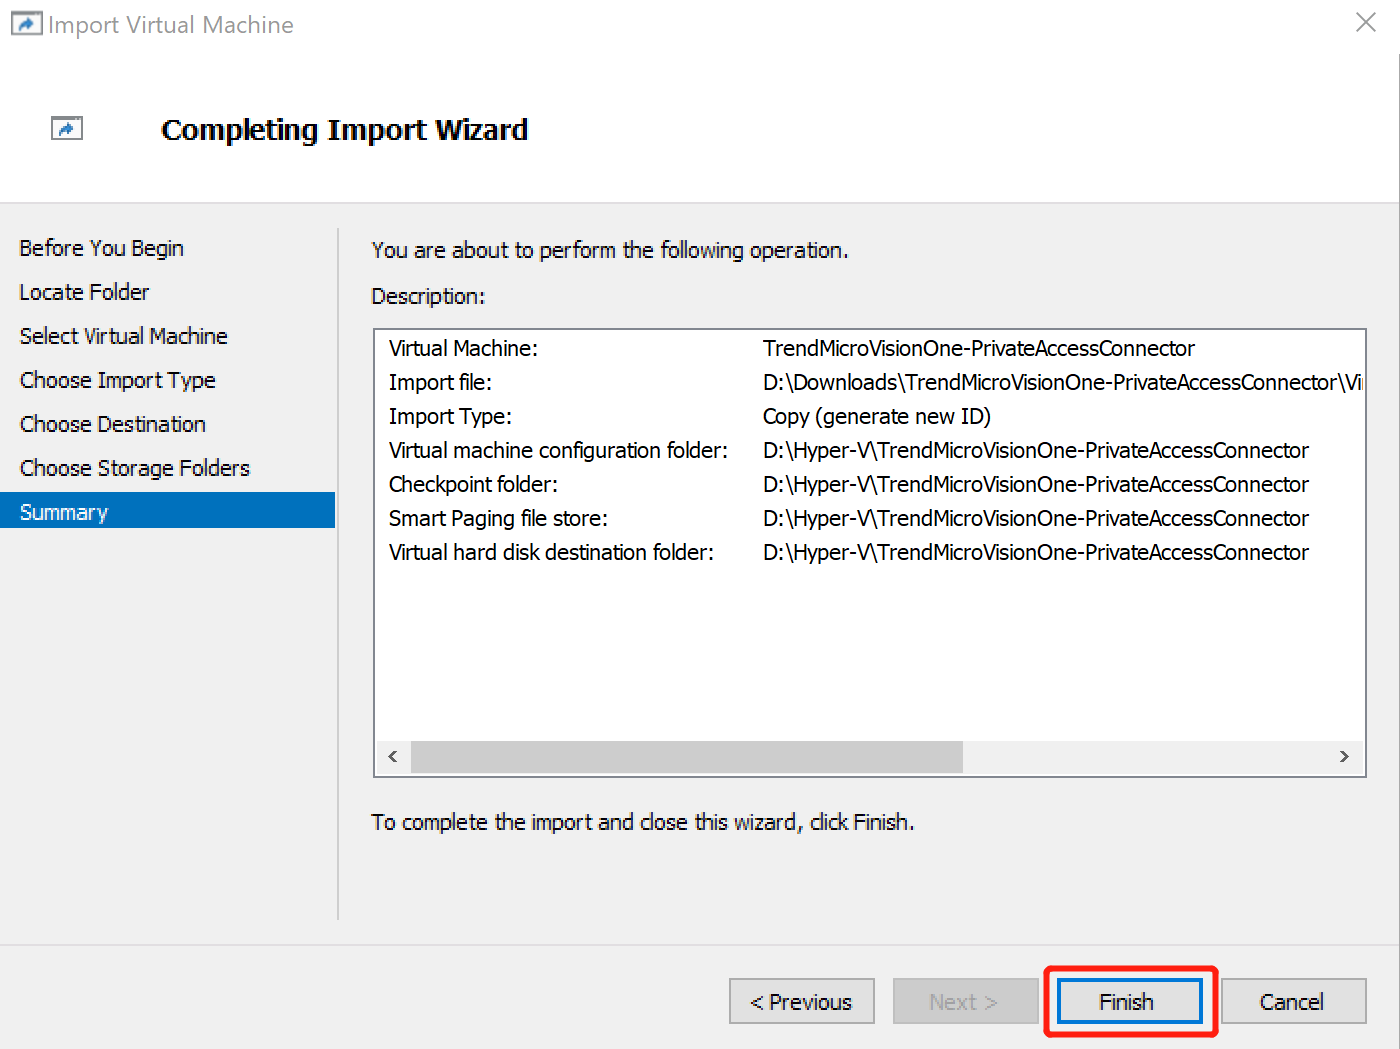
- Review the information and click Finish.
- Power on the Private Access Connector virtual machine and configure settings in
the Command Line Interface (CLI).
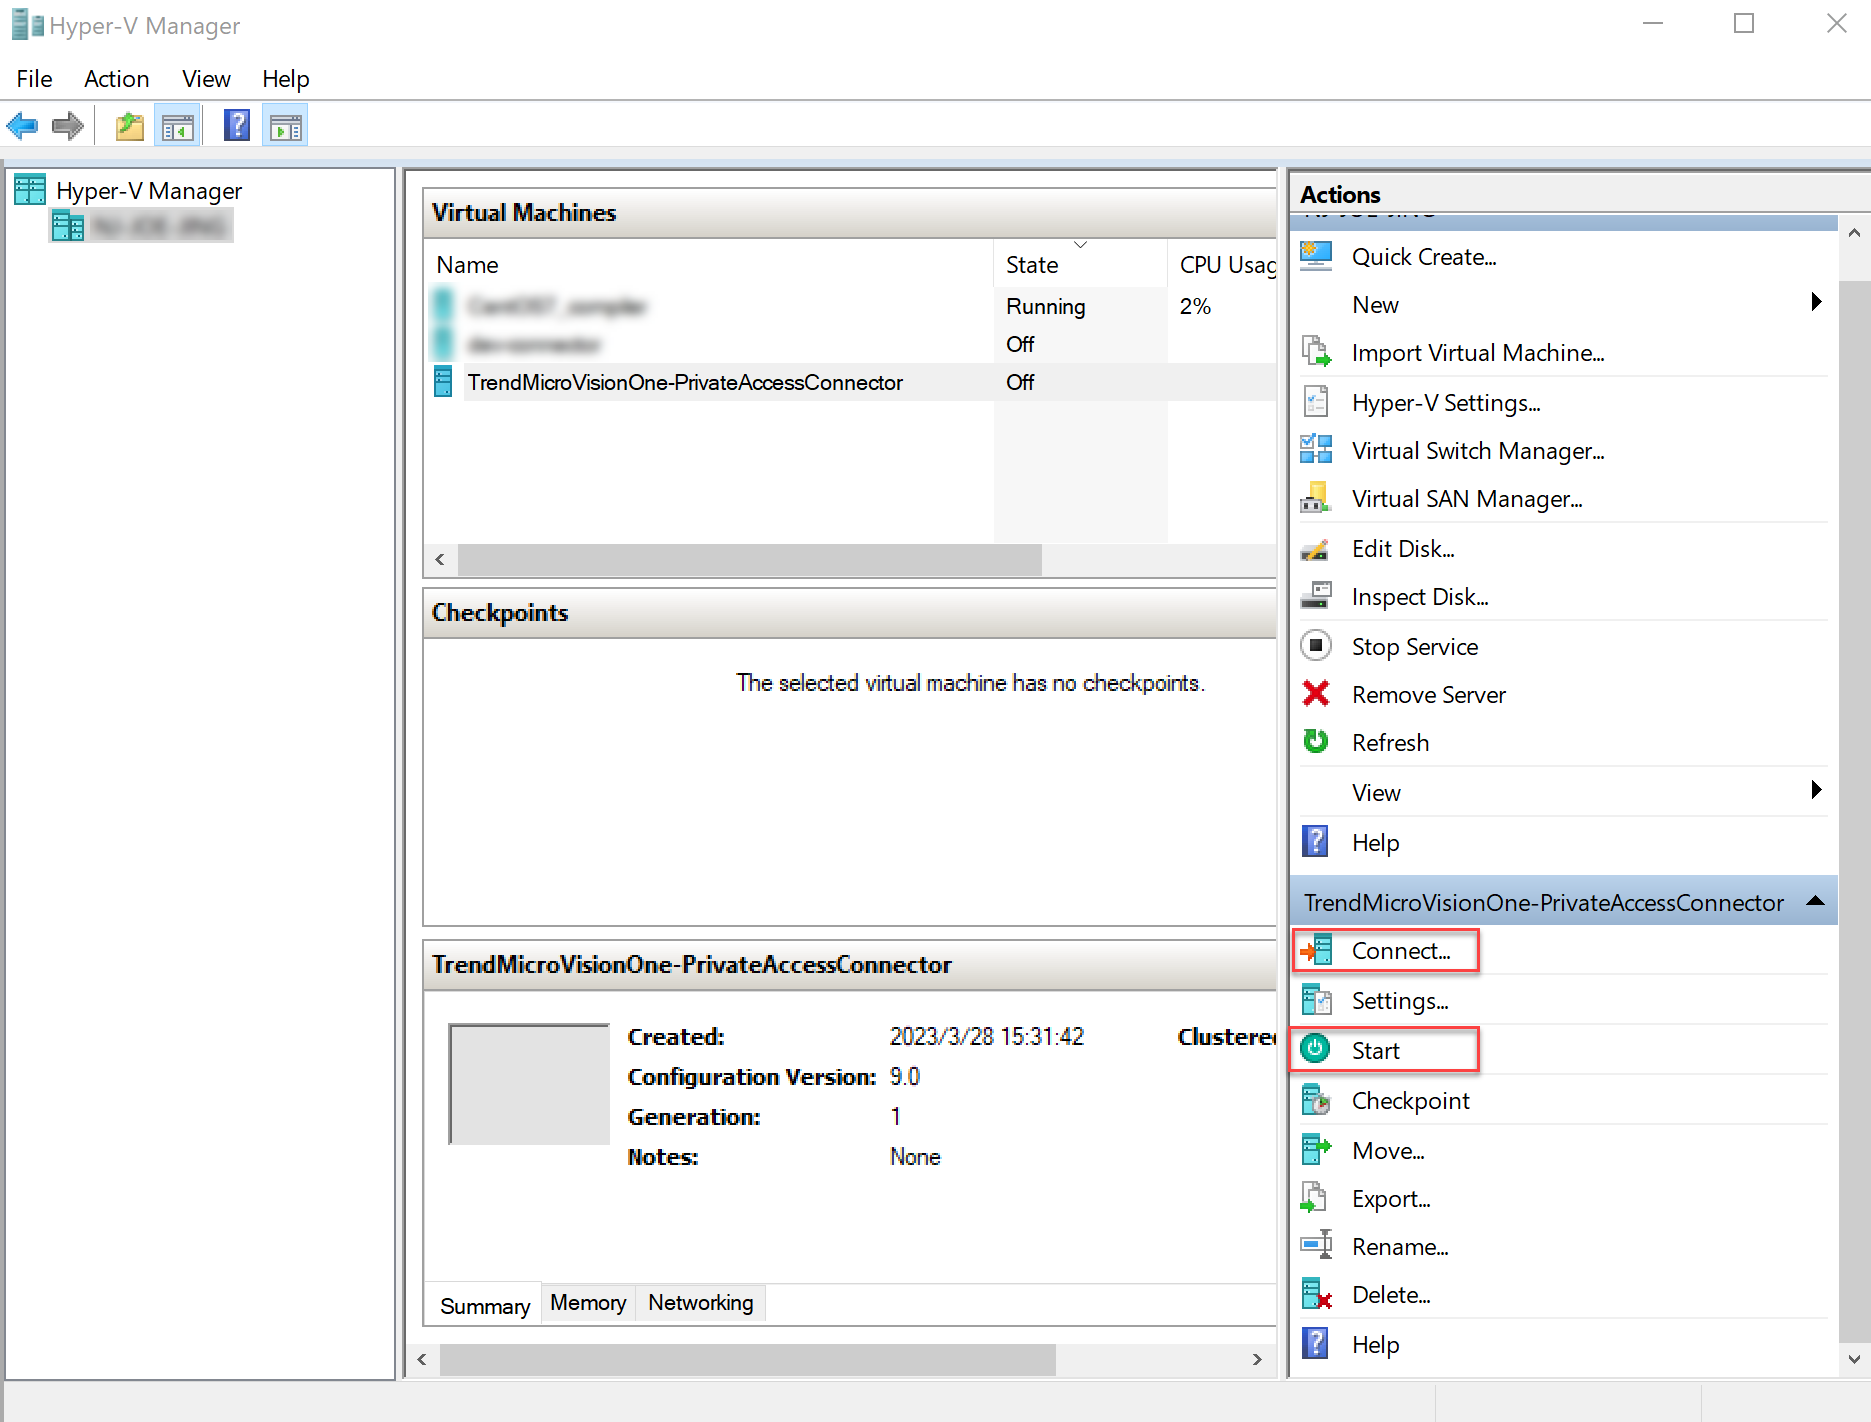
- In the Microsoft Hyper-V console, find and select the Private Access Connector virtual machine.
- In the Actions panel, click Start to power on the virtual machine.
- Click Connect... to open the virtual machine
console.
- Sign in to the Private Access Connector virtual appliance with the
default credentials.
-
User name: admin
-
Password: saseztna
-
- In the Command Line Interface (CLI), type passwd
and press ENTER to change the password.

Note
-
The new password cannot be the same as the default password.
-
The admin user and privileged mode share the same password.
-
- Switch to privileged mode with the enable
command, and provide the updated password when prompted.The command prompt changes from > to #.
- To check the network configuration, type the
ifconfig command.
Note
The default IP assignment method is DHCP. If your company does not use a DHCP server, use the Private Access Connector CLI commands to configure your network settings manually.You can use the assigned IP address to sign into the virtual appliance via SSH. - To configure the time zone manually, type the configure
timezone <timezone> command.
Note
The default time zone is America/Los_Angeles. - Verify NTP settings.
-
To check current NTP server settings, type the show ntp server command.
-
Type the show ntp status command to check that the virtual appliance can connect to the NTP server.
-
To change the NTP server, type the configure ntp server <address> command.
Note
-
The Private Access Connector requires a connection with an NTP server to synchronize the system clock. The default setting is the public NTP server
0.pool.ntp.org. -
To allow access to public NTP servers, verify that your firewall is configured to allow outbound UDP traffic on port 123.
-
After configuring the NTP, it may take several minutes for the virtual appliance to connect and synchronize with the NTP server. While the virtual appliance is synchronizing, checking the NTP status may return an incorrect or unsuccessful status.
-
- Register the Private Access Connector virtual appliance to Trend Vision One with
the register <registration_token> command
using the registration token you copied from the Trend Vision One
console.
Note
-
If your environment uses a local NTP server, verify that the NTP server synchronizes with the local time to ensure successful registration.
-
Trend Micro recommends using an SSH client to perform registration, as you can easily copy and paste the registration token.
-
- Use the Private Access Connector CLI commands to configure other
settings as required.After successful deployment, the Private Access Connector virtual appliance appears under the corresponding connector group on the Private Access Connectors tab on the Trend Vision One console.