

Procedure
- For customers that do not already have Conformity, sign up for a free
trial.
- Go to the sign up form.
- Provide all the required information and complete the reCAPTCHA.
- Agree to the terms and conditions, privacy notice, and data collection notice.
- Click Sign Up.
- Click the Verify Email link in the confirmation email sent to your business email account.
- Sign in to activate your Trend Cloud One
console.Allow a few moments to provision your new console.
- Specify an Account Alias for your account.You can change your alias later using the console.
- Specify the Region in which Trend Cloud One stores all of your data.
- Click Continue.
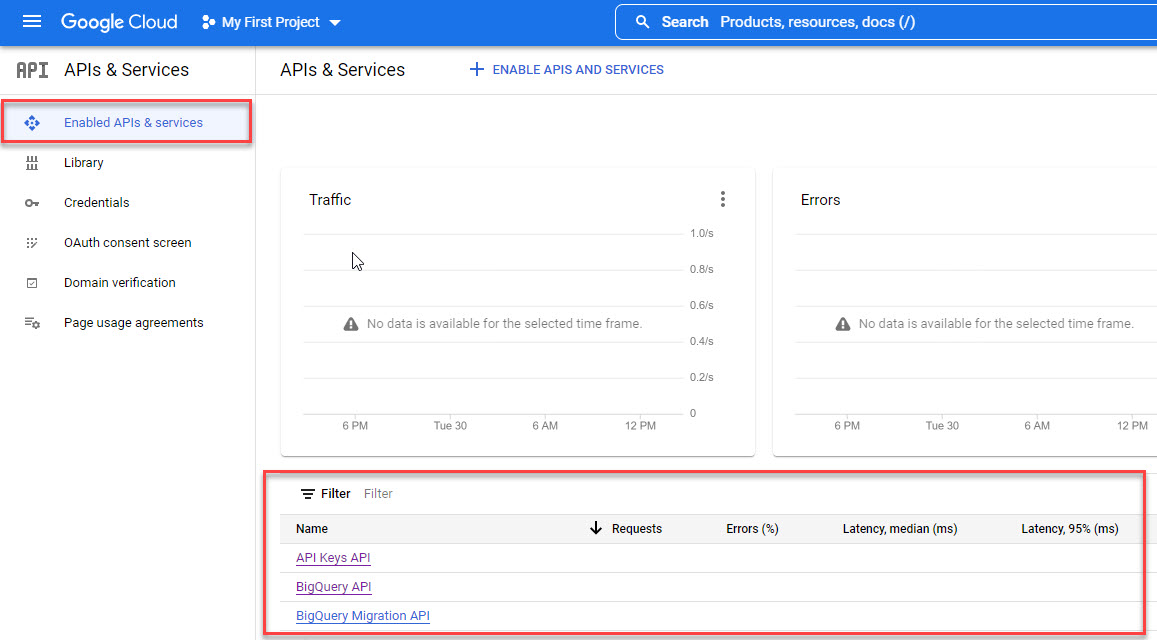
- Ensure that you go to Google Cloud and enable all APIs that Conformity
requires.
- Sign in to Google Cloud.
- In the left menu, click .

- Verify that all of the following APIs display in the Enabled
APIs & services table.
-
API Keys API
-
BigQuery API
-
Cloud Dataproc API
-
Cloud DNS API
-
Compute Engine API
-
Cloud Key Management Service (KMS) API
-
Cloud Logging API
-
Cloud Pub/Sub API
-
Cloud Resource Manager API
-
Cloud SQL Admin API
-
Cloud Storage API
-
Identity and Access Management (IAM) API
-
Kubernetes Engine API
-
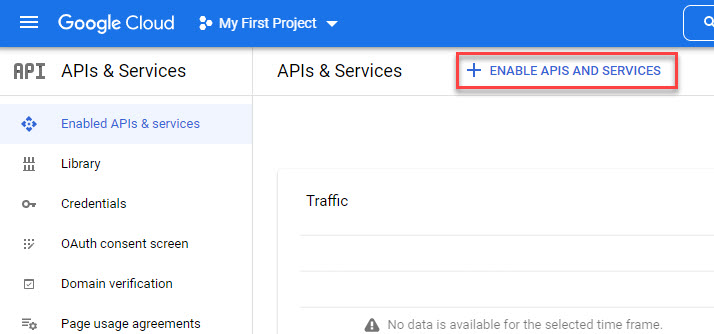
- Enable all missing APIs by repeating the following steps.
-
Click ENABLE APIS AND SERVICES.
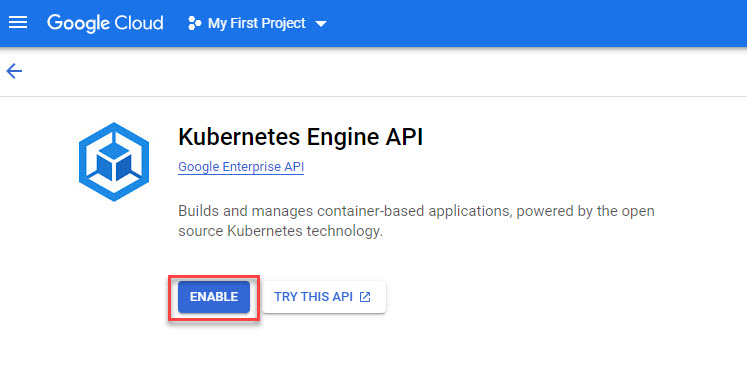
-
Search for the API name and click the correct result.
-
Click Enable.
-
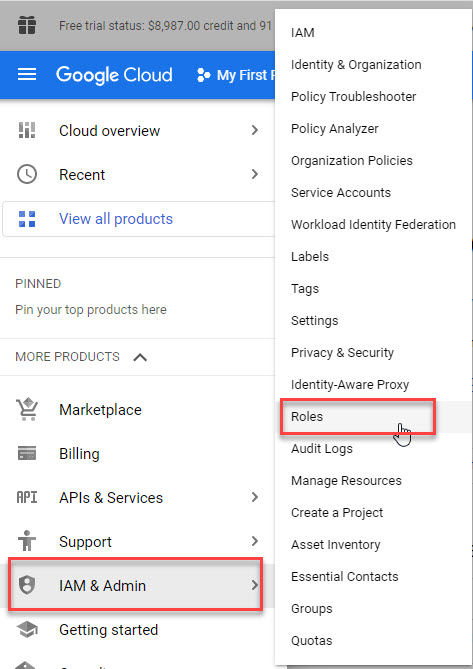
- Create the Google Cloud role for usage with the Conformity service
account.
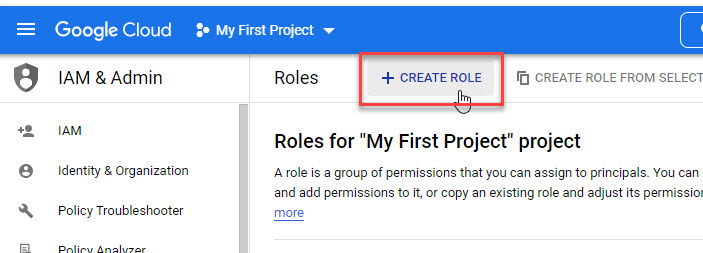
- In the left menu, go to .
- Click CREATE ROLE.
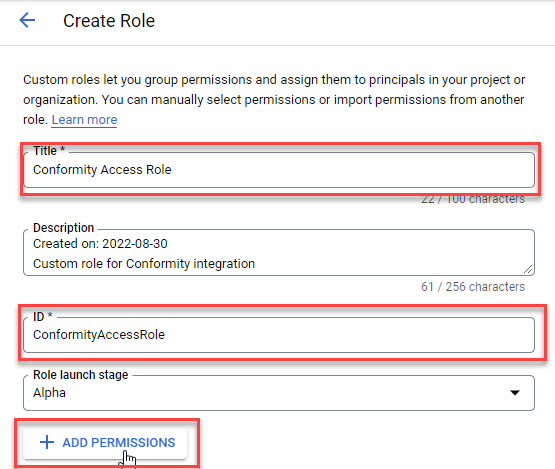
- Specify the Title and ID for the new role.
- (Optional) Provide a description.
- Do not modify the default Role launch stage: Alpha.
- Click ADD PERMISSIONS.
- Next to the Filter, type the name of the
permission.
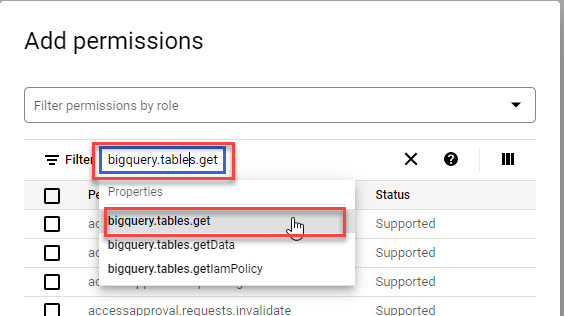 The role requires all the 34 following permissions:
-
apikeys.keys.list
-
bigquery.datasets.get
-
bigquery.tables.get
-
cloudkms.cryptoKeys.getIamPolicy
-
cloudkms.cryptoKeys.list
-
cloudkms.keyRings.list
-
cloudkms.locations.list
-
cloudSql.instances.list
-
compute.backendServices.list
-
compute.firewalls.list
-
compute.globalForwardingRules.list
-
compute.images.getIamPolicy
-
compute.images.list
-
compute.instances.list
-
compute.networks.list
-
compute.projects.get
-
compute.sslPolicies.list
-
compute.subnetworks.list
-
compute.targetHttpsProxies.list
-
compute.targetSslProxies.list
-
compute.urlMaps.list
-
container.clusters.list
-
dataproc.clusters.list
-
dns.managedZones.list
-
dns.policies.list
-
iam.serviceAccounts.get
-
logging.logMetrics.list
-
logging.sinks.list
-
monitoring.alertPolicies.list
-
pubsub.topics.list
-
resourcemanager.projects.get
-
resourcemanager.projects.getIamPolicy
-
storage.buckets.getIamPolicy
-
storage.buckets.list
-
- Select the permission in the list and click
Add.
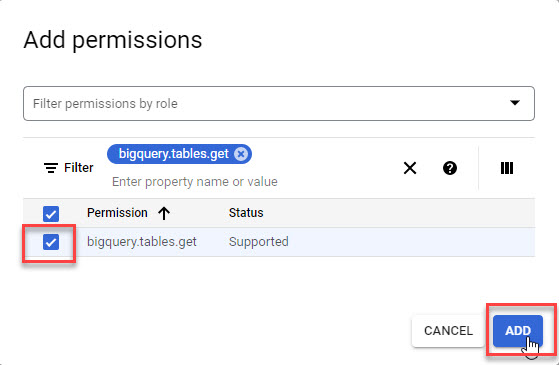
- Repeat for all permissions.
- After adding all the required permissions, click the check box at the top of the list
for each page until all 34 permissions have been assigned.
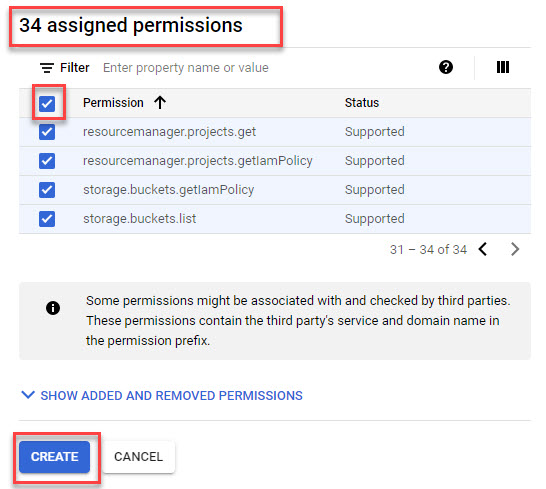
- Click CREATE.
- In the left menu, go to .
- Create the service account in Google Cloud used for the Conformity
integration.
- In Google Cloud, select the project that you want to protect with Conformity.
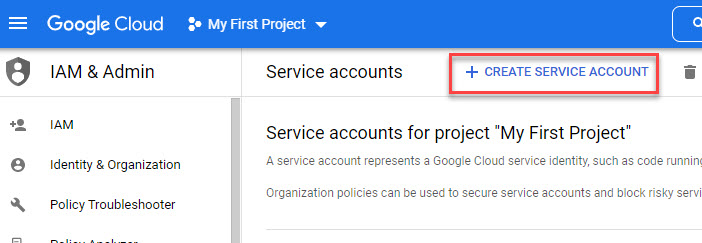
- In the left menu, go to .
- Click CREATE SERVICE ACCOUNT.
- Specify the Service account name and a Description, and click CREATE AND CONTINUE.

- Select the customer role you created in step 3 by clicking Select a role and locating the role.
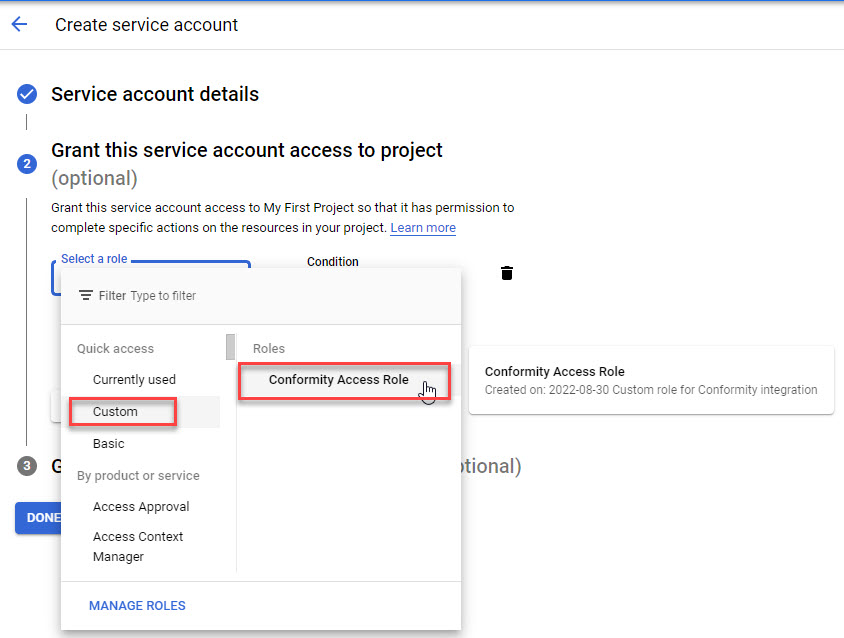
- Click CONTINUE.
- Click DONE.

Note
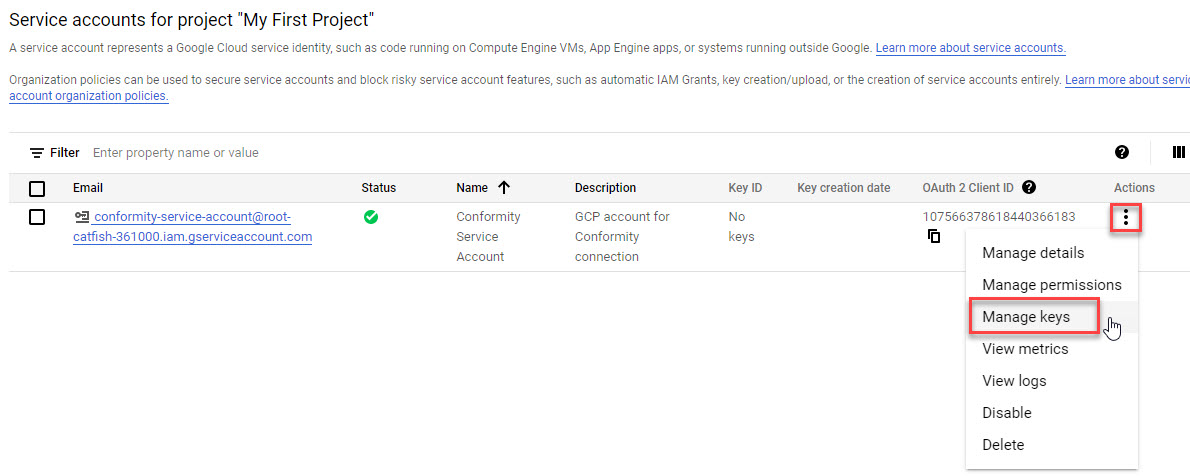
You do not need to grant users access to this service account. - Create the key used by the service account.
-
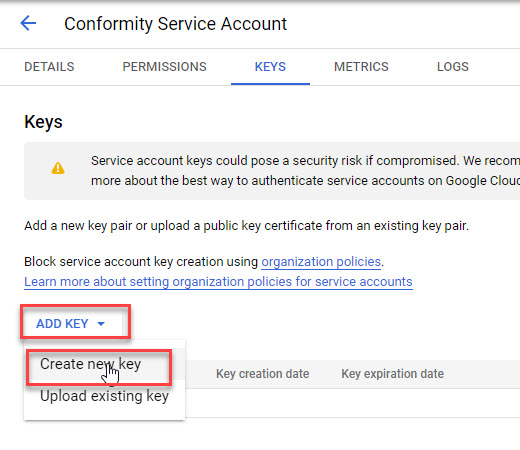
In the Action column for the service account you just created, click the button and select Manage keys.
-
Click ADD KEY and Create new key.
-
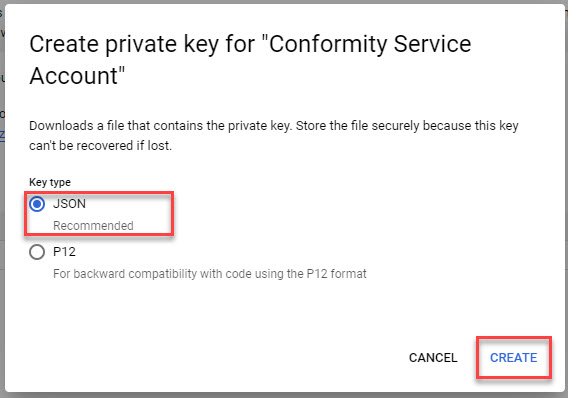
Leave the default JSON key type and click CREATE.
-
Save the generated JSON file in a secure location for use in the Conformity console.
-

Important
Add the service account to all projects that you want to protect with Conformity. - Create your Google Cloud project in Conformity.
- Sign in to Trend Cloud One.
- Click Conformity.
- Click Google Cloud Project and click Next.
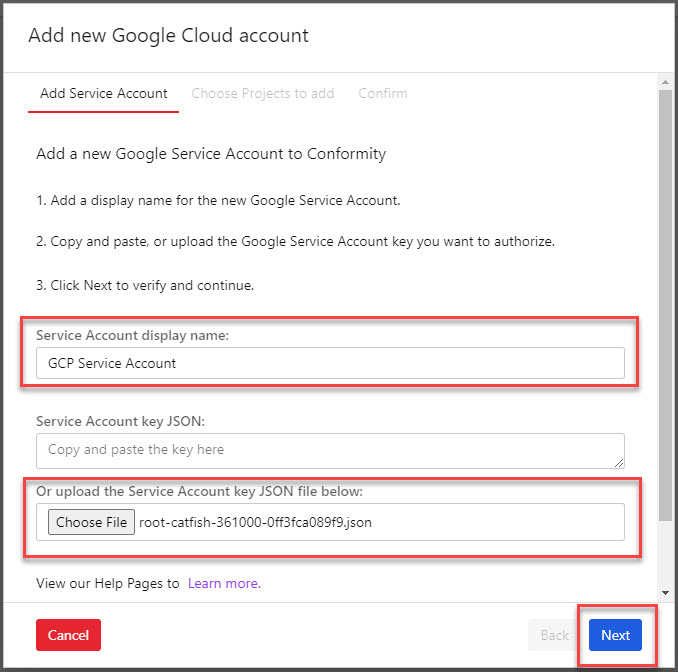
- Specify the display name of the service account used in the Conformity console.
Note
The display name does not need to match the name of the service account in Google Cloud. - Upload the JSON file containing the Google Cloud service account key generated in
step 4 and click Next.
- Select all the Google Cloud projects you want to protect using Conformity and click
Next.
Note
You can only view Google Cloud projects that you assigned the service account to in the Google Cloud console.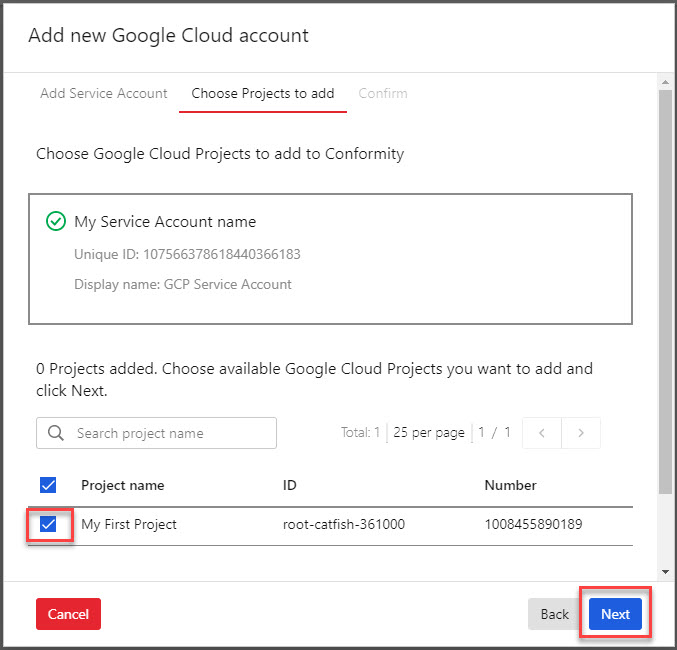
- Review the settings and click Finish.
- Connect Conformity with Cyber Risk Exposure Management using an API
Key.
- Go to the home screen of the Trend Cloud One console, and click User Management.
- In the left menu, click API Keys.
- Click New.
- Specify the API Key Alias.
- In Role, select Read Only.
- Click Next.
- Copy the API Key immediately.
Important
You cannot access the API Key again after closing the dialog. Copy and store the API Key in a safe location. - In the Trend Vision One console, open the Trend Cloud One - Conformity data source panel.
- Paste the API Key from Conformity in the API Key field.
- Acknowledge that your Conformity data may be transferred to another data center based on the configured Trend Vision One region.
- Click Save.