

Create an S3 bucket and set up a custom role with custom permissions to allow TrendAI Vision One™ to connect to your S3 buckets.
The following instructions detail how to create an S3 bucket in AWS, and how to
configure a custom role and permissions in the AWS IAM console to allow you to
connect to your configured S3 bucket.
ImportantThe following instructions are valid for the Amazon AWS console, S3 console, and
IAM console as of July 2023. If you are using a newer version, refer to the
official product/service documentation.
|
Procedure
- Create a new S3 bucket.
- Sign in to your AWS management console and navigate to the S3
console.You can access the S3 console directly at https://console.aws.amazon.com/s3/.
- In the S3 console, click Create bucket.
- In the General Configuration section, specify a unique Bucket name.
- (Optional) Configure other settings as needed for your security environment.
- Click Create bucket.
- Find the bucket you created and click the bucket name.
- Click the Properties tab.
- Copy the bucket Amazon Resource Name (ARN).
- Sign in to your AWS management console and navigate to the S3
console.
- Create a role in the AWS IAM console to allow TrendAI Vision One™ to connect to your S3 bucket.
- In the AWS management console, navigate to the IAM console.You can access the IAM console directly at https://console.aws.amazon.com/iam/.
- In the IAM console, go to .
- Click Create role.
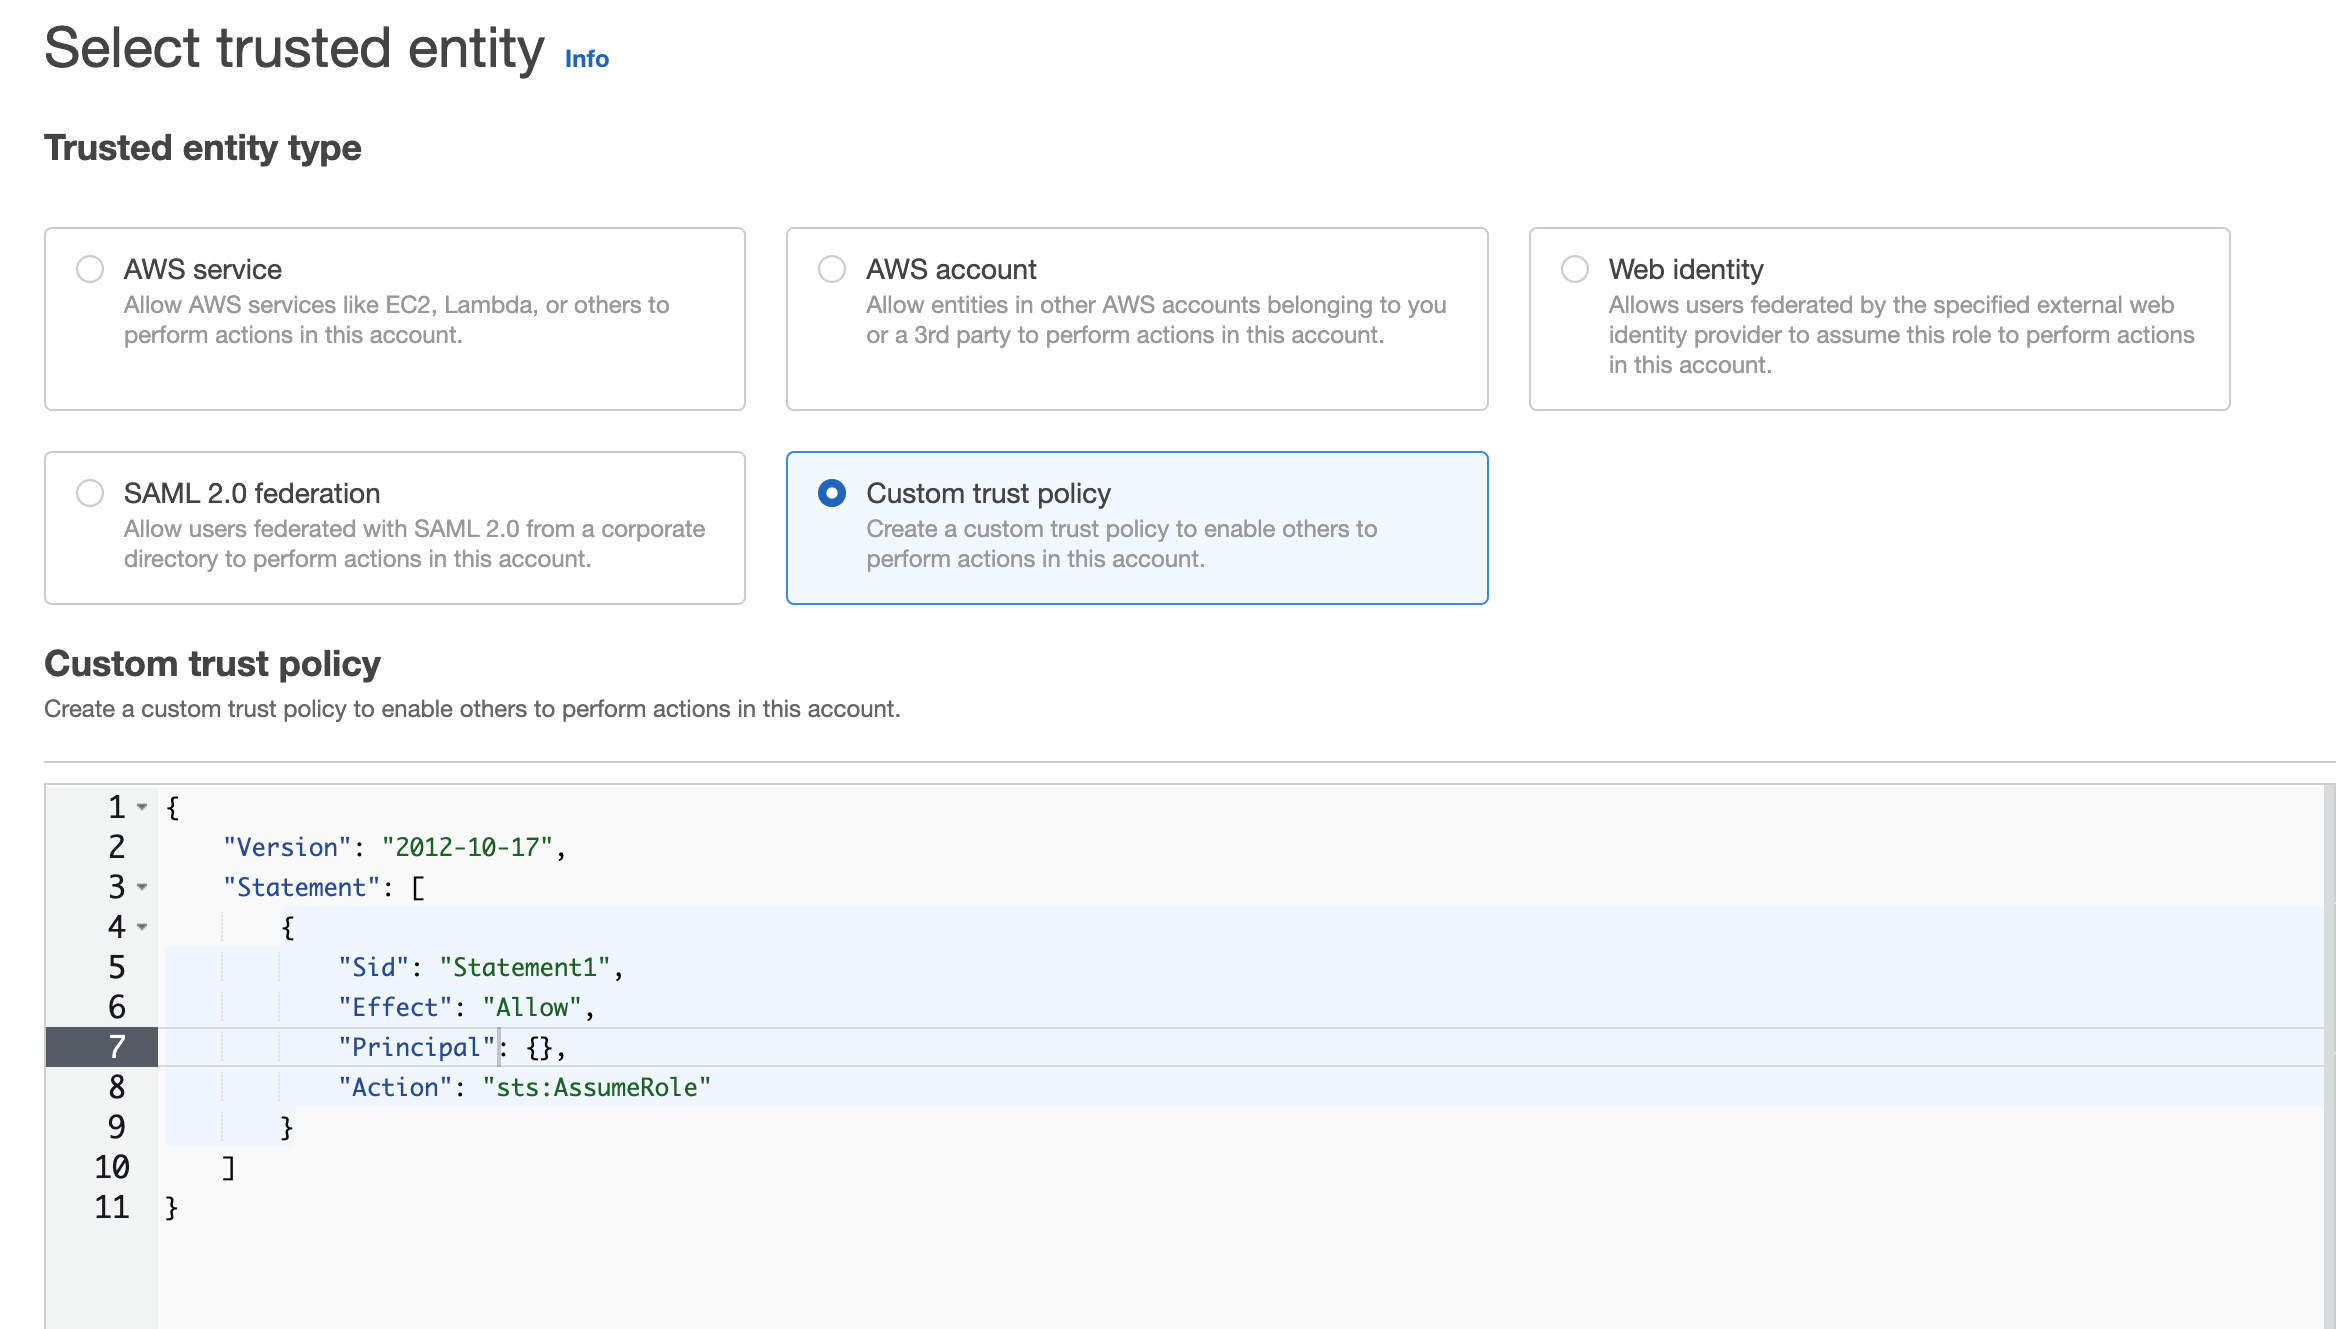
- For Trusted entity type,
select Custom trust policy.The Custom trust policy section appears.
- For
Principal, type "AWS": and then the Trust Role ARN: arn:aws:iam::466026206465:role/PROD-TrendV1S3Exporter.You can also copy and paste the full line as follows:"AWS":"arn:aws:iam::466026206465:role/PROD-TrendV1S3Exporter"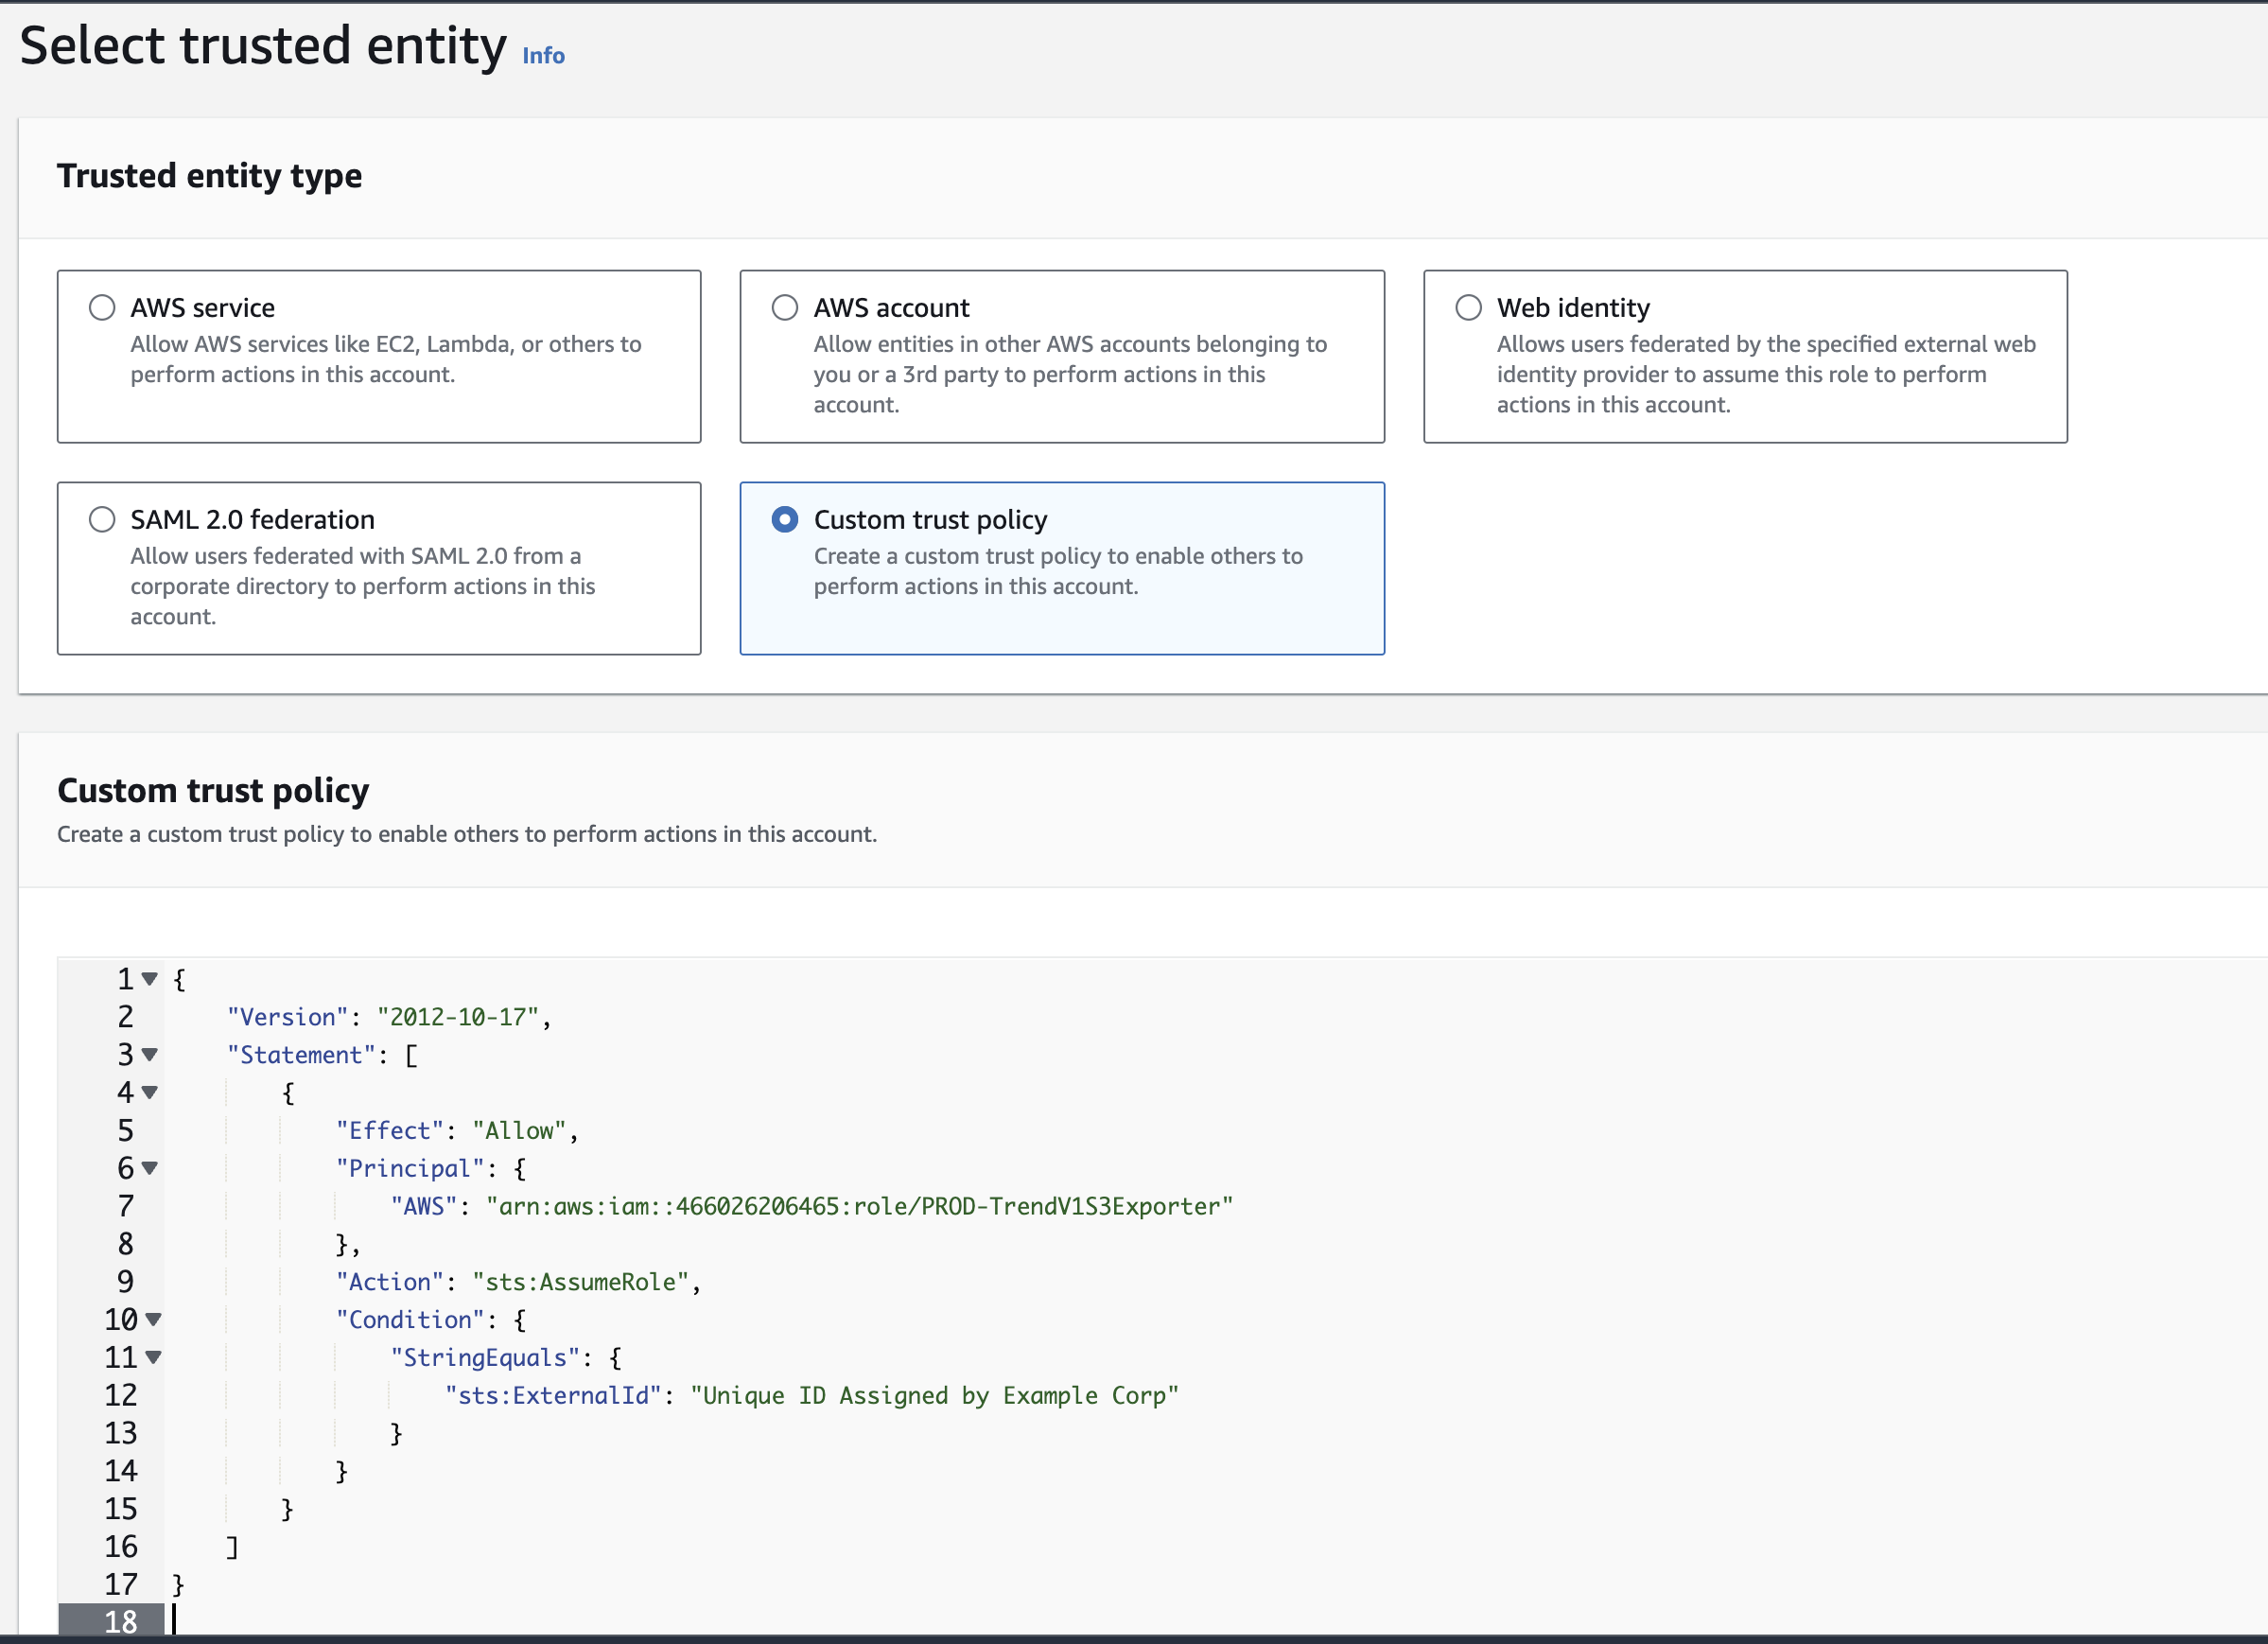
- Add a
Conditionelement to the trust policy, then type "sts:ExternalId": and paste the external ID copied from the TrendAI Vision One™ console."Principal": {"AWS": "Example Corp's AWS account ID"}, "Condition": {"StringEquals": {"sts:ExternalId": "Unique ID Assigned by Example Corp"}} - Click Next, then click Next.
- In the Name, review, create screen, specify a unique Role name.
- Click Create role.
- Search for the role you created.
- Click the name of the role you created.
- Copy the ARN.
- In the AWS management console, navigate to the IAM console.
- Create a policy to allow TrendAI Vision One™ to connect to the bucket and role.
- In the AWS management console, navigate to the IAM console.
- In the IAM console, go to .
- Click Create policy.
- In the Specify permissions screen, locate Policy editor.
- Click JSON to view the policy code.
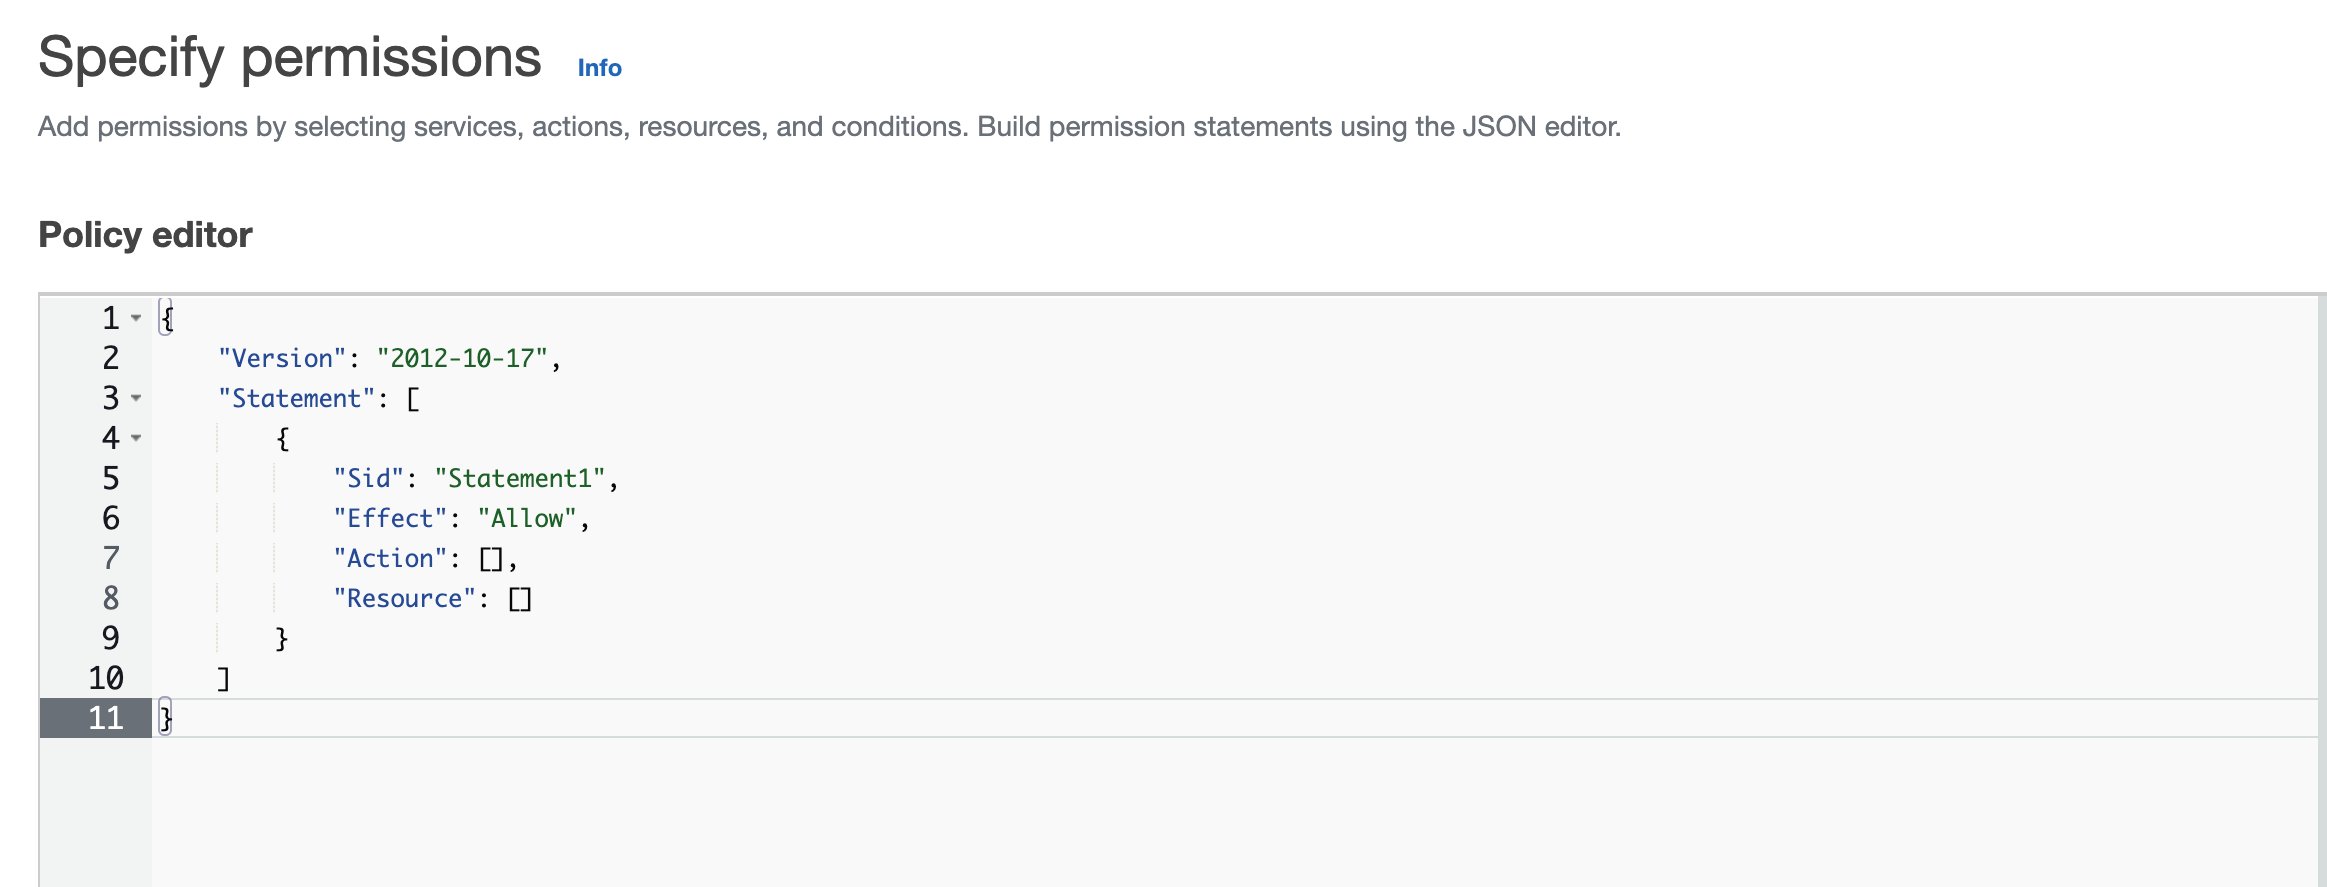
- Replace the code in the Policy editor with the following JSON format
policy:
{
    "Version": "2012-10-17",
    "Statement": [
        {
            "Effect": "Allow",
            "Action": [
                "s3:PutObject",
                "s3:ListBucket"
            ],
            "Resource": [
              "your-s3-bucket-arn",
              "your-s3-bucket-arn/*"
            ]
        }
    ]
}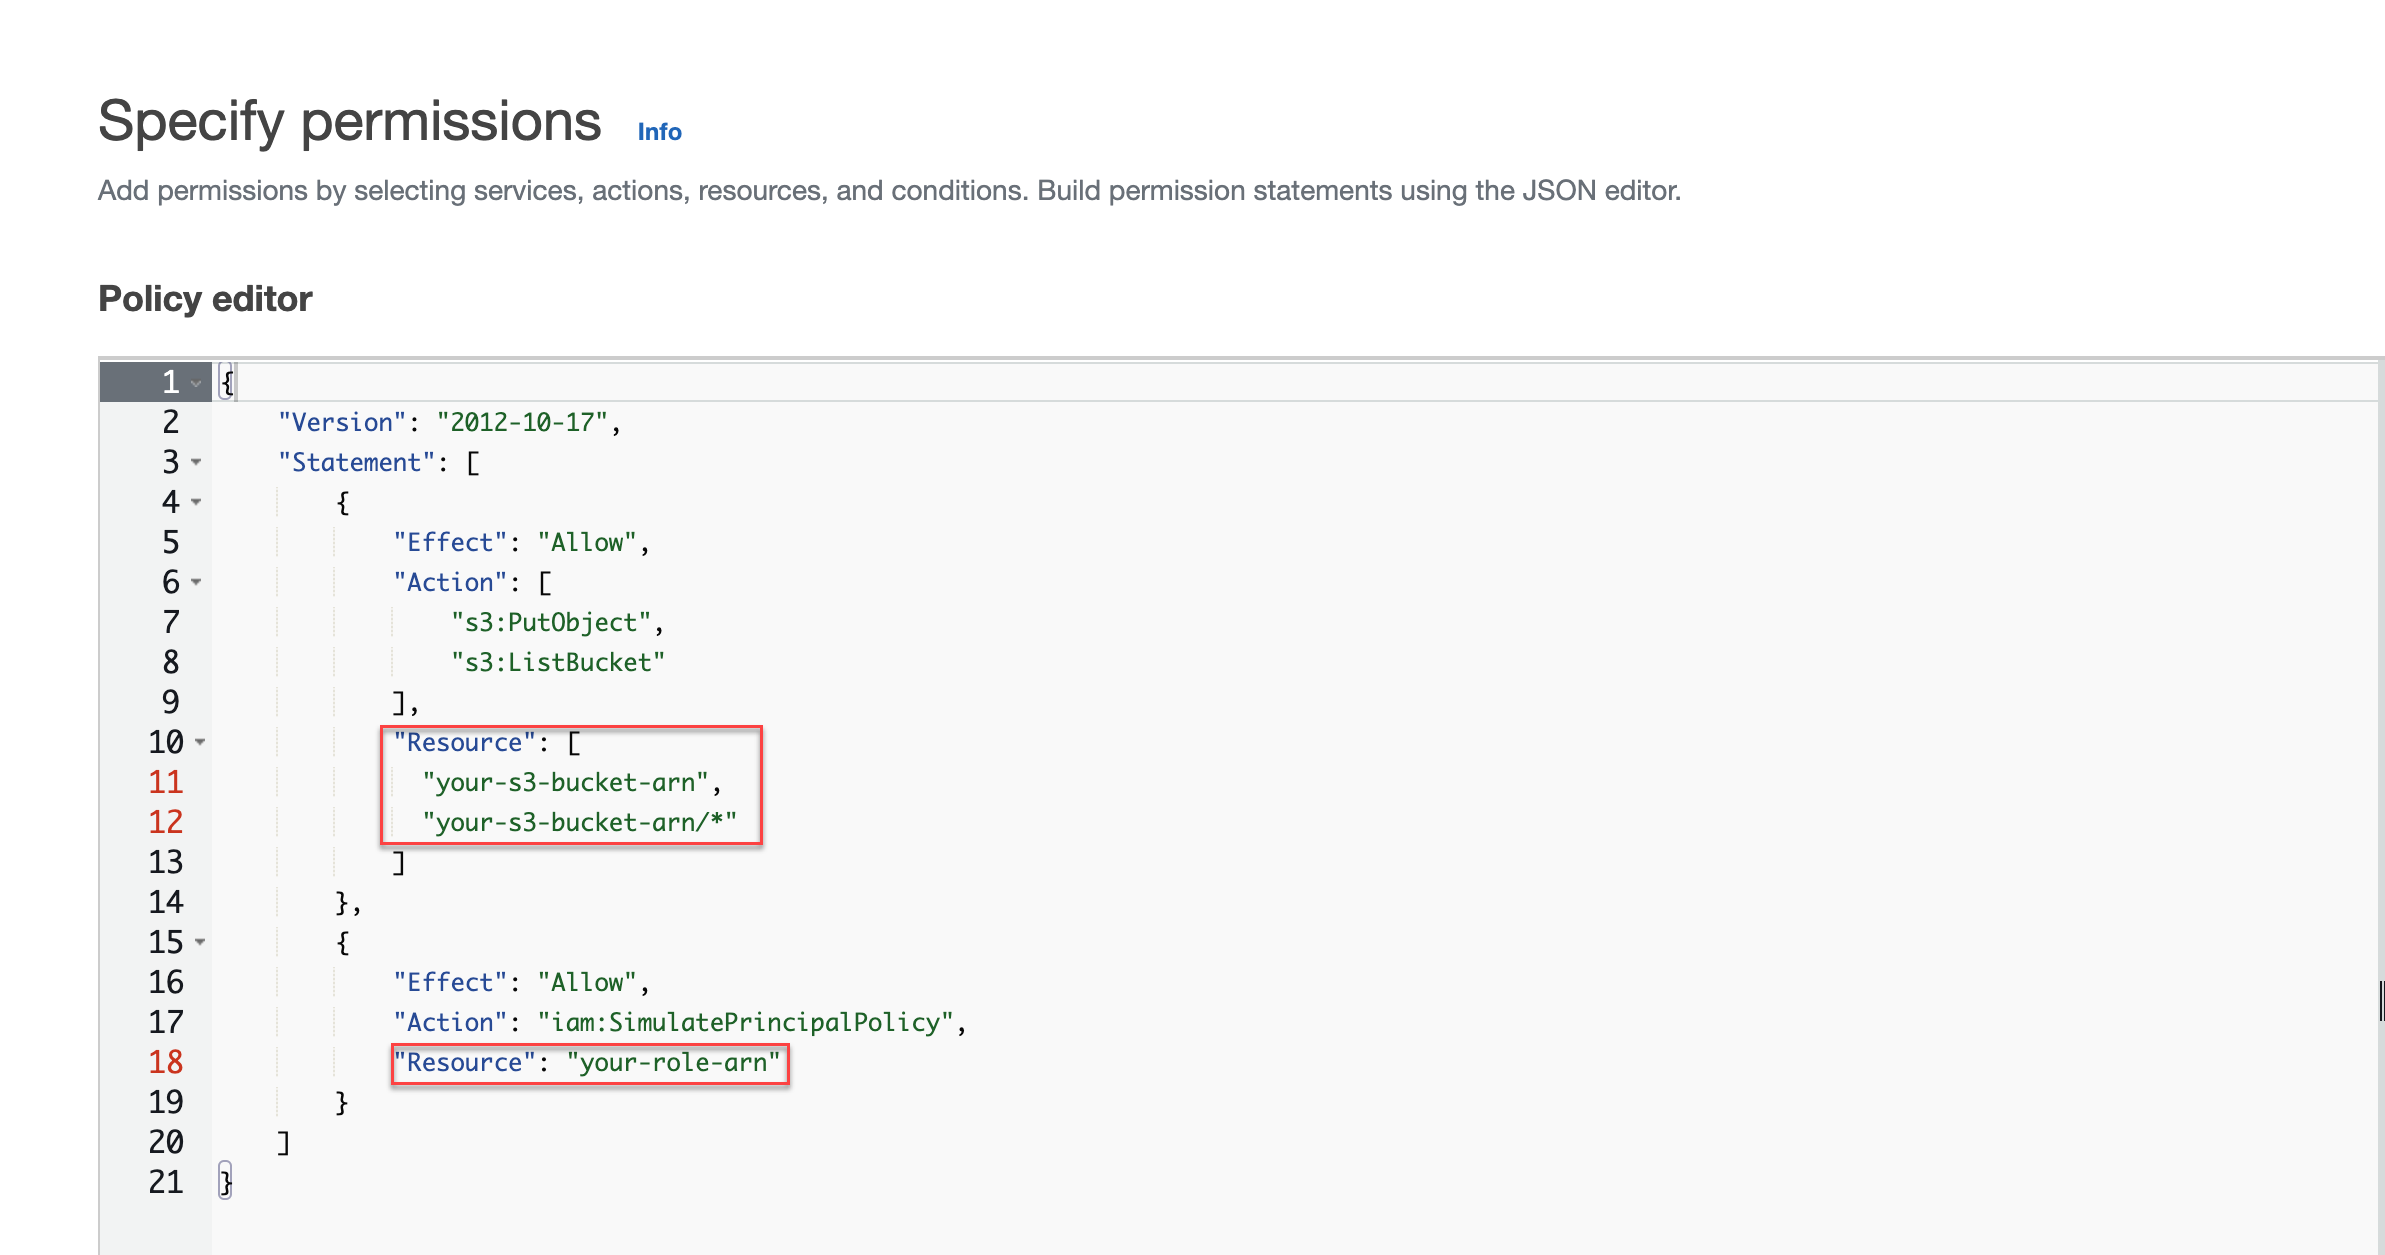
- Replace
your-s3-bucket-arnon line 11 and line 12 with the bucket ARN for the bucket you created.The following is an example configuration.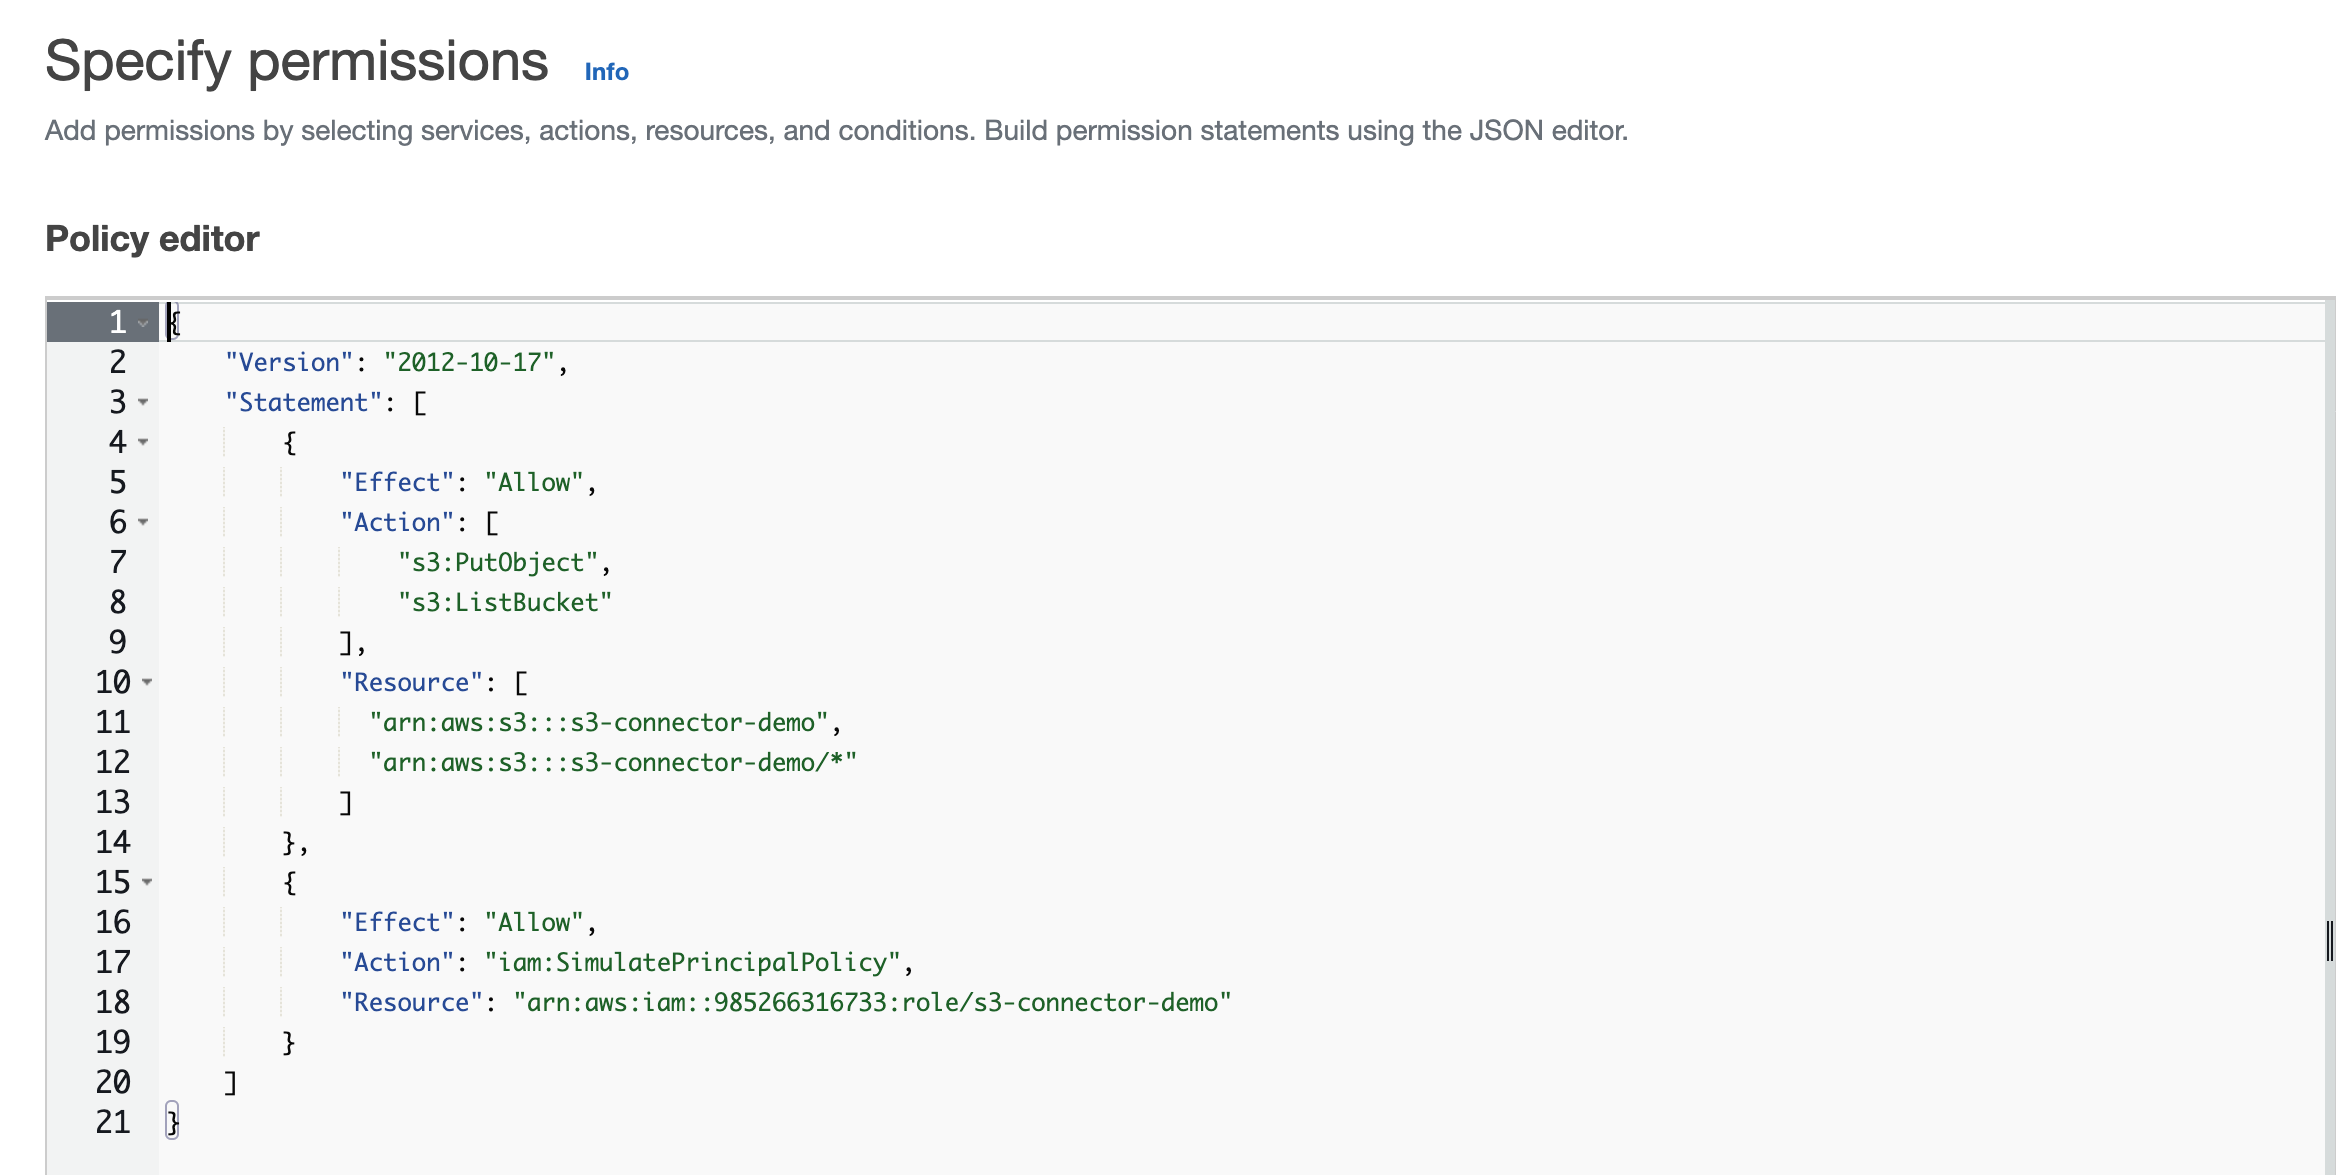
- Click Next.
- In the Review and create screen, specify a unique Policy name.
- Click Create policy.
- Attach the policy to the role.
- In the AWS management console, navigate to the IAM console.
- In the IAM console, go to .
- Search for the role you created.
- Click the name of the role you created.
- Click the Permissions tab.
- Click Add permissions, then click Attach policies.
- Search for the policy you created.
- Select the policy and click Add permissions.