Procedure
- To create a new customer:
-
Go to and click the Create Customer button.
-
Click the Create Customer shortcut (
 ) on the left of the screen.
The Specify Account Information screen appears. -
- Provide the following required account items for the customer:
-
Company
-
City
-
State: Can also be the customer's region or province
-
Account name: Must be a unique value for the parent Tier 1 channel
-
User role: Set to
Administrator
(not configurable) -
Contact person: Both the First name and Last name fields are required
-
Email address

Note
-
All other fields are optional.
-
You can configure the Emergency contact email to ensure that you have a backup contact method in case of a service disruption with the customer's email provider.
-
- In the Send account creation email field, select whether you want the system to send the email notification to the customer immediately upon creation, or on the date you set.
- Click Assign Service Plan to assign one or more service
plans to the customer.
Note
Click Skip Service Plan to create the customer account without assigning any service plans.If you decide to add a service plan to an existing customer account at a later time, see Modifying a Customer’s Service Plan.The Assign Multiple Service Plans screen appears.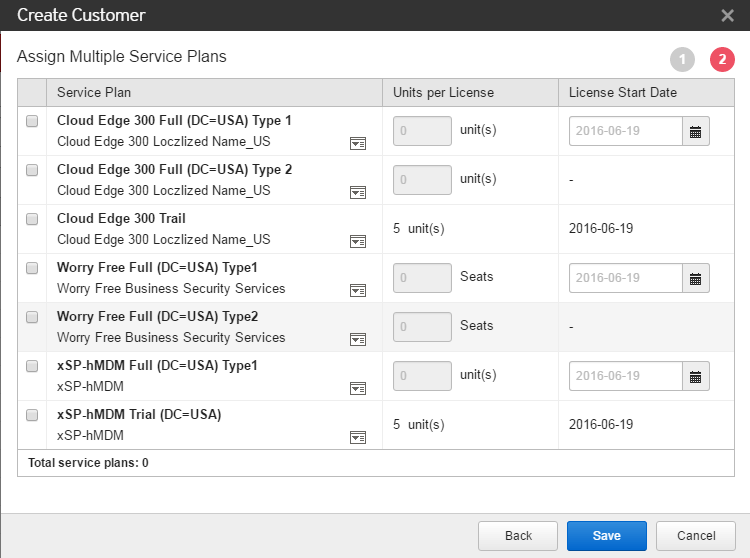
- Select at least one service plan to assign to the customer.
- Specify the number of units to assign to each license.
Note
The type of unit depends on the type of product or service the plan is for. - Specify the license start date.
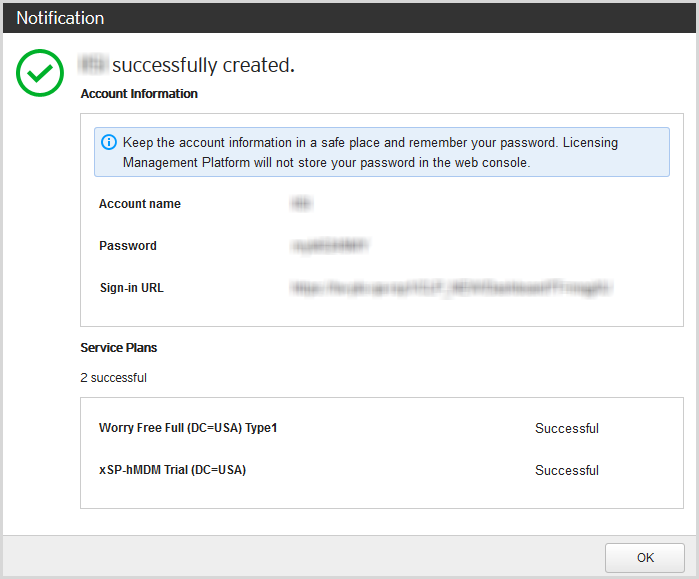
- Click Save.A screen appears confirming that the account was successfully created.