

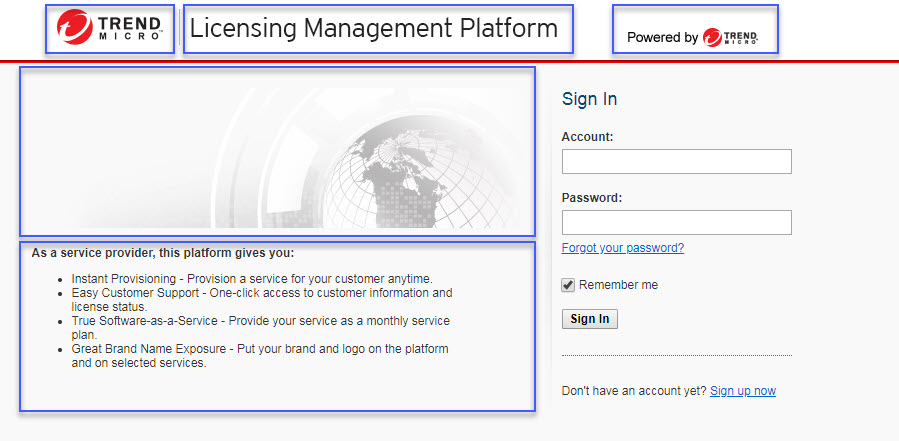
You can customize the appearance and information that displays to partners on the
Licensing Management Platform web console. The
following diagram highlights the portions of the sign-in screen that you can
customize.
Procedure
- Go to .
- Select Licensing Management Platform from the left menu.
- Click the Web Console tab.
- Modify the required settings.SettingDescriptionWeb console titleSpecify the display name of the Licensing Management Platform productSign-in screen descriptionIn the text field provided, modify the description that partners see at the bottom left pane of the sign-in screen.Company logoSelect the company logo image that you want to appear at the top left corner of the Licensing Management Platform console.Image specifications:
-
Format: GIF file only
-
Width: 120 pixels
-
Height: 55 pixels
Company bannerSelect the company banner image that you want to appear at the top and center of the Licensing Management Platform console.Image specifications:-
Format: GIF file only
-
Width: 450 pixels
-
Height: 55 pixels
Secondary logoSelect a secondary logo image that you want to appear to the right of the Company banner.Image specifications:-
Format: GIF file only
-
Width: 140 pixels
-
Height: 35 pixels
Sign-in page cover imageSelect the sign-in page image that you want to appear above theSign-in screen description
.Image specifications:-
Format: GIF file only
-
Width: 510 pixels
-
Height: 140 pixels
-
- Click Save.