

NoteAWS Lambda is ending support of Python 3.6. As of July 18, 2022, Lambda will no
longer apply security patches and updates to Python 3.6 runtime. As of August
17,
2022, we will no longer be able to update functions using Python 3.6 runtime.
As a
result:
We recommend that you upgrade your existing Python 3.6 functions to Python
3.8 before August 17, 2022. You may need to manually update the File Storage
Security stacks to take advantage of certain features and fixes. |
NoteNot all features and fixes require a stack update. See What's New for details.
|
For information on automatic updates performed by File Storage Security to AWS
components, see Update
components.
Before you begin 
Procedure
- Check What's New to see which stack (scanner, storage, or all-in-one) you need to update for the feature you want. Features and fixes that require a stack update are described with the phrase "This functionality requires a stack update".
- If you were running the preview version and had a stack create a
ScanningBucket on AWS, move the files out of the ScanningBucket as
follows:

Note
You have to move your files because the ScanningBucket will be deleted when you update the stack. The bucket to which you move the files will become your new S3 bucket to scan which you'll be specifying during the stack update.- Go to AWS > CloudFormation > your storage stack > Resources.
- Select the ScanningBucket link. The S3 service launches with your ScanningBucket contents displayed.
- Select your files and select Actions > Move.
- Select an S3 bucket that's in the same region as the storage stack. For details, see Where can I add stacks?
- Select Choose.
- Select Move.
Update a stack
To update an all-in-one stack:
Update the nested scanner and storage stacks individually, in any order.
NoteUpdating the all-in-one stack is not recommended. It is recommended that you
individually update the nested scanner and storage stacks.
|
To update a scanner stack or storage stack:
Procedure
- In AWS, go to CloudFormation > your scanner or storage stack.
- In the main pane, select Update (top-right).
- Select Replace current template.
- Under Template source, select Amazon S3 URL.
- In the Amazon S3 URL field, enter the S3 URL of the latest
stack template. The URLs are:Scanner template URL:
https://file-storage-security.s3.amazonaws.com/latest/templates/FSS-Scanner-Stack.templateStorage template URL:https://file-storage-security.s3.amazonaws.com/latest/templates/FSS-Storage-Stack.template - Select Next.The Specify stack details page appears.
- In the S3BucketToScan field, do one of the following:
- Leave the default name to have File Storage Security continue to scan the named bucket.
- Change the name to a different S3 bucket to scan, as it appears in S3. For details, see Change the bucket associated with a stack.
Note
If this field is blank, add the name of the S3 bucket to scan, as it appears in S3.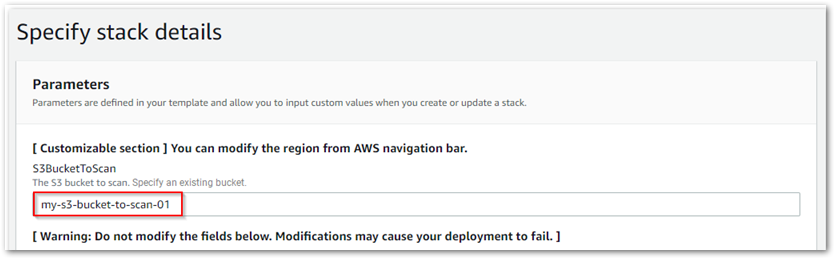
- Leave all remaining fields as they are.
- Select Next.
- On the Configure stack options page, select
Next.

WARNING
In the Stack failure options section, do not select Preserve successfully provisioned resources. Some resources do not support this option. When using AWS CLI to update stacks, do not specify the --disable-rollback option. - On the Review
your_stack_name page:
- Review your settings.
- Under Capabilities, select both I Acknowledge [...] check box(es).
- Select Update stack.
The stack is updated. If you're updating the all-in-one stack, its nested stacks are also updated.Note
If you're a preview customer, the ScanningBucket that was included inside the storage stack is deleted.