

You can configure the following for ICAP Scanner:
-
Scan file type
-
Scan options
-
Compressed file scanning
-
Scan action
-
Options
Procedure
- Click a Normal Server with ICAP Scanner on the domain browser tree.
- Do one of the following:
-
Click on the side bar.
-
Click on the main menu.
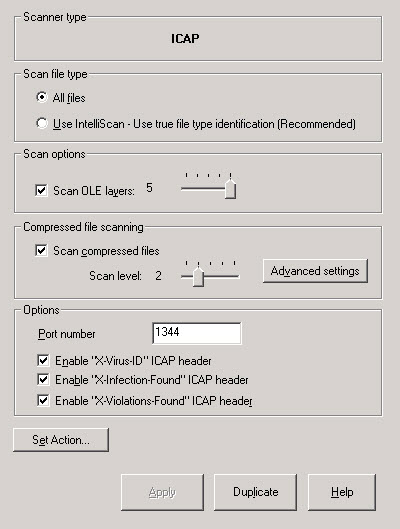
ICAP Scanner Configuration dialog -
- Under Scan file type, choose one of the following:
-
All files: Scans all file types
-
IntelliScan: Scans files using true file type identification. See IntelliScan.
-
- Under Scan options, select Scan OLE layers. Move the Scan OLE layers slider to set the number of OLE layers. ServerProtect can scan up to five layers.
- Under Compressed file scanning, select the Scan compressed files check box. Move the Scan level slider to set the number of compressed layers that you want to scan. For information on advanced settings, refer to the Compressed file scan topic in the online help.
- Under Options, do the following:
-
Type the port number in Port Number. Scan Server uses this port number to listen for ICAP server connections from ICAP Clients.
-
Select Enable "X-Virus-ID" ICAP Header. If ServerProtect detects a virus, it adds the X-Virus-ID ICAP extension header in the ICAP response.
-
Select Enable "X-Infection-Found" ICAP Header. If ServerProtect detects a virus, it adds the X-Infection-Found ICAP extension header in the ICAP response.
-
Select Enable "X-Violations-Found" ICAP Header. If ServerProtect detects a virus, it adds the X-Violations-Found ICAP extension header in the ICAP response.
-
- Click Set Action to configure how ServerProtect acts on infected files. See Defining Actions Against Viruses in ICAP Scanner.
- Click Apply to save the changes.