

Scheduled updates allow you to perform regular updates without user interaction;
thereby, reducing your workload.
Procedure
- Select on the left menu.The Scheduled Update screen appears.
- Select the Enable Scheduled Update check box.
- Select the check box of the component you want to update. The current version of each component appears to the right of the component label. Select the Component check box to select all components.
- Select a download source.You can set up multiple backup update servers/sources for automatic failover in case the primary update source fails.

Note
To use multiple backup update sources, servers running ServerProtect must first successfully complete one update from the new primary update source. If you need assistance setting up the primary update source and additional backup update sources, please contact Trend Micro technical support. - Select a start time in hours and minutes from the Start time menu.
- Specify a repeat interval. The options are Hourly,
Daily, and Weekly. For weekly
schedules, specify the day of the week (for example, Sunday, Monday, and so on.)
Note
The Daily and Weekly fields offer you an interval called update for a period of x hours. This means that your update will take place sometime within the x number of hours specified, following the time selected in the Start time field. This feature helps with load balancing on the ActiveUpdate server. Alternatively, you can specify an exact time if you prefer. Hover your cursor over the tooltip icon ( ) for more
explanation of this feature, and examples.
) for more
explanation of this feature, and examples. - Configure a download schedule. See Specifying a Download Source
for more information.
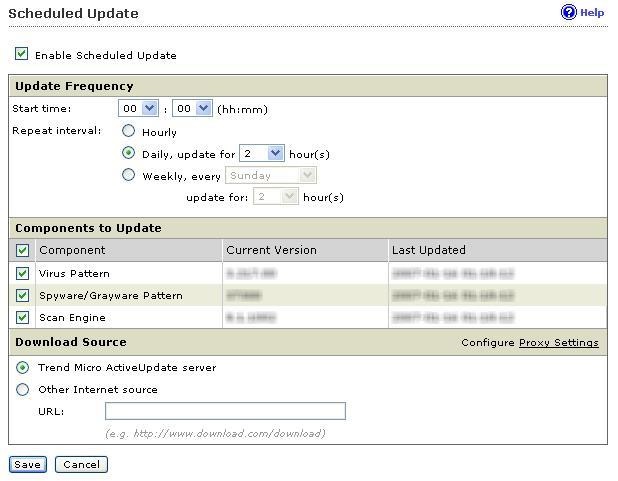
Scheduled Update screen - Click Save.