

This version of SMD provides two options for determining the reputation and safety
of URLs; these options are: the Global Smart Protection Network, and the Local Smart
Protection Server. The Global Smart Protection Network sends requests to the Trend
Micro Smart Protection Network to examine the reputation of URLs. The Local Smart
Protection Server sends these requests to your local smart protection server. The
Local Smart Protection Server will provide more privacy and improve the processing
speed. Protection is automatically updated and strengthened as more products, services
and users access the network, creating a real-time neighborhood watch protection service
for those who use it. The smart scan solution uses the Smart Protection Network for
in-the-cloud protection.
To configure Web reputation:
-
On the Mail Scan tab, select Enable Web reputation, and then click Configure. The Trend Micro Web Reputation window appears.
-
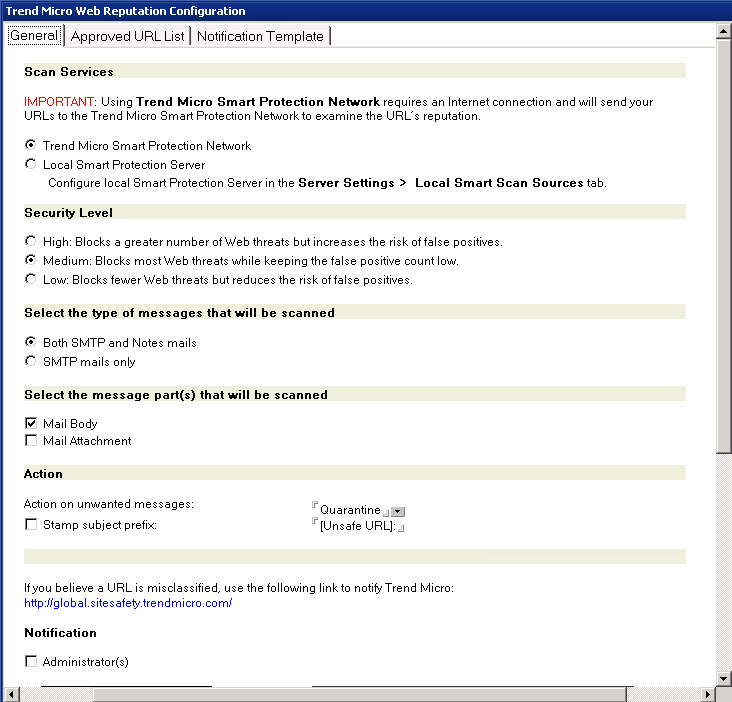
From the Trend Micro Web Reputation Configuration window, select the Scan Services method you would like to use on the General tab:
-
Trend Micro Smart Protection Network
-
Local Smart Protection Server

Note
If you select Local Smart Protection Server, you can also select Do not allow Smart Protection Server to make external queries to Smart Protection Network.This feature only works if you are using Smart Protection Server 2.1 or older.Note
You must also configure Smart Protection Server to stop sending external queries to Smart Protection Network. Refer to the Smart Protection Server documentation for the procedure. -
-
On the Trend Micro Web Reputation Configuration window, select a Security Level on the General tab:
-
High- Blocks a greater number of Web threats, but increases the risk of false positives.ScanMail monitors all messages for suspicious URLs, but there is a greater chance of false positives. False positives are email messages that ScanMail filters as containing dangerous URLs when they are actually legitimate.
-
Medium- Blocks most Web threats while keeping the false positive count low.ScanMail monitors at a high level of detection with a moderate chance of filtering false positives.
-
Low- Blocks fewer Web threats, but reduces the risk of false positives.ScanMail will only filter the most obvious and common Web threats and there is a very low chance that it will filter false positives.
-
-
Select the type of messages that will be scanned:
-
Both SMTP and Notes mails or Both SMTP and HCL Notes mails
-
SMTP mails only
-
-
Select the message part(s) that will be scanned:
-
Mail Body
-
Mail Attachment
-
-
In the Action section, select the Action on unwanted messages: Pass, Quarantine, or Block.
Note
If you have selected Mail Attachment in the Select the message part(s) that will be scanned section, and Block in the Action section, then you can also select Delete the attachment if only the attachment contains unwanted URLs to delete only the attachment with the unwanted URL, and pass the email to the recipient. However, if you have selected Mail Body in the Select the message part(s) that will be scanned section, and Block in the Action section, then it will block the whole message if the mail body contains an unwanted URL. -
Select Stamp subject prefix, and then type a stamp label to add eye-catching notices or keywords in the subject header.
Note
If you believe a URL is misclassified, use the following link to notify Trend Micro: http://global.sitesafety.trendmicro.com -
In the Notification section, select the notification options to apply when an URL is identified by the Web Reputation filter.
-
On the Approved URL List tab, select Enable approved URL list, and then Add, Import, Export, or Remove URLs to the list to help minimize false positives by doing the following:
-
Type a URL in the Add field and click Add.
-
Click Import to import a list of URLs from a text file (*.txt), and click Add.
-
Click Export to export a list of URLs to a text file (*.txt).
-
To remove a single URL, select the URL and click Remove.
-
To remove All URLs, click Remove All.
-
-
On the Notification Template tab, configure the notification template.
-
After you complete all settings, click OK to save and exit.
Note
The approved URL list can be managed in thesmlists.nsfdatabase. See Managing the Filter Lists for details on how to manage the list in the database.