

This section explains the steps required to configure a manual scan.
Procedure
- On the left menu, click Manual Scan.The Manual Scan screen appears.
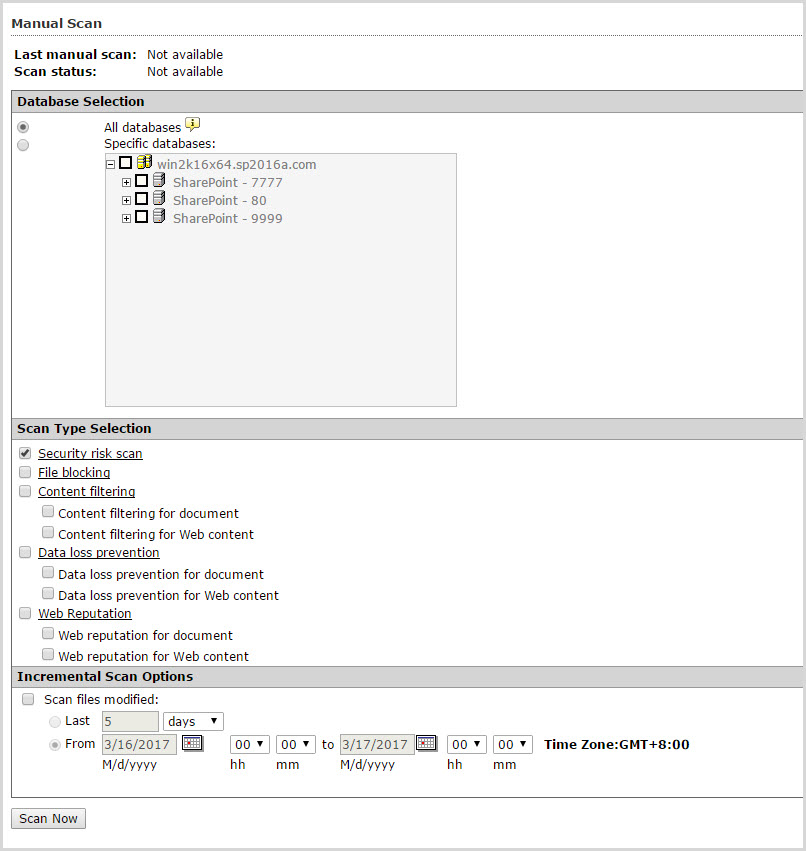
Manual Scan main screen - Select from the following options under Database
selection:
-
All databases: select to scan all databases
-
Specific databases: select to enable the option to choose the specific databases you want to scan
-
- Select from the following options under Select the scan
type:

Note
Click the Security risk scan, File blocking, Content filtering, Data loss prevention, or Web Reputation links to configure the manual scan options. For more information, refer to:-
Security risk scan: select to perform a manual security risk scan
-
File blocking: select to perform a manual file blocking scan
-
Content filtering: select to perform a manual content filtering scan.
-
Content filtering for document: select to scan documents according to the content filtering options and policies you choose. See Configuring Content Filtering for more information.
-
Content filtering for Web content: select to scan Web content posted to SharePoint according to the content filtering options and policies you choose.
-
-
Data loss prevention: select to perform a manual data loss prevention scan.
-
Data loss prevention for document: select to scan documents according to the data loss prevention options and policies you choose.
-
Data loss prevention for Web content: select to scan Web content posted to SharePoint according to the data loss prevention options and policies you choose.
-
-
Web Reputation: select to perform a manual scan for Web Reputation.
-
Web reputation for document: select to scan and block files containing URLs that are classified as unsafe. See About Web Reputation for more information.
-
Web reputation for Web content: select to scan Web content posted to your SharePoint server.
-
-
- To scan files modified within a certain date range, select Scan
files modified to enable the following Incremental
Scan Options:
-
Select Last, and type a number in the entry field that corresponds to the Hours, Days, or Weeks you want to scan.
-
Select From, and choose a date, hours, and minutes that corresponds to the From and To query you want to scan.
-
- Click Scan Now.