

This section explains the steps required to add or edit a scheduled scan task.
Procedure
- On the left menu, click Scheduled Scan, to display the Scheduled Scan screen.
- Click Add on the Scheduled Scan
toolbar.The Scheduled Scan: Add Scan Task screen appears.
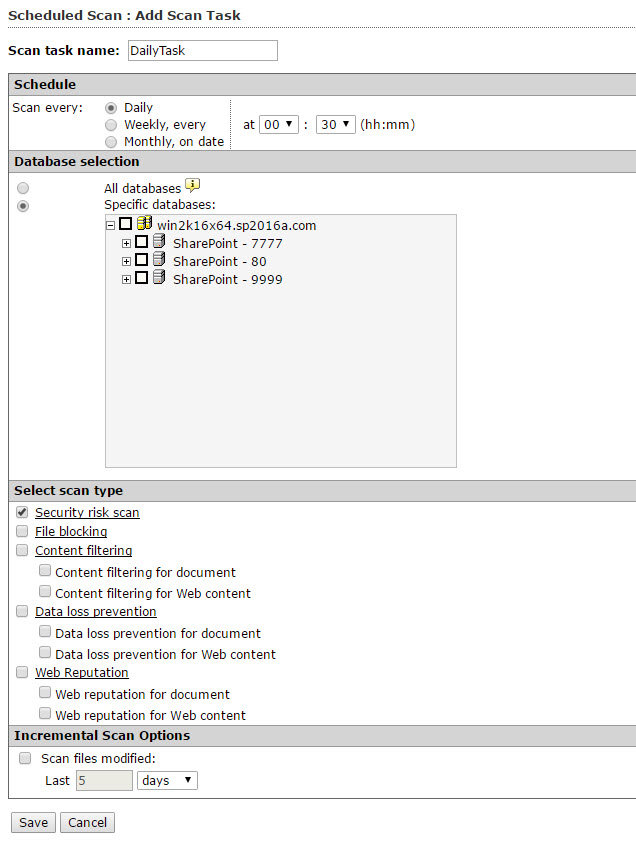
Scheduled Scan: Add Scan Task screen - In the Scan task name field, type a name for the new scan task.
- Under Schedule, select a scan schedule from the
following options:
-
Daily—at (hh:mm): select to perform a scan every day at the hour and minute you choose
-
Weekly, every—[day of week] at (hh:mm): select to perform a scan every week on the day, hour and minute you choose
-
Monthly, on date—[day of month] at (hh:mm): select to perform a scan every month on the day, hour and minute you choose
-
- Under Database selection, select one of the following
options:
-
All databases: includes databases added after you configure this setting
-
Specific databases: expand and choose which databases to scan from those listed in the window
-
- Select from the following options under Select the scan
type:

Note
Click the Security risk scan, File blocking, Content filtering, Data loss prevention, or Web Reputation links to configure the scheduled scan options. For more information, refer to:-
Security risk scan: select to perform a scheduled security risk scan
-
File blocking: select to perform a scheduled file blocking scan
-
Content filtering: select to perform a scheduled content filtering scan. Select or clear Content filtering for document or Content filtering for Web content as required
-
Data loss prevention: select to perform a scheduled data loss prevention scan. Select or clear Data loss prevention for document or Data loss prevention for Web content as required
-
Web Reputation: select to perform a manual scan for Web Reputation. Select or clear Web Reputation for document or Web Reputation for Web content as required.
-
- To scan files modified within a certain date range, select Scan
files modified to enable the following Incremental
Scan Options:
-
Select Last, and type a number in the entry field that corresponds to the Hours, Days, or Weeks you want to scan.
-
- Click Save.