Procedure
- Log on to the Citrix XenMobile web console, and click .
- Click Add.
- Click App Configuration from the main screen.
- Type the Policy Name and Description in the fileds provided, and then click Next.
- Select iOS from the left menu, and clear all other platforms.
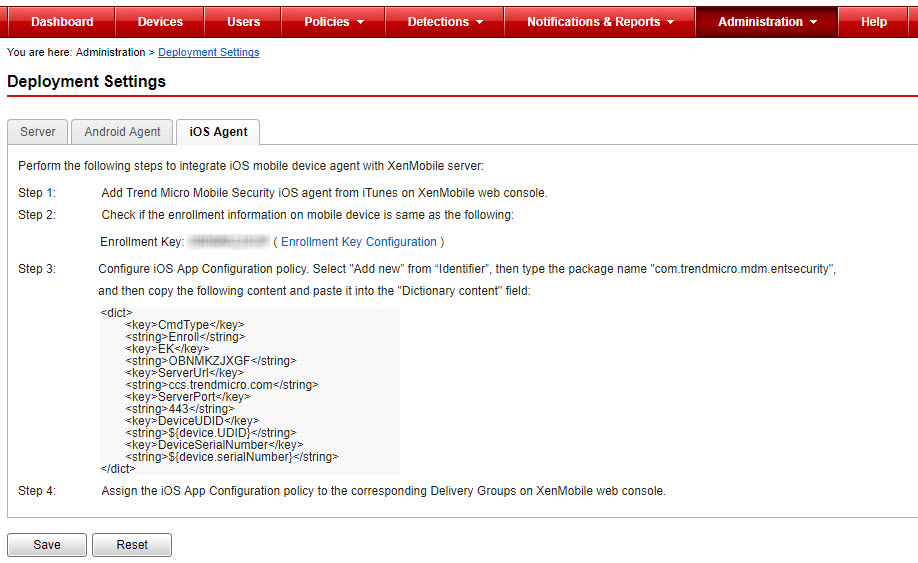
- On the App Configuration Policy screen, select Add new from the Identifier drop-down list.
- Type the identifier name and the enrollment key information in the
Dictionary content field.For the Identifier name and Dictionary content, refer to

- Click Check Disctionary to verify dictionary content.
- Click Next.
- On the App Configuration Policy screen, select the groups you want to assign and modify the settings if required.
- Click Save.
- Click .
- Click Add, and then click Public App Store.
- In the Name field, type ENT Security.
- Add the description for Enterprise Mobile Security, and from the Category drop-down list, select the category where you want to place this application, and then click Next.
- Select iPhone and/or iPad, under Platform from the left menu, and clear all others.
- Type ENT Security in the search filed, and click Search.
- Click Enterprise Mobile Security, and modify the app details if required, and then click Next.
- On Approvals (optional) screen, modify the settings if required, and then click Next.
- On the Delivery Group Assignments (optional) screen, select the groups you want to assign and modify the settings if required.
- Click Save.

