In order to adapt into the AWS environment, the Deep Discovery Inspector virtual appliance has some minor
changes. These changes do not impact any major features and are described in the following
list.
-
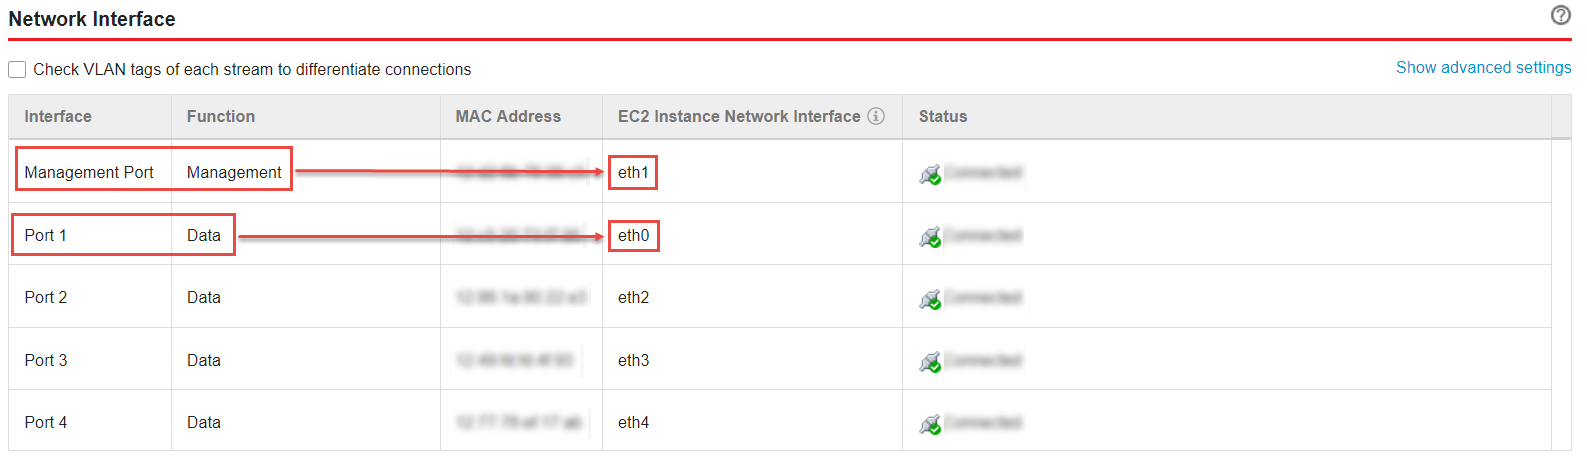
Swapping port enumeration for management portThe management port for Deep Discovery Inspector on-premises is fixed at the first NIC port (known as eth0). This change provides consistent information on Amazon EC2 console.The Deep Discovery Inspector virtual appliance swapped port enumeration for the management port to port 1 (known as eth1) and the data port to port 0 (known as eth0).
-
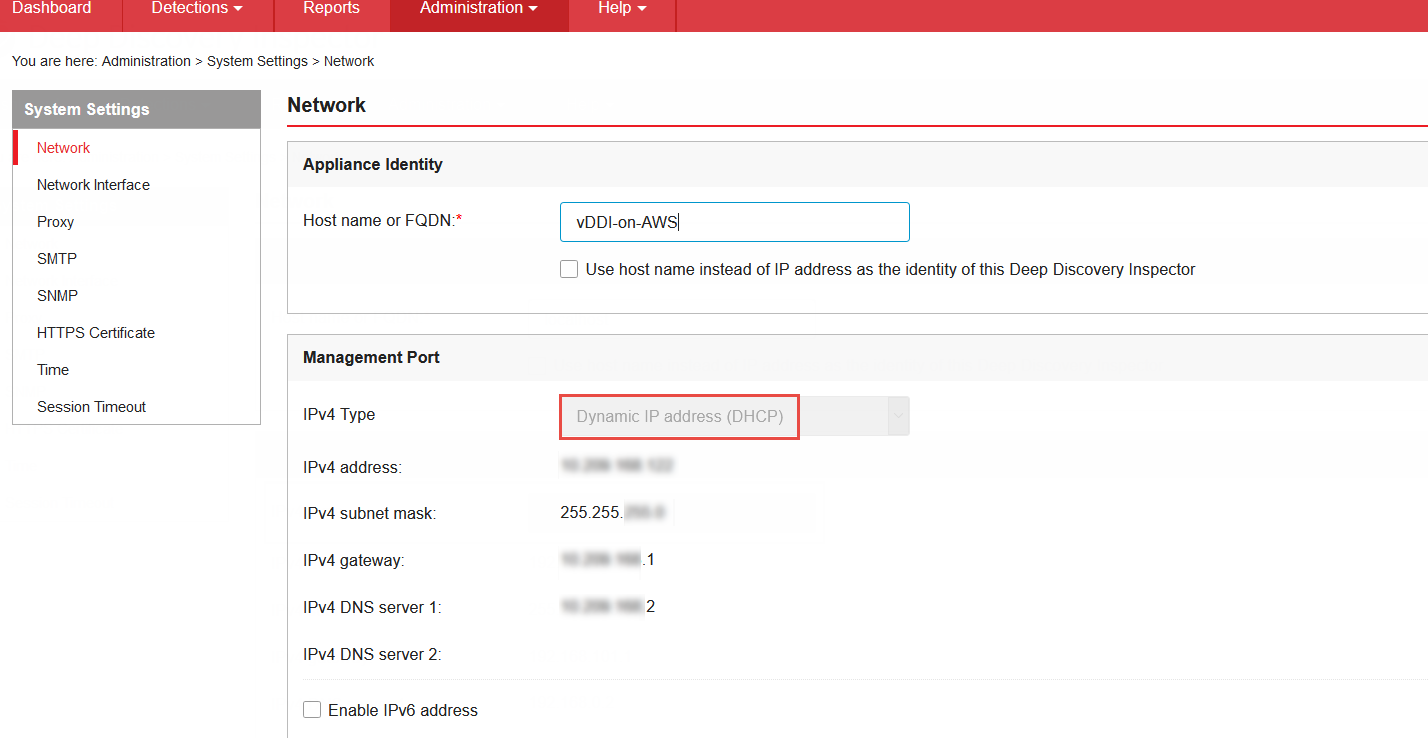
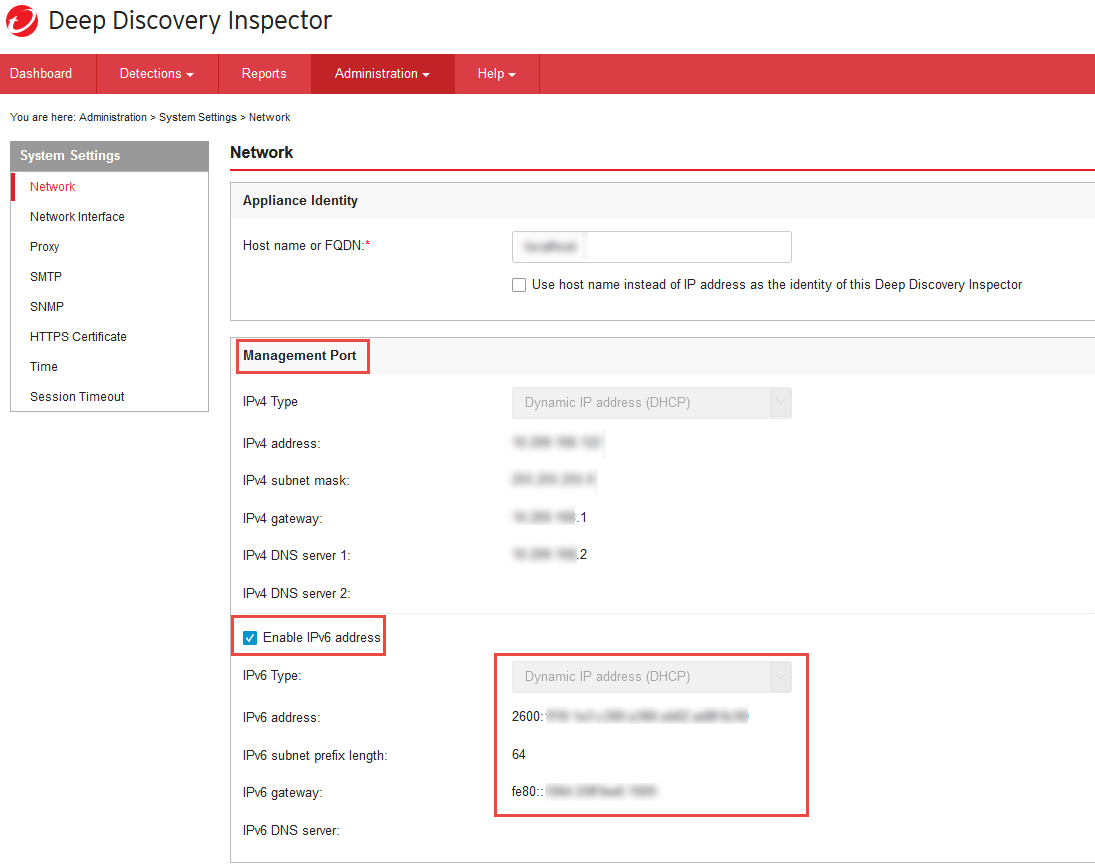
IPv4 address for management port only supports DHCPManagement ports configured as IPv4 only support DHCP. To modify the IPv4 address that is assigned, use the Amazon EC2 console.
 To modify the IPv4 address that is assigned, perform the following steps on the Amazon EC2 console.
-
Open the Amazon EC2 console at https://console.aws.amazon.com/ec2/.
-
In the navigation pane, select Instances and select the Deep Discovery Inspector virtual appliance.
-
Go to .
-
In the drop-down list, select eth1 and click Detach.
-
In the navigation pane, select Network interfaces.You can create a network interface (For details, see https://docs.aws.amazon.com/AWSEC2/latest/UserGuide/using-eni.html#create_eni) or find the IPv4 address that you want to attach to the management port of the Deep Discovery Inspector virtual appliance.
-
Select the network interface that you created or found in the previous step, and then click Attach.
-
Select the instance ID of the Deep Discovery Inspector virtual appliance, and then click Attach.

-
Reboot the Deep Discovery Inspector virtual appliance.
-
Verify that the management port (eth1) of the Deep Discovery Inspector virtual appliance is assigned to the new IPv4 address.
-
-
IPv6 address for management port only supports DHCPOn AWS, the IPv6 address is managed on the Amazon EC2 console. The Deep Discovery Inspector virtual appliance on AWS retrieves the IPv6 address automatically when IPv6 is assigned to a network interface on the Amazon EC2 console.To assign an IPv6 address, perform the following steps.
-
Open the Amazon EC2 console at https://console.aws.amazon.com/ec2/.
-
In the navigation pane, select Instances.
-
Select the Deep Discovery Inspector virtual appliance, and then select .
-
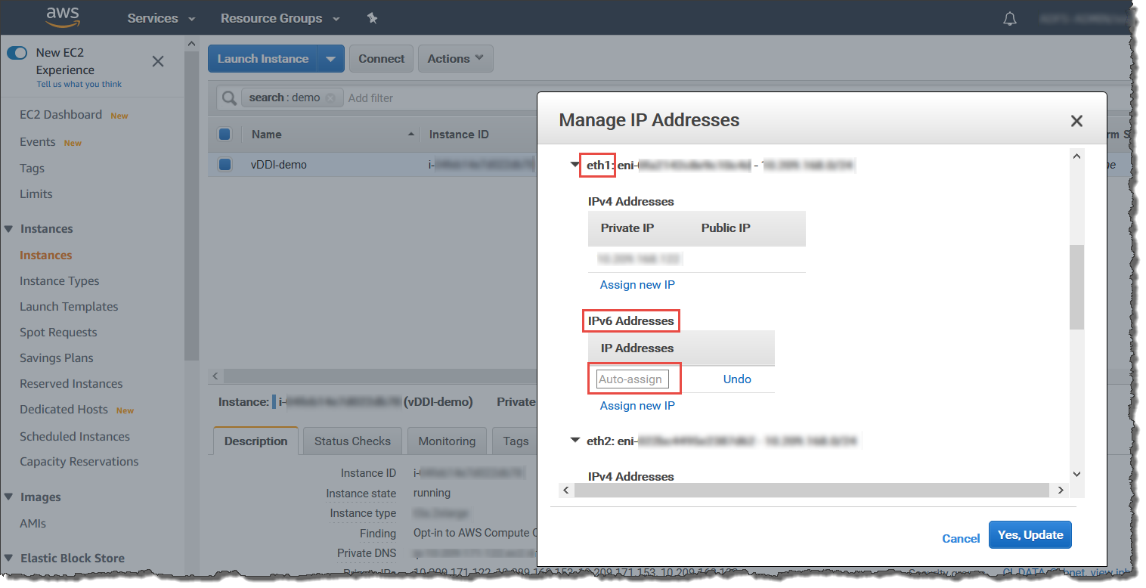
For eth1, under IPv6 Addresses, select Assign new IP. You can specify an IPv6 address in the subnet range, or leave the Auto-assign value to let Amazon choose an IPv6 address for you.
-
Click Yes, Update.
-
Log in to the management console of the Deep Discovery Inspector virtual appliance.
-
Go to .
-
In Management Port section, select Enable IPv6 address.
-
Click Save.
-
Reboot the Deep Discovery Inspector virtual appliance.
-
Go to and verify that the Deep Discovery Inspector virtual appliance is assigned an IPv6 address.
-
-
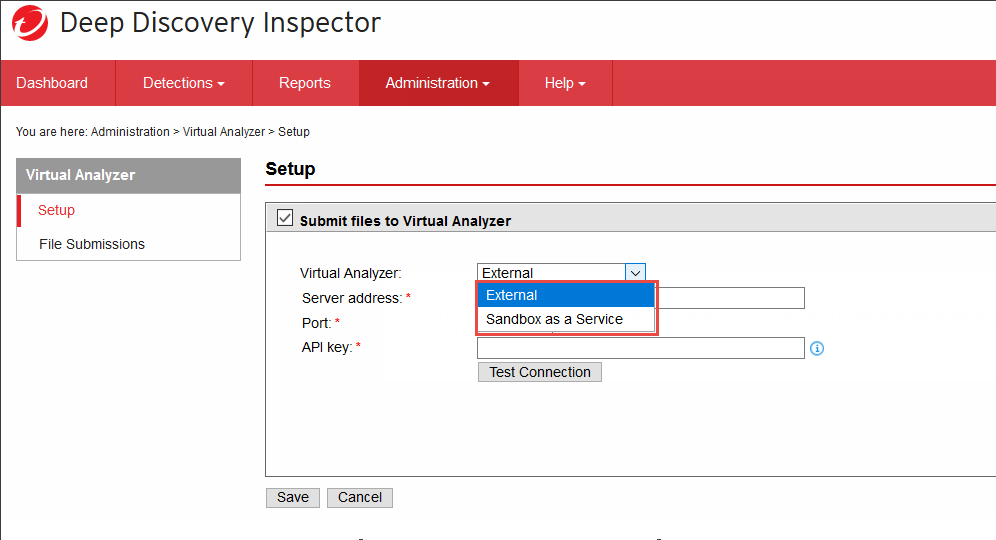
No support for internal Virtual AnalyzerWhen launching a Deep Discovery Inspector virtual appliance on AWS, only external Virtual Analyzer and Sandbox as a Service are supported.