Views:
  1. Open the Check Point SmartConsole and click the main menu icon ().
  2. Go to New object > More object types > Server > OPSEC Application > New Application....

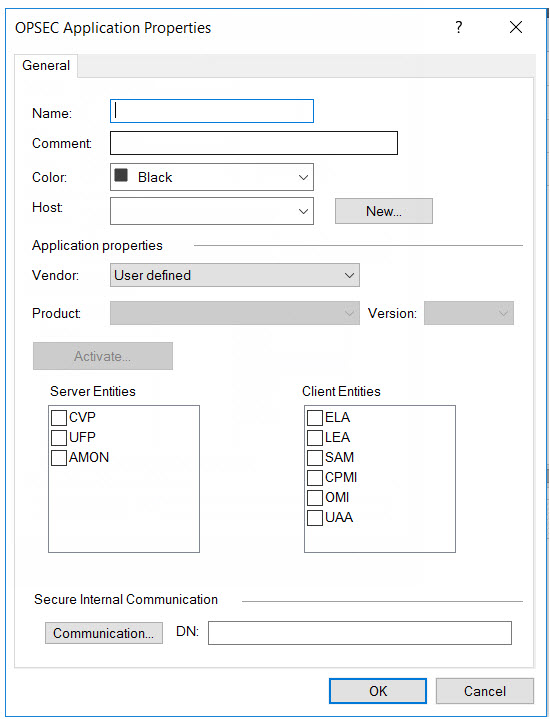
    The OPSEC Application Properties window appears.

  3. Type a Name.
    Note:
    • Use this name as the OPSEC application name in Deep Discovery Director (Internal Network Analytics Version).

    • The application name must be less than 101 characters, start with an English alphabetical letter, and contain only English alphabetical letters, periods, underscores, or dashes.

  4. Select a Host.
  5. Under Client Entities, select SAM.
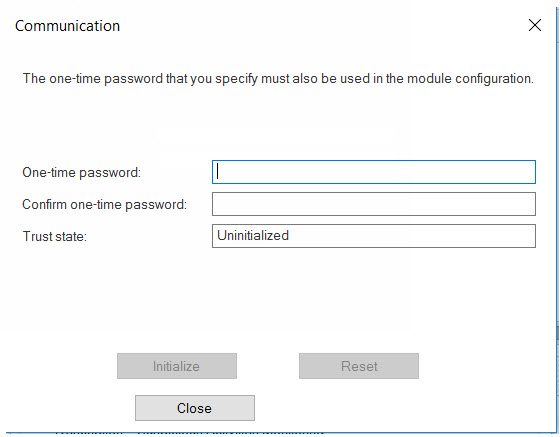
  6. Click Communication....

    The Communication window appears.

  7. Type a password in One-time password and type the same password in Confirm one-time password.
    Note:

    Use this password as the SIC one-time password in Deep Discovery Director (Internal Network Analytics Version).

    Note:

    If the one-time password is reset on the Check Point appliance, the new one-time password must be different than the previous one-time password.

  8. Click Initialize.

    The Trust state becomes Initialized but trust not established.

  9. Install the user definition.
    1. In the Check Point SmartConsole main window, click and select Install database....

      The Install database window appears.

    2. Choose the installation components and then click OK.

      The user definition starts installing.