

Procedure
- Go to the Dashboard.
- Click a tab.
- To add a widget:
- Click the Settings button to the right of the
tab display.
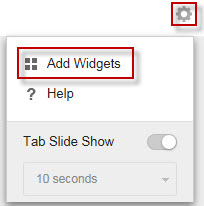
- Click Add Widgets.
- Select widgets to add.
-
In the drop-down on top of the widgets, select a category to narrow down the selections.
-
Use the search text box on top of the screen to search for a specific widget.
-
- Click Add.
- Click the Settings button to the right of the
tab display.
- To move a widget to a new location on the same tab, drag-and-drop a widget to a new location.
- Resize widgets on a multi-column tab by pointing the cursor to the right edge of the widget and then moving the cursor to the left or right.
- To rename a widget:
- Click the settings icon (
 →
→  ).
). - Type the new title.
- Click Save.
- Click the settings icon (
- To modify the product
scope of the widget:
- Click the settings icon ( → ).
- Configure the Scope.Widgets use one of the following methods for managing scope:
-
Select the scope using the drop-down.
-
Click the double arrow button (
 ), and select the products to contribute data for the widget.
-
- Click Save.
- Click the settings icon (
- To delete a widget, click the delete icon ( →
 ).
).