This feature allows users of SecureCloud to move
devices on legacy versions of the SecureCloud Agent.
Procedure
Receive the self-provision tool from SecureCloud technical support and place it in
the SecureCloud folder.
On Linux, the default path is
/var/lib/SecureCloud
On Microsoft Windows, the default path is C:\Program Files
(x86)\Trend Micro\SecureCloud
Stop the agent service.
On Linux, do the following:
Type cd /var/lib/securecloud/
Type the command service scagentd stop
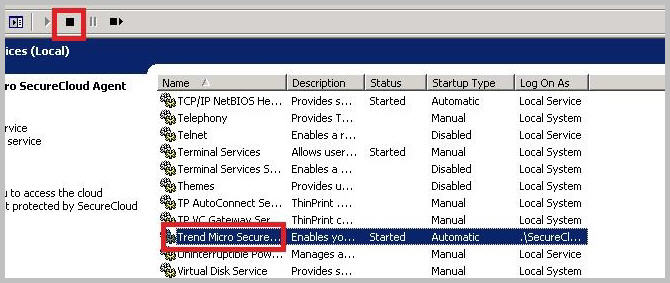
On Microsoft Windows, do the following to stop the device and then
navigate to the appropriate directory in a command shell:
Click Start and type
run to open the Run
window, then type services.msc
Select Trend Micro SecureCloud Agent
Service and click the stop button.
Click Start and type
cmd to open a command shell, then type
cd C:\Program Files (x86)\Trend
Micro\SecureCloud\Agent\
Execute the appropriate selfprov.py script in the command
shell.
On Amazon Web Services, type python selfprov.py --device
<volume_id> --mountpoint <mount_point> --cspcredential
access_id=<access_id>,secret_key=<secret_key> --passphrase
<passphrase>
An example script is as follows:
On other instances, type python selfprov.py --device
<volume_id> --mountpoint <mount_point> --passphrase
<passphrase>
An example script is as follows:
When the process is finished, the following message displays:
Start the SecureCloud Agent
service on the destination image.
You can find the instance on the Active Keys screen on
the Web Console of the destination image.
Configure the config.xml file on the source image.
Open the config.xml file.
On Linux, the default path is
/var/lib/SecureCloud/config.xml
On Microsoft Windows, the default path is
C:\Program Files (x86)\Trend
Micro\SecureCloud\config.xml
Delete the moved device on from the device list.
Start the SecureCloud Agent service on the source
image.
The instance appears on the Active Keys screen on the
Web Console of the source image.