Log on to the Citrix XenMobile web console, and click Configure → Device Policies.
Click Add.
Click App Configuration from the main screen.
Type the Policy Name and
Description in the fileds provided, and then click
Next.
Select iOS from the left menu, and clear all other
platforms.
On the App Configuration Policy screen, select
Add new from the Identifier
drop-down list.
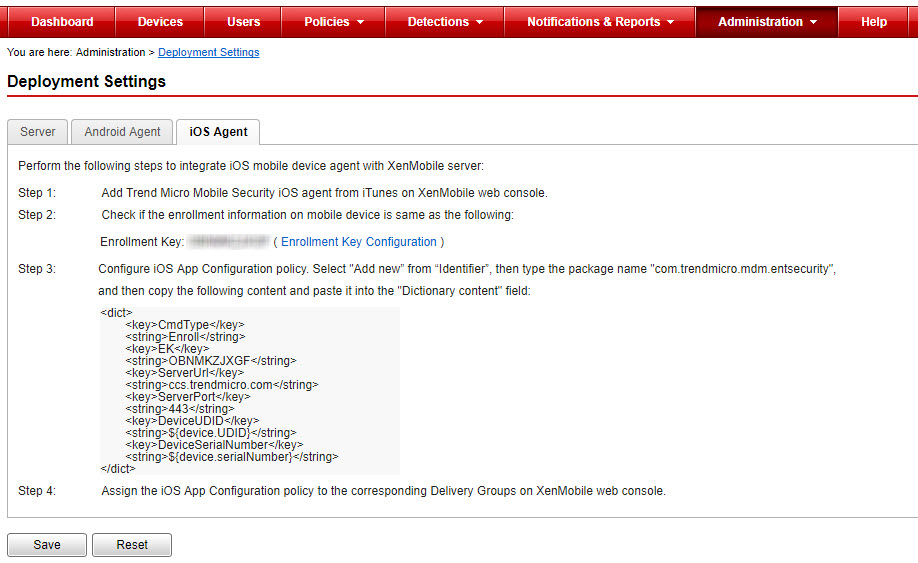
Type the identifier name and the enrollment key information in the
Dictionary content field.
For the Identifier name and Dictionary
content, refer to Mobile Security web console → Administration → Deployment Settings → iOS Agent (tab)
Click Check Disctionary to verify dictionary
content.
Click Next.
On the App Configuration Policy screen, select the
groups you want to assign and modify the settings if required.
Click Save.
Click Configure → Apps.
Click Add, and then click Public App
Store.
In the Name field, type ENT
Security.
Add the description for Enterprise Mobile Security, and from the
Category drop-down list, select the category where
you want to place this application, and then click
Next.
Select iPhone and/or iPad, under
Platform from the left menu, and clear all
others.
Type ENT Security in the search filed, and click
Search.
Click Enterprise Mobile Security, and modify the app
details if required, and then click Next.
On Approvals (optional) screen, modify the settings if
required, and then click Next.
On the Delivery Group Assignments (optional) screen,
select the groups you want to assign and modify the settings if required.