Creating and Encrypting a RAID Array Parent topic

Before you begin

Before creating a RAID array, administrators must:
  • Create the devices
  • Upload the devices to the inventory
  • Ensure the devices are unencrypted

Procedure

  1. On the Inventory screen, click the name of the machine.
  2. Select the devices to add to the RAID array.
    Tip
    Tip
    Trend Micro recommends using the same device size for each device in a RAID array. In a Microsoft Windows environment, the maximum volume size is 2TB for simple and mirrored volumes and up to 64TB for Windows striped volumes (2TB per disk with a maximum of 32 disks per volume).
    In Amazon EC2, Trend Micro recommends limiting the RAID array to a maximum of eight devices. In a CSP environment, the maximum number of devices you can add to a RAID array is 32.
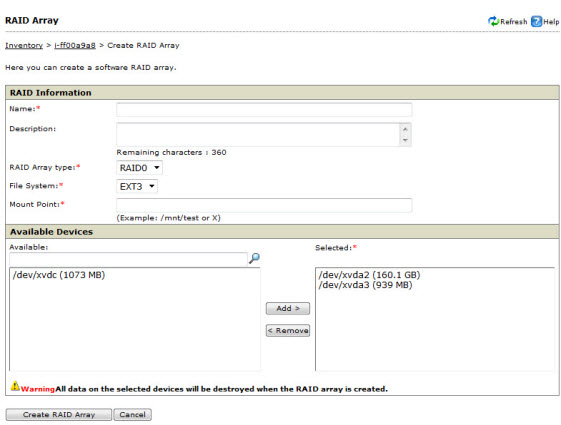
  3. Click Create RAID Array.
    The RAID Array screen appears.
    raid_array_information.jpg
  4. In the RAID Information section, specify the RAID array name, type, file system, and mount point.
    The RAID array name cannot contain any special characters.
  5. In the Available Devices section, choose from the following options:
    • Add an available device to the RAID array by selecting the device from the Available list and clicking Add.
    • Remove a device from the RAID array by selecting the device from the Selected list and clicking Remove.
  6. Click Create RAID Array.
    WARNING
    WARNING
    All data on the selected devices is erased when the RAID array is created.
  7. To encrypt the RAID array, select the RAID array and click Encrypt.