
groupip
Create custom client groups using network IP addresses to sort clients in the OfficeScan client tree. The feature can help administrators arrange the OfficeScan client tree structure before the client registers to the OfficeScan server.
To add IP address groups:
Networked Computers > Client Grouping
Go to the Client Grouping section and select Custom client groups.
Go to the Automatic Client Grouping section.
Click Add and then select IP Address. A new screen appears.
Select Enable grouping.
Specify a name for the grouping.
Specify one of the following:
A single IPv4 or IPv6 address
An IPv4 address range
An IPv6 prefix and length
If a dual-stack client’s IPv4 and IPv6 addresses belong to two separate client groups, the client will be grouped under the IPv6 group. If IPv6 is disabled on the client’s host machine, the client will move to the IPv4 group.
Select the OfficeScan domain to which the IP address or IP address ranges maps. If the domain does not exist, do the following:
Mouseover anywhere on the client tree and click the add domain icon.
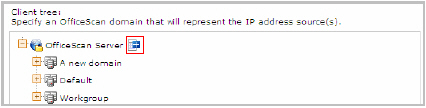
Add domain icon
Type the domain in the text box provided.
Click the check mark next to the text box. The new domain is added and is automatically selected.
Click Save.
See also: