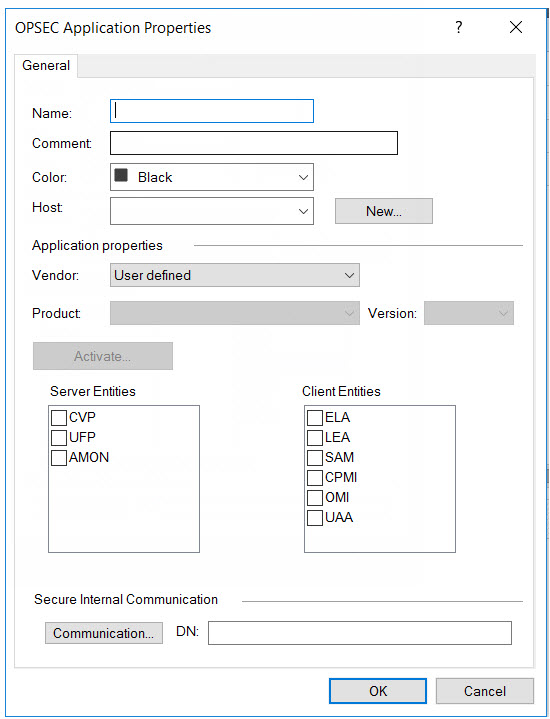
Configuring a Secured Connection Parent topic

Procedure

  1. Open the Check Point SmartConsole and click the main menu icon (checkpoint_SmartCons_001.png).
  2. Go to New objectMore object typesServerOPSEC ApplicationNew Application....
    The OPSEC Application Properties window appears.
    admin_intgr_prods_se.jpg
  3. Type a Name.
    Note
    Note
    • Use this name as the OPSEC application name in Deep Discovery Inspector.
    • The application name must be less than 101 characters, start with an English alphabetical letter, and contain only English alphabetical letters, periods, underscores, or dashes.
  4. Select a Host.
  5. Under Client Entities, select SAM.
  6. Click Communication....
    The Communication window appears.
    admin_intgr_prods_se_001.jpg
  7. Type a password in One-time password and type the same password in Confirm one-time password.
    Note
    Note
    Use this password as the SIC one-time password in Deep Discovery Inspector.
    Note
    Note
    If the one-time password is reset on the Check Point appliance, the new one-time password must be different than the previous one-time password.
  8. Click Initialize.
    The Trust state becomes Initialized but trust not established.
  9. Install the user definition.
    1. In the Check Point SmartConsole main window, click checkpoint_SmartCons_001.png and select Install database....
      The Install database window appears.
    2. Choose the installation components and then click OK.
      The user definition starts installing.